Axle adjusters

Collapse

Desktop Ad Forum Top

Collapse

Mobile ad top forum

Collapse
X
 
  • Time
  • Show
Clear All
new posts
  • IronNP3
    Junior Member
    • Jun 2022
    • 9

    Axle adjusters

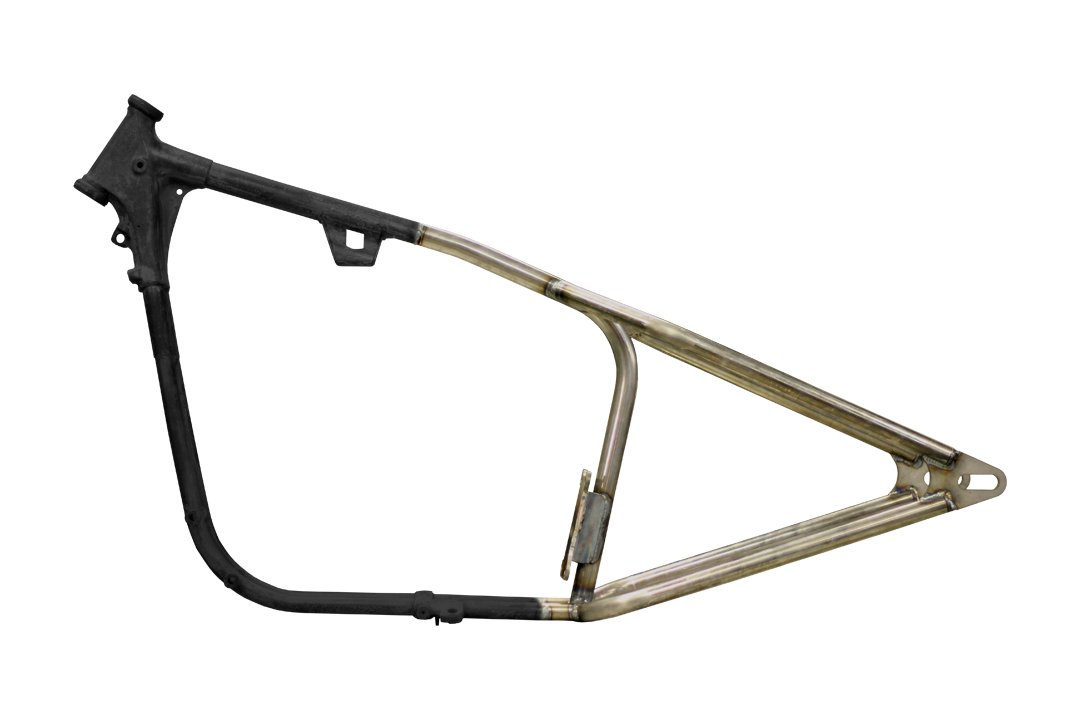
    I’m still working on building up my old ‘72 XLCH and have a Voodoo Vintage hardtail on it. Trouble is, there is no place for axle adjusters so I’m going to fab my own out of some small metal tubing welded to the dropouts. Question I have is, does it matter if the axle adjusters go in front of or behind the axle? I’ve seen them both ways.
    Thanks in advance!
  • TriNortchopz
    Senior Member
    • Dec 2017
    • 3256

    #2
    doesn't look like much room at the back of the axle slot to mount a axle adjuster... I would go in front, more space on the axle plate ahead of the axle on that hardtail.

    Click image for larger version

Name:	hardtail, VV,MK52_Ironhead_000.jpg
Views:	1
Size:	16.7 KB
ID:	1324301
    The MK52 Hardtail is specifically designed for the 64-78 Ironhead Sportster original factory frame. Our first Sportster hardtail to utilize a full rear motor mount system. Includes 20mm (3/4") axle slots and requires separate brake stay for use with original factory drum brake hubs. INSTRUCTIONS LENGTH: 37"WIDTH: 11"HE


    you running a 3/4" axle?
    they say: "...Includes 20mm (3/4") axle slots..."

    if so, note that has 20mm axle slots; 20mm = 0.787". looks to be about 0.035" too wide.

    perhaps make a couple covers on each side of the axle plate, to cover and protect the paint from chipping when adjusting the chain tension... use 20 ga. (0.036") steel, fab it with a lip that fits into the bottom of the slot...now you got 3/4" slots.

    If you are unfamiliar with the gauge system, this blog will explain the gauge system and includes a sheet metal gauge chart.
    Last edited by TriNortchopz; 04-10-2023, 9:04 PM.
    If buildin' old school choppers was easy, anyone could do it... ain't nobody said it's gonna be easy...

    Comment

    • TriNortchopz
      Senior Member
      • Dec 2017
      • 3256

      #3
      found an old cc thread where I suggested this for another hardtail chopper build:

      "...20 gauge stainless steel measures 0.036"...

      Make a couple of 20 gauge plates which fits on the outside of the hardtail frame plate, which are attached with drive screws, that will prevent the paint from chipping each time you adjust the chain, and has a tab bent over, fitting into the bottom of the slot, the thickness of the frame plate. This will convert the 20mm slot to 3/4":

      Click image for larger version

Name:	axle plate, 20mm to 3-4 inch, 0.036 stainless.jpg
Views:	1
Size:	16.7 KB
ID:	1324302

      This could be attached with four #10 s/s drive screws:

      Click image for larger version

Name:	Drive Screws_600056_CatImg.jpg
Views:	2
Size:	1.7 KB
ID:	1324303

      If buildin' old school choppers was easy, anyone could do it... ain't nobody said it's gonna be easy...

      Comment

      • confab
        Senior Member
        • May 2019
        • 1337

        #4
        does it matter if the axle adjusters go in front of or behind the axle?
        No..

        Indian Larry even used them on both sides.

        Comment

        • IronNP3
          Junior Member
          • Jun 2022
          • 9

          #5
          Originally posted by TriNortchopz
          doesn't look like much room at the back of the axle slot to mount a axle adjuster... I would go in front, more space on the axle plate ahead of the axle on that hardtail.

          [ATTACH=CONFIG]110481[/ATTACH]
          The MK52 Hardtail is specifically designed for the 64-78 Ironhead Sportster original factory frame. Our first Sportster hardtail to utilize a full rear motor mount system. Includes 20mm (3/4") axle slots and requires separate brake stay for use with original factory drum brake hubs. INSTRUCTIONS LENGTH: 37"WIDTH: 11"HE


          you running a 3/4" axle?
          they say: "...Includes 20mm (3/4") axle slots..."

          if so, note that has 20mm axle slots; 20mm = 0.787". looks to be about 0.035" too wide.

          perhaps make a couple covers on each side of the axle plate, to cover and protect the paint from chipping when adjusting the chain tension... use 20 ga. (0.036") steel, fab it with a lip that fits into the bottom of the slot...now you got 3/4" slots.

          https://www.metalsupermarkets.com/sh...l-gauge-chart/
          Thanks for the reply! I am running a 3/4” axle.

          Comment

          • IronNP3
            Junior Member
            • Jun 2022
            • 9

            #6
            So ran into a snag with my plan to put in some steel tubing for the adjusters. I bought a set of adjusters from Lowbrow shown below and when mocking things up, the adjustment nuts are touching the frame. Should I set the tubing out a bit to make the nuts clear the frame?
            Click image for larger version

Name:	13B051D0-8B3A-4845-ABFF-E587F7F8B9BD.jpg
Views:	1
Size:	22.6 KB
ID:	1324419

            Comment

            • TriNortchopz
              Senior Member
              • Dec 2017
              • 3256

              #7
              sounds like you need a spacer behind the tubing you welded on so you can spin your nuts.

              if you replace them with threaded bungs, you would only need one lock nut; the ones from Bungking look to be thick-walled and may not need a spacer:
              Click image for larger version

Name:	bung,516_threaded_bungs__56310.jpg
Views:	1
Size:	18.6 KB
ID:	1324437
              or you could just make your own 'custom' ones from solid rod or using a connector nut (with the hex 'point' against the axle plate) with weld above and below. I see high strength ones here (better than those found in your typical hardware store)
              Click image for larger version

Name:	coupling nut mcmaster, high strength.png
Views:	1
Size:	8.9 KB
ID:	1324438
              McMaster-Carr is the complete source for your plant with over 595,000 products. 98% of products ordered ship from stock and deliver same or next day.
              If buildin' old school choppers was easy, anyone could do it... ain't nobody said it's gonna be easy...

              Comment

              • IronNP3
                Junior Member
                • Jun 2022
                • 9

                #8
                Originally posted by TriNortchopz
                sounds like you need a spacer behind the tubing you welded on so you can spin your nuts.

                if you replace them with threaded bungs, you would only need one lock nut; the ones from Bungking look to be thick-walled and may not need a spacer:
                [ATTACH=CONFIG]110640[/ATTACH]
                or you could just make your own 'custom' ones from solid rod or using a connector nut (with the hex 'point' against the axle plate) with weld above and below. I see high strength ones here (better than those found in your typical hardware store)
                [ATTACH=CONFIG]110641[/ATTACH]
                https://www.mcmaster.com/products/th...-nuts-grade-8/
                Thanks very much! The connector nut just may be the ticket!

                Comment

                300 mobile ad bottom forum

                Collapse
                Working...
                ;