If this is your first visit, be sure to
check out the FAQ by clicking the
link above. You may have to register
before you can post: click the register link above to proceed. To start viewing messages,
select the forum that you want to visit from the selection below.
(Might just go that route when the SBC 400 gives up the ghost and I hit the big one with Lotto)
As far as the overdrive goes ...
Got that going on with the 4L85E trans that I recently built ..
A car alarm will be added when I get around to doing the wiring ..
(Redoing the whole trucks' wiring harness)
About the rain guard welding ... Going to try making up some heat sinks to pull as much heat off the weld as I can ..
Getting the needed materials together to go forward with this at the moment ...
Really like the engine turning idea .. If it doesn't go well they will be painted the same color as the truck ...
Speaking of welding thin SS sheet metal:
I was at a "Carl Casper's" car show in Nashville Tn. many years ago ... A world of Custom Hot-Rods was in attendance ..
One that still sticks in my mind to this day was a 56 Chevy Bel-Air Sports Coupe ...
Top was chopped bout 5 inches, all the factory SS trim was cut down to fit and looked like it came from GM that way..
A super nice shine was on every stick of trim ...
Bet I walked around that car for more than a hour eyeballing that chop job .. I'm here to tell you that had to be a hundred hours of work the owner did to get it that slick !!
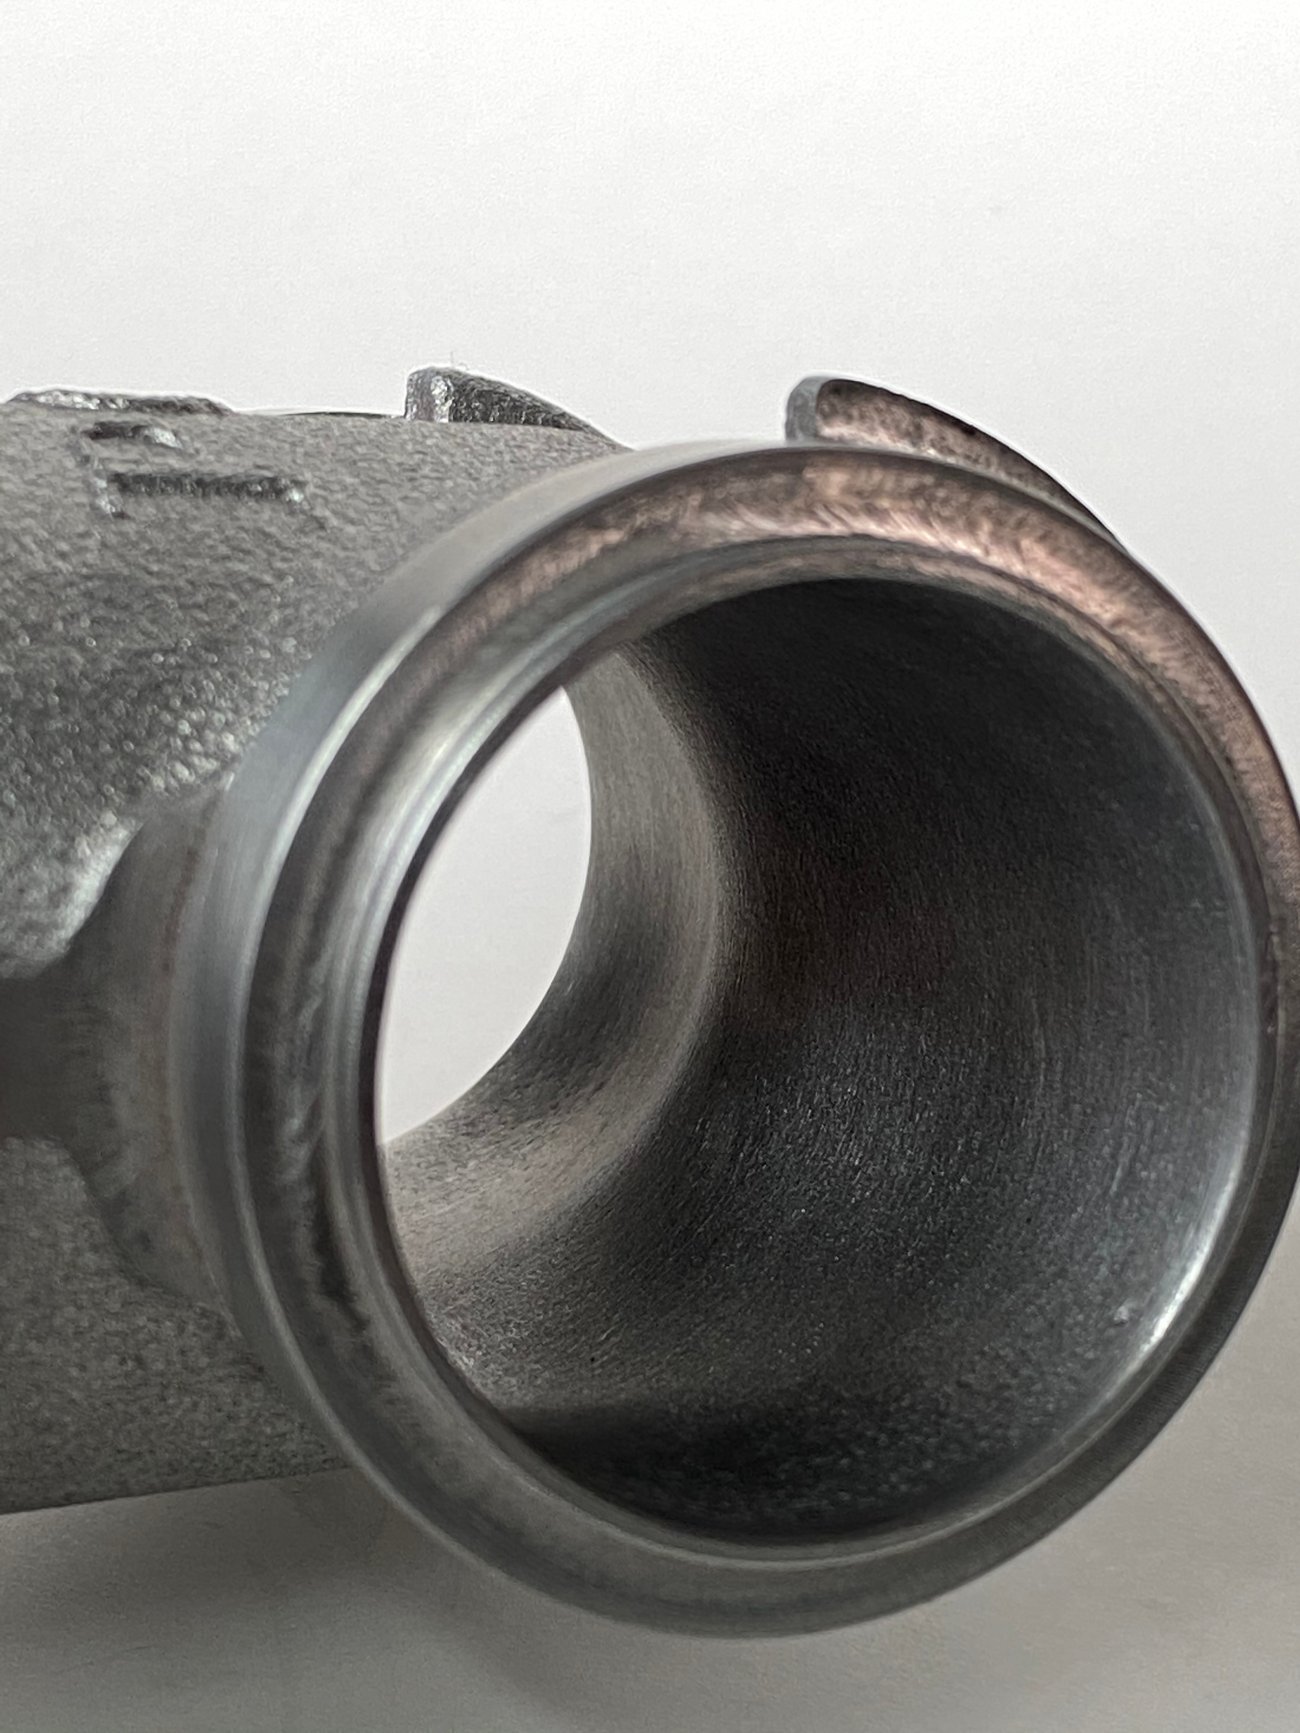
What's with the pipe holding the temp sender so far from the intake manifold casting? Thread adapter?
The corroded water neck and dirt dauber invasion in the bolt hole below it are clear and urgent safety justification for a big block upgrade vs. the years of guilt-ridden anguish from running imperfect components.
We have your best interests at heart so it's our duty to find these dangerous defects before they cause horrific explody disembowelling life-changing damage then vocally encourage sound repairs.
What's with the pipe holding the temp sender so far from the intake manifold casting? Thread adapter?
I'm running the truck's og 6-V gauges, acquired a Ron Francis voltage reducer to power the gauges..
The temp sending unit is off the IH og 220ci Sliver Diamond motor ... Used a under dash temp gauge to calibrate the og temp to read close to right ... Going to clean that up when the motor gets pulled ..
The corroded water neck and dirt dauber invasion in the bolt hole below it are clear and urgent safety justification for a big block upgrade vs. the years of guilt-ridden anguish from running imperfect components.
Good eye ... Dang good thing it's not pitot tubes or I could have crashed ... !!
We have your best interests at heart so it's our duty to find these dangerous defects before they cause horrific explody disembowelling life-changing damage then vocally encourage sound repairs.
.... Looks pissed to me ....
_____________________________________________
The two inch piece I cut from the rain guard will be the Test & Tune piece to dial in the welder settings before the real deal sees a arc ...
That's not going to cut it in order to keep the polished look ...
Sooooooo .....
They will be painted ...
I think I could have done the job if I had tooled up for it .. Heat sinks, build a cage to purge the back side with argon (That would require a dual output argon regulator flow meter, or another tank with a flow meter)
I'm not going to spend that kind of money just to have the stainless polished, paint will look good cause the windshield Sun visor will also have paint ... Kinda a hand in hand deal ...
Do you have to adjust the oil ring expander when you use the bigger ring size. I have to adjust the expander on my scout cylinders since they are made of unobtanium. Even the right size need loosening most of the time. I usually shoot for a 6 lb. drag with a breakaway of no more than 12 lb.
Dusty
Do you have to adjust the oil ring expander when you use the bigger ring size. I have to adjust the expander on my scout cylinders since they are made of unobtanium.
Dusty
I no longer use rings made from unobtanium, the cost has gotten to be out of this world ...
(That would require a dual output argon regulator flow meter, or another tank with a flow meter)
Easy way I did at the welding school is a tee and a single (cheap is fine for purging) flowmeter on each end. If a dual flowmeter malfunctions or gets broken you lose both during repair. If one of two singles on a tee breaks just swap in whatever.
You can purge with regulators borrowed from MIG machines leaving your flowmeter for your torch.
Your local welding supply should have them in stock. Good time to grab some green hose and fittings if you want to separate your cylinder (chained to wall or sitting on cart) from your welder where many sit and of course for a purge hose.
We used this clamp style because it doesn't cost a crimp ferrule for each joint or require special tools.
Inert Hose set with nut, nipple and hose clamp. All RADNOR™ fittings are manufactured to CGA-standards. In addition to CGA-numbers, many popular fittings commonly are referred to as A-size, B-size, C-size and D-size. These letter designations are included in the product descriptions.
But I'm good with them being under paint ...
Shoot with the visor being painted they might look better than having a polish finish on em...
(Really don't want to backup or tool up for this job, still got the other door to do)
What that cut allowed, was for letting the bottom retainer sit flush on the head instead of on the valve guide shoulder, in turn increasing installed height measurement .. (Which was needed for the .533" valve lift that this cam grind has going on)
That attention to detail and knowing what details to attend is key. It is also not common vs. the fuckton of slapped together work out there more suitable for a lawnmower but considered "good enough" when those bikes were transportation.
Since engine is near done I'll need to choose a clutch and belt drive. I'll reengage brain after reviewing previous posts so we can get that stuff ordered.
Let's revise and get a Panifold on order. A bit more midrange can't hurt.
Two very good, and basic steps shown here by D in setting up these heads.
One is the chamfer of the margin area of the valve to get the valve-to-valve clearance needed for the cam. In these hemi heads, where the valves move toward each other in overlap, this is a needed check.
The other really good point is moving the lower spring seat down to get enough spring installed height. This is a little more difficult than just slapping on a taller top collar. But the tall top collars have their own clearance issues. And of course with a pan head, you have a valve cover right there that limits upper collar height.

 Tweet
Tweet


Comment