
 Tweet
Tweet
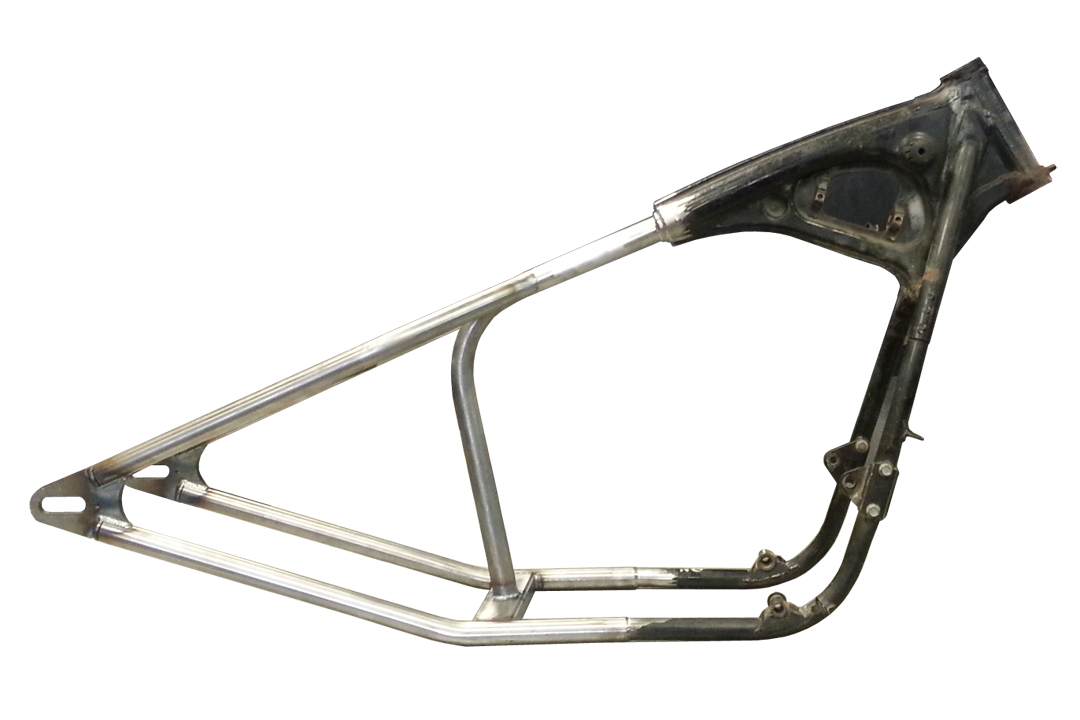
Okay so I ordered the mk46 section for a cb650 build I wanted to do . Had the bike kicking around so figured why not . After about a month of waiting I finally got the hardtail section in about a week ago . Now yesterday I got ready to cut my stock frame . Measured it about 12 times Then had a smoke and got ready to cut er up .. upon the instruction on the voodoo site it looks that they want you to cut 16.5 from center of head tube and 7 from center of front motor mount . Well that's what I did and i double checked it many times to make sure she's good .well Now it won't lign up . The back bone slug Wil only slide about 1/4 into my stock frame , checked my cuts and once again they're perfect to a T... I was talking to my buddy who has more experience than me and he said drop the motor in it'll act as a jig and see what that does ..well it made it worse . Rear motor mounts on the section section won't line up they're to long they'd have to be raised and cut and now my back bone is about an inch away from the stock frame ........now what the hell can I do .this is my first build but I made sure my cuts were good and I got the right section ... I have access to a lathe so should I spin up some longer slugs and strech it that couple inch.. my worry is I would no longer have that butt weld from the section to stock frame. The frames would be gapped with a welded slug In between ......... Hopefully this made sense but any help would be appreciated. Thanks. I will post some really shit pictures below but I all I I at the moment
-
-
-
Comment
-
I see from the V V page, it looks like you got your cuts right.
Did you call the guys at V V? They may have had an issue with that one...maybe a Friday afternoon or Monday morning fabrication. You should be able to confirm measurements of the hardtail section if you talk with them...
if you make a new slug, have the part that fits into the hardtail the same, and make the larger diameter section longer...that would be all you need.I have access to a lathe so should I spin up some longer slugs and strech it that couple inch.. my worry is I would no longer have that butt weld from the section to stock frame. The frames would be gapped with a welded slug In between...
You mentioned an issue with the rear mounts too...hhmmmm... if you were to have the bottom of your CB frame rails shorter, that would allow the bottom of the hardtail to move ahead...would that allow the backbone slug to fit? But would the engine sill fit? I see those rear engine plates are made to fit after engine is installed, so could be re-cut.
on the website, they mention "and ships with backbone strapped inside to reduce shipping cost."... did you have to set and weld the backbone section into the hardtail? Could that be an issue?
further they advertise is as Honda CB650 Hardtail 79-82 - MK46
then down below state, "The MK46 Hardtail is specifically designed for the 1979-1981 Honda CB650c original factory frame.
What year is your frame?
phone them; Voodoo Vintage ; Phone: (512) 825-0523
If buildin' old school choppers was easy, anyone could do it... ain't nobody said it's gonna be easy...Comment
-
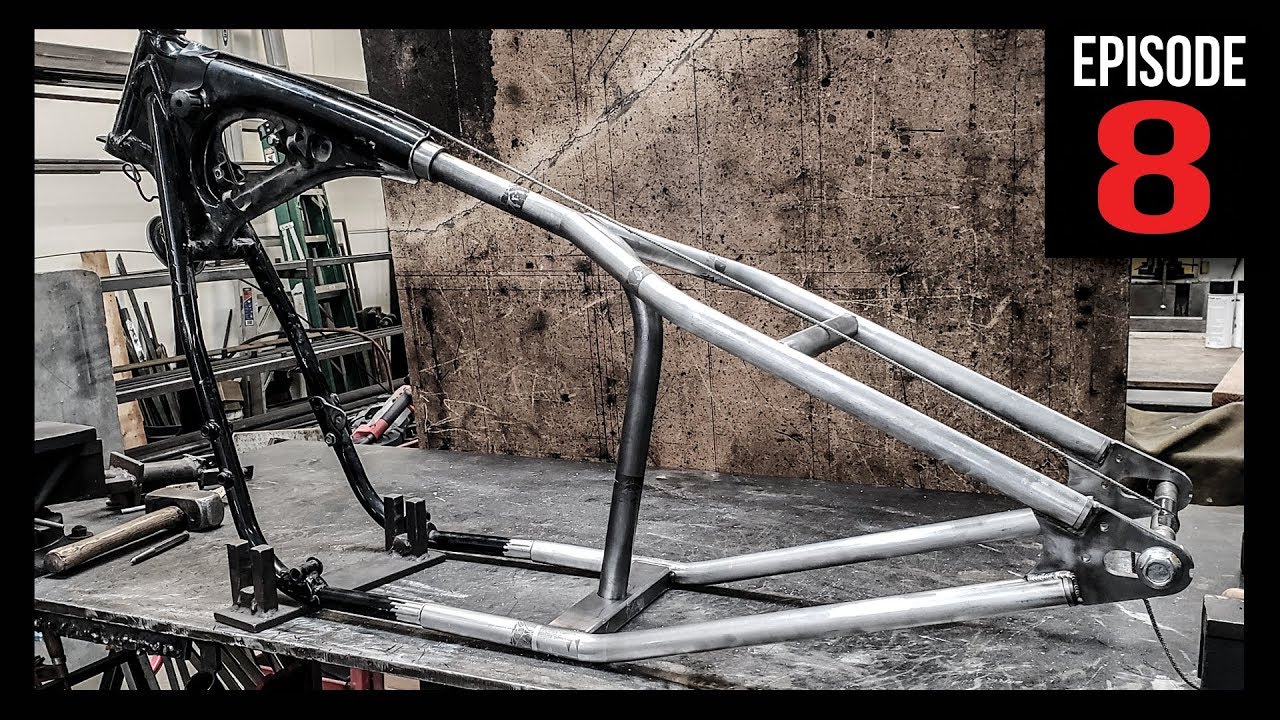
HardTail Frame Kit Install - CB650 Bobber Build - Episode 8
Voodoo Vintage hardtail install on CB650
If buildin' old school choppers was easy, anyone could do it... ain't nobody said it's gonna be easy...Comment
-
I haven't called them yet since its the long weekend I figured I'd wait a bit. I did send him an email though hoping they'll get back within a few days
Yeah I can spin up some slugs for the bottom and top but what kinda steel am I looking for? Also for the bottom rails should I tapper a section of the slug to also fit the O.D of the tubing so its not gapped
I don't think the motor would fit if I cut the bottom rails anyshorter. Or it be a really tight squeeze I'd have to cut at least 1.5
Now for the back bone I haven't welded it I yet for a few reason . One nothing fit lol but there's also alot of slop now if I raise it from the seatpost and move it forward I almost get a better fit . But than It dosent sit on the crossmember or bottom out on that cross member .. I found another blueprint on lowbrow for the mk46 and it shows 8 inches for the back bone to tip of slug . But I can't achieve that without pulling it out of the bottom. Plate.... but when I measure everything up it seems to be proper length . Only thing I can tink is that maybe the top rails are short
And yeah my bike is the 81 cb650c so should've lined up with minor tweaking at the mostComment
-
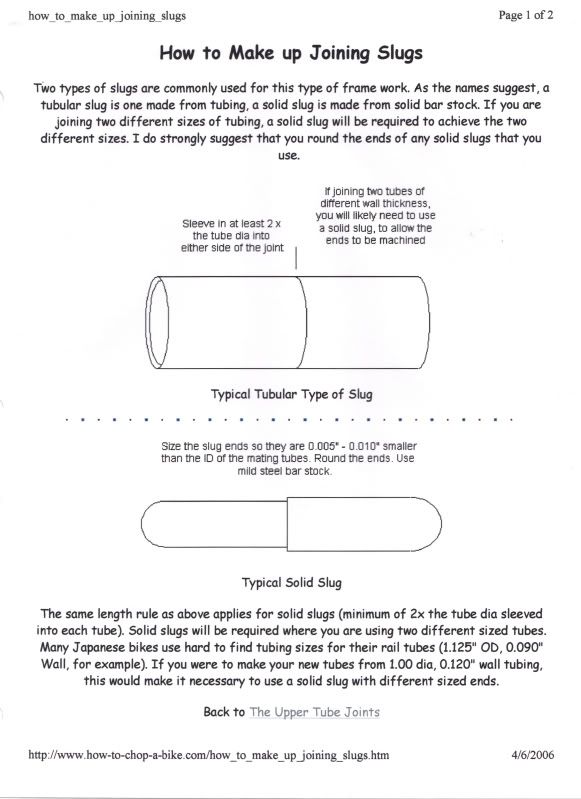
Slugging a frame
How to make up joining slugs
2013 Thread: Garage Built Frame-Tips and Tricks
"All good advice here by these guys. I'm not going to soapbox or JP this because I believe it's your ass in the seat, they call em death traps for a reason and I've seen some ugly shit from back in the day hold up. Instead I'll just offer you some tips and knowledge aswell as address some of the stuff mentioned above. First I'd like to address the use of slugs, USE THEM when connecting two pieces of tubing together. I usually make my slugs 3" long so I have an 1 1/2" on each side. Drill 4 holes (top, bottom, and both sides) in each tube about 3/4" in from the end. Bevel both ends of the tubes to be connected. Insert slug 1 1/2" into the open end of one tube and weld the 4 holes. Next fit the next tube leaving a 1/16" joint and weld the 4 holes. Now weld up your seam. Finish it off with a hand file for the best finish. Get ready to do this process twice because being a green welder your gonna say fuck that file and grab the grinder I've seen it to many times. Remember the better your welds look the easier they are to clean. Oh, and yes this is not the correct way but will work fine in this situation. The correct way would be to replace the whole tube or an open root v groove weld. Next lets discuss coping "fish mouthing" this is used to get the most surface area to weld to when welding the end of a tube into the side of a tube (no need for slugs here). This is how I fish mouth tube because I don't have the cash to buy the proper equipment. Use a bi-metal hole saw and a pilot bit in your drill. This will cope the ends just clean them up WITH A HAND FILE and bevel the coped ends weld into place and again had file the welds for best appearance. Now for more knowledge, many of the guys around here will preach tig welding to no end but mig is fine and my personal favorite. Practice, practice, practice. Know the ABC'S of welding Always Be Comfortable. Pay special attention to L.A.S.H L=length of the tip of your rod or wire from the material your welding, A= angle of your rod or wire to the joint you are welding, S=your travel speed make sure to stay in the puddle, H= heat make sure your heat is high enough for good penetration but low enough you are not blowing holes in your material. Also every welding machine is different even if there the same make and model there different so a manufactures recommended settings are just that always feel the machine out and set it to your liking. Every welder is different and welds different ways to their preference, the things I wrote here are my preferred ways. If I were you and a green welder I'd start by getting me a good mig welder such as a Lincoln, Miller, or a Hobart with a gas hook up on it. You'll learn about gas later. Start with a flux core wire and build the following things for practice, a welding cart, a welding table, and then a frame jig this will give you practice. Always measure twice and cut once. Built not bought is my motto at Back Porch Choppers, Round here we build choppas motha fucka. Hope this helps. " LinkBelt.
If buildin' old school choppers was easy, anyone could do it... ain't nobody said it's gonna be easy...Comment
Comment