Fabricating a Foot Clutch - 2006 Softail

Collapse

Desktop Ad Forum Top

Collapse

Mobile ad top forum

Collapse
X
 
  • Time
  • Show
Clear All
new posts
  • alferguson01
    Junior Member
    • Oct 2018
    • 3

    Fabricating a Foot Clutch - 2006 Softail

    Hi Folks,

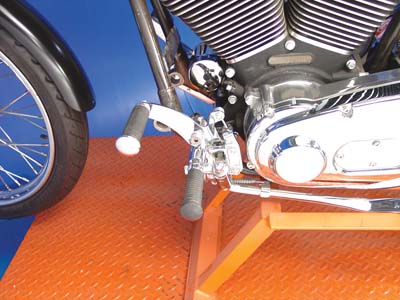
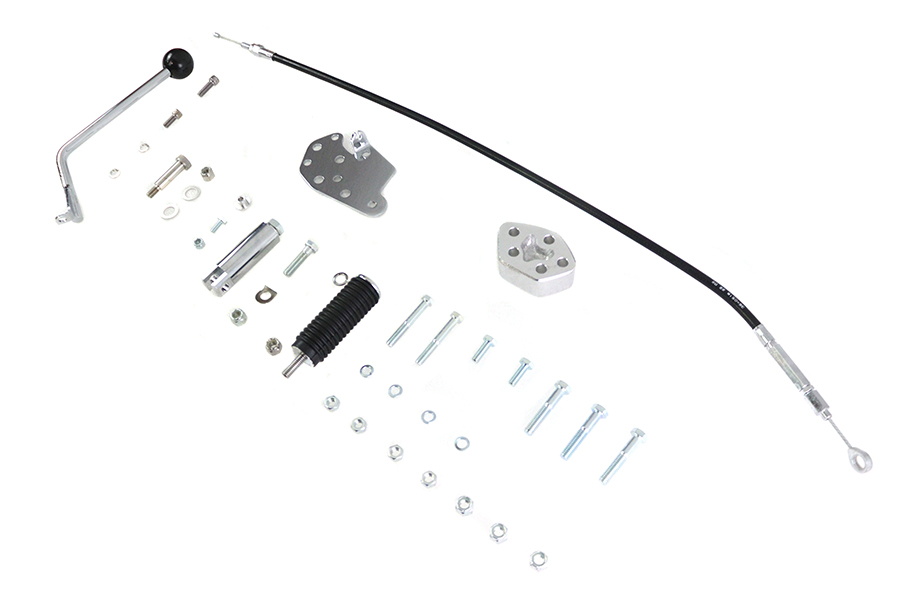
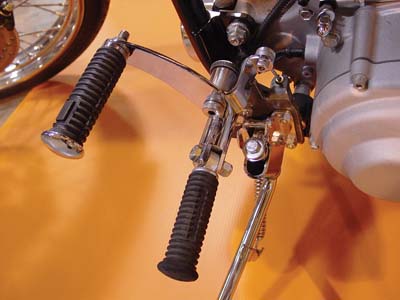
    I'm looking for some photos of LaBriola OR home-made foot clutch - LaBriola (Denver) isn't making these anymore and I haven't found a (kit) source for them so I'll give it a go fabricating my own. I have a 2006 Softail Deluxe - it has floorboards on it which I would very much like to keep. Any photos and ideas would be appreciated - especially if you have a LaBriola kit on a Softaill or have Fabricated a system yourself.
    Thanks for any help.
    Al
    Click image for larger version

Name:	Img 6.jpg
Views:	1
Size:	28.3 KB
ID:	1344406
  • TriNortchopz
    Senior Member
    • Dec 2017
    • 3258

    #2
    Can you adapt this to your 2006? I looked at LaBriola, saw it was a Lee-style clutch, looked for that, and found this, but for older models(up to 1984):
    Lee Style Clutch Pedal For Jockey Shift
    Click image for larger version

Name:	s-l1600.jpg
Views:	1
Size:	64.3 KB
ID:	1308035
    If buildin' old school choppers was easy, anyone could do it... ain't nobody said it's gonna be easy...

    Comment

    • Dragstews
      Senior Member
      • Sep 2010
      • 13739

      #3
      VT has this available ....


      VT No: 21-0114 .. $273.99 .. "IN STOCK"
      Kit includes pedal, plate, 36-1/2" cable, and handle.
      Order footpegs separately. *Note: UPS may consider this part as packaged "oversize" for shipment, as compared to the actual weight, which will result in higher shipping costs.
      Fits:
      Custom application

      Last edited by Dragstews; 01-29-2019, 7:51 AM.
      Take my 45 and outrun em all ..

      Comment

      • Tattooo
        Senior Member
        • Sep 2012
        • 12407

        #4
        ^^^^ That sure is clean looking....^^^^^^ I was wondering where the cable was in the other pic you posted....

        Comment

        • Dragstews
          Senior Member
          • Sep 2010
          • 13739

          #5
          It's pretty much a copy of Rick's (LaBriola Machine) pedal ....

          Rick is a gear head from way back ...
          Closed down his shop and moved to his backyard...
          He's got this old Gasser that runs like a scared haint ... Said that he's putting a blower on it....
          That will make it more interesting in the 1/4 mile ....

          36 Five Window Plymouth Coupe ... 392 Hemi

          Click image for larger version

Name:	Capture R36PG.JPG
Views:	1
Size:	110.5 KB
ID:	1308045
          Last edited by Dragstews; 01-30-2019, 7:23 PM.
          Take my 45 and outrun em all ..

          Comment

          • alferguson01
            Junior Member
            • Oct 2018
            • 3

            #6
            Thanks, I did see that one on Throttle Addiction and emailed the sales dept but they said it wouldn't fit and given it is chrome, I opted not to try this one.

            Comment

            • alferguson01
              Junior Member
              • Oct 2018
              • 3

              #7
              Originally posted by Dragstews
              VT has this available ....


              VT No: 21-0114 .. $273.99 .. "IN STOCK"
              Kit includes pedal, plate, 36-1/2" cable, and handle.
              Order footpegs separately. *Note: UPS may consider this part as packaged "oversize" for shipment, as compared to the actual weight, which will result in higher shipping costs.
              Fits:
              Custom application


              This one really interested me - I asked the sals dept and was told it would not work - I believe they said 86 - 99 FXST . The kit looks really complete so thought it might make a good start but at $273 it's a bit spendy t hack up... That is when I went to Fabricating my own from photos of others efforts. Thanks for the response!

              Comment

              • nuklhd
                Senior Member
                • Sep 2013
                • 1248

                #8
                talk to kevin at fabkevin.com

                Comment

                • SamHain
                  • Apr 2024

                  #9
                  Keeleyvision did one but he’s not too active on here. Cable went around the front of the frame I believe

                  Last edited by Guest; 01-30-2019, 6:26 PM.

                  Comment

                  • Scot229
                    Junior Member
                    • Oct 2013
                    • 5

                    #10
                    Click image for larger version

Name:	20151123_195231.jpg
Views:	1
Size:	308.3 KB
ID:	1308390
                    Click image for larger version

Name:	20151123_195206.jpg
Views:	1
Size:	300.4 KB
ID:	1308391
                    Click image for larger version

Name:	20151123_195145.jpg
Views:	1
Size:	308.4 KB
ID:	1308392
                    Click image for larger version

Name:	20151123_190815.jpg
Views:	1
Size:	287.3 KB
ID:	1308393
                    Click image for larger version

Name:	20151123_190800.jpg
Views:	1
Size:	290.4 KB
ID:	1308394

                    I made a foot clutch for my 5 speed chopper. I started with a new take off clutch cable. It's going to be much shorter than any stock cable so it doesn't really matter what you start with.

                    Cut the eyelet off the clutch lever end and pull the inner wire out of the outer housing.

                    You will need to keep the outer housing length adjuster in the cable somewhere so pick out a good spot for it that will still be easy to get at when you're maintaining the bike, doing clutch adjustments. If you are running it to your left foot a spot near the voltage regulator would work out well I think.

                    On my bike the cable needed to be shortened on both ends so I removed the fitting that screws into the transmission side cover. I did this by cutting the end off with about 1 inch of cable housing still attached to the the threaded fitting. The cable housing is like a coiled wire inside the protective outer black covering. I put the threaded fitting into my vise and pulled the remaining stub of cable housing out of it unraveling it in the process. Kind of like over stretching a spring.

                    Once the threaded fitting is liberated from the outer housing you can screw it into the transmission side cover for mock up. Hold your outer cable housing up to the bike routed the way you plan to install it and cut the housing to length on the transmission end first. I used a cut off wheel in a die grinder.

                    The inside of the fitting has "threads" or grooves cut into it. It must be twisted onto the outer housing like a nut. I used liquid pipe thread sealant on the end of the housing as a sealant and it also worked as assembly lube. I marked my outer cable housing before I started putting the threaded fitting on to ensure it got installed all the way.

                    The cable end fitting that originally went into the clutch lever perch is just crimped on. I pulled it apart like the other end. To get it re installed on the end of the housing i had to lightly ream out the inside with a drill bit to get it slid back over the outer cable housing. You will need to make some type of clutch cable perch for this end of the cable housing to sit in. If it were me I would have it under the clutch foot pedal instead of behind it. You could weld or bolt a bracket to the front foot board support to accept the cable housing.

                    If you can find a good spot to come up vertical behind the shifter pivot point, like the pics above, you might be able to use your existing shift lever shaft shortened down a bit.

                    the clutch pedal fabrication is gonna be on you. all you really need is a perch for that clutch cable housing to stop at in a place that will allow you to get a cable to the lever. I read in the horse years ago an article by Billy Lane where he suggested a 4 to 1 ratio for a 5 speed foot clutch on the lever. so if your clutch pedal is 4 inches from the pivot point center you want the lever where the cable hooks up to be 1 inch from the center. If it's a 8 inch long clutch pedal the cable point would be 2 inches from the center. I followed this advice and my clutch pedal works pretty good.

                    After you get the pedal arrangement sorted collapse the cable adjuster all the way short and then make it about 1/3 of the adjustment range from all the way short. that way you can lengthen the housing for clutch adjustment and shrink it a little if you need to.

                    After you have a cable housing that fits up to your bike and clutch pedal it's time to make the inner wire.

                    This is the only thing that requires any type of special tool. I used a 1/4-28 fine thread bolt that I cut the head off it. I ran a few nuts on it and had a buddy chuck it up in a lathe so it could be center drilled all the way through.. I don't remember the size but use a drill bit the same diameter as the inner wire so you can slip it on the end of your cable. I soldered the end of my cable, twice, and had a failure, twice where the threaded bolt pulled off the end of the wire because my solder job failed. This part is IMPORTANT if you don't want to get stranded with a clutch cable failure. Your clutch pedal needs something to limit its travel. I welded a tab on my clutch pedal and threaded a set screw into it so so I could adjust where it stops. Think of the floor boards on a car. the clutch pedal goes down till you hit the floor. if it doesn't have anything to stop against you will have problems with stretched cables and pulling off the threads.

                    The 3rd time i "fixed" the cable I added the travel stop and a squashed the threaded insert in a press. just make sure you squash it far enough down that good threads remain for screwing on the heim ball joint.

                    Comment

                    • Scot229
                      Junior Member
                      • Oct 2013
                      • 5

                      #11
                      Click image for larger version

Name:	20151123_193522.jpg
Views:	1
Size:	300.8 KB
ID:	1308395

                      Click image for larger version

Name:	20151123_192702.jpg
Views:	1
Size:	299.1 KB
ID:	1308396

                      Click image for larger version

Name:	IMG_20151123_200828.jpg
Views:	1
Size:	283.1 KB
ID:	1308397

                      Click image for larger version

Name:	IMG_20160902_130258.jpg
Views:	1
Size:	281.7 KB
ID:	1308398

                      This pic shows how I squashed the threaded bolt in a press to give it better grip on the cable. Since I did this I have had no problems

                      I don't check this forum real often if you want to ask me questions hit me up on instagram https://www.instagram.com/evoscot/?hl=en
                      Last edited by Scot229; 02-15-2019, 9:39 PM.

                      Comment

                      • SamHain
                        • Apr 2024

                        #12

                        Comment

                        300 mobile ad bottom forum

                        Collapse
                        Working...
                        ;