
 Tweet
Tweet
We’ll, I thought it time for me to post a build thread on my shovelhead. I’ll give you the backstory from my first days of ownership.
So, I live in New Zealand and round here old Harleys are few and far between, so in 2014 I went looking to import a bike from the US. After a few months scouring Craigslist I found one I was pretty keen on, the money was right, I got it checked out and pulled the trigger. This is the pic of the bike on Craigslist,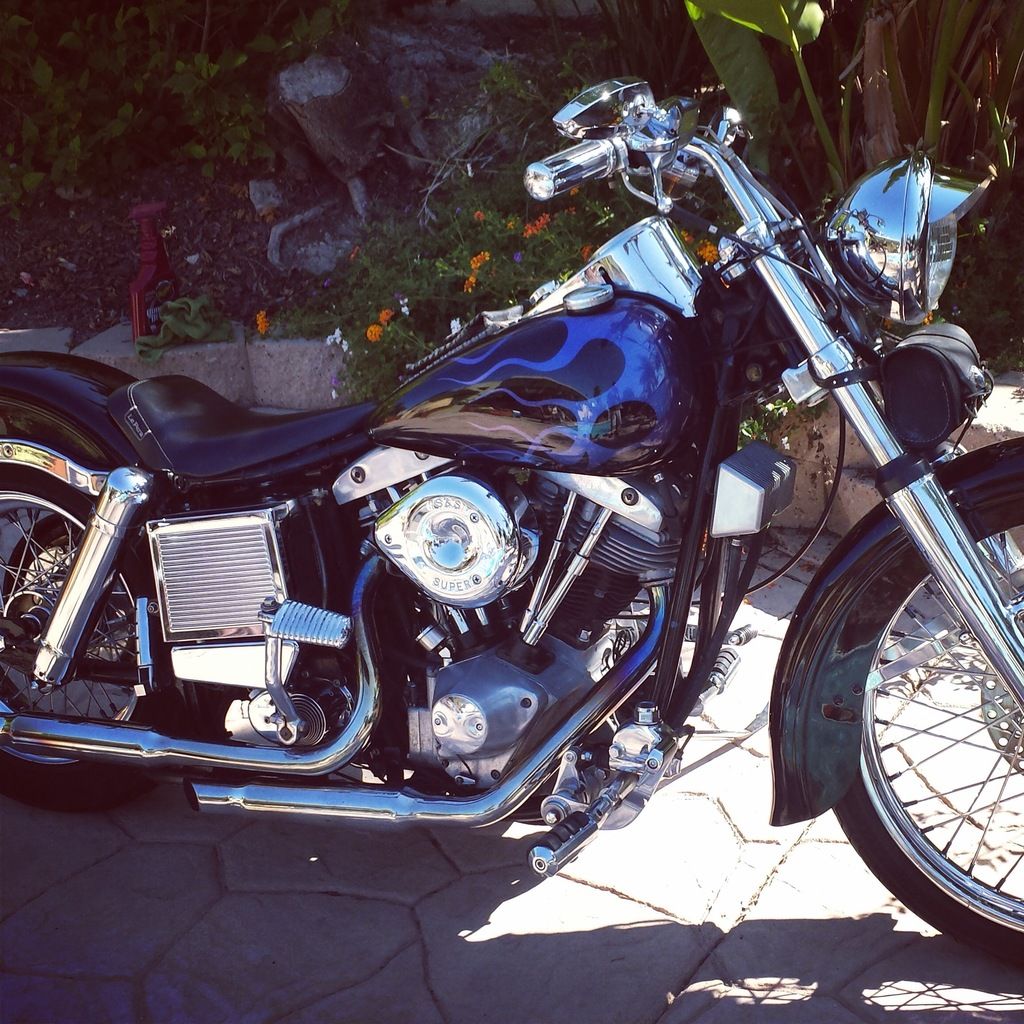 it had a few nice bits on it such as belt drive primary, early swingarm, juice drum brake, 21” front wheel, 3.5Gal tanks etc, rebuilt heads (apparently), I was pretty happy. I put it on a boat to NZ and after a 4 month wait it turned up.
All was good with the bike, it matched the pictures, was quite tidy, and ran. I had seen video of it run by the guy who picked the bike up and freighted it for me, but this was a relief to see it in person. The day I got it I changed the oil out, got it running, gave it a quick once over, and was off for a ride. Bear in mind this is the first time I’d ever ridden a HD….I was stoked and headed round to my mate Steves to show him. @Straightleg_steve on Instagram, he has a heap of cool old stuff and has been a mentor with the old HD big time for me. Cheers Steve for all your time and wisdom.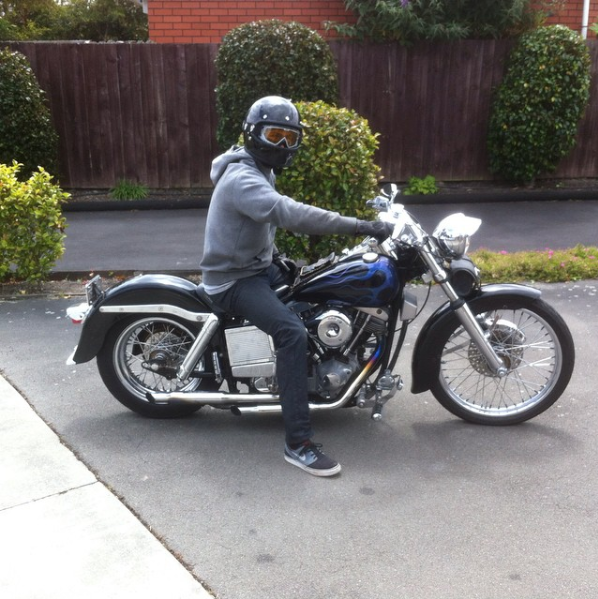
Here’s me arriving at Steves, this is about 30km from my house. Bike ran great on the ride over.
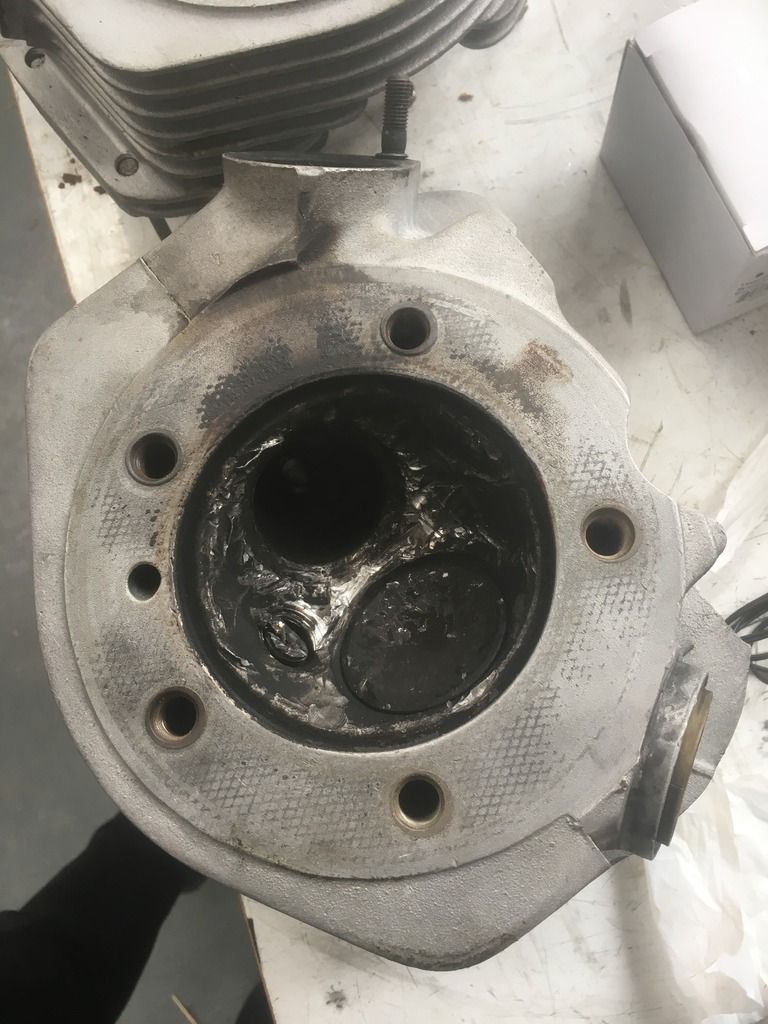
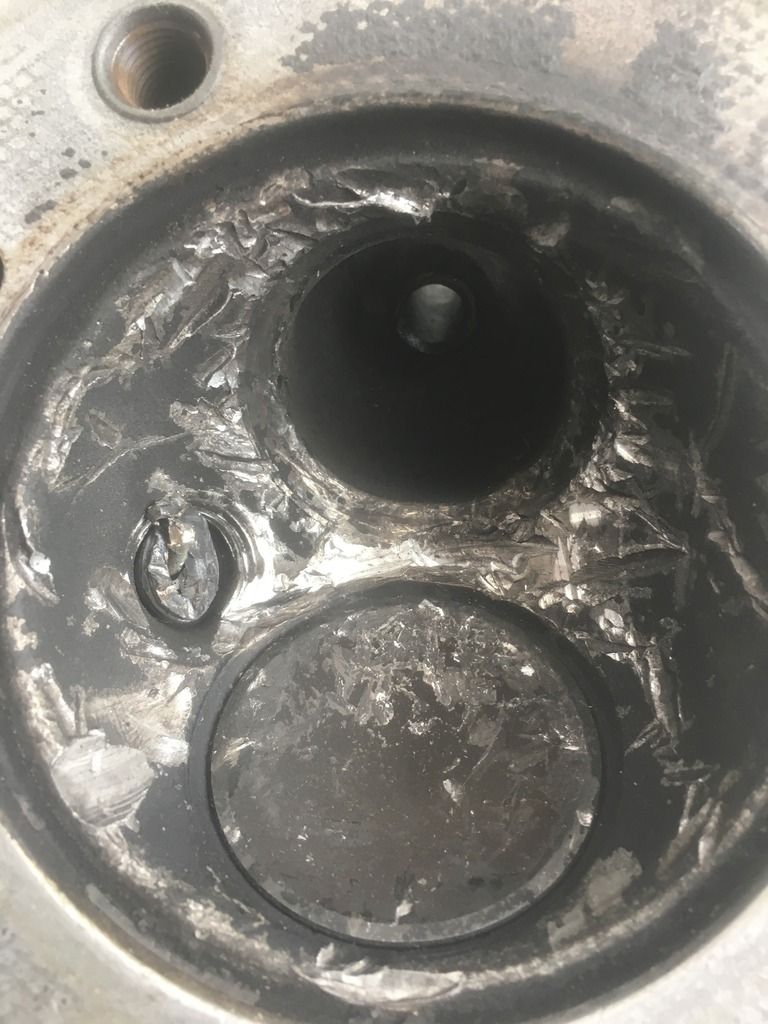
We hit the road, my shovel and Steves shovel. About 15 mins down the road i hear a faint tapping, just enough of a noise change to make me wonder, I pull over, we check It out, still running “fine”, but head back to check pushrod adjustment etc just in case. All checks out and we cant find anything obviously wrong, so back on the road. Noise goes away. So we make it about 30kms further from Steves to the pub, have a beer and then decide to head back. About 5kms back down the road the noise of a spanner being shaken in a tin can and a dead Shovelhead fills the air.
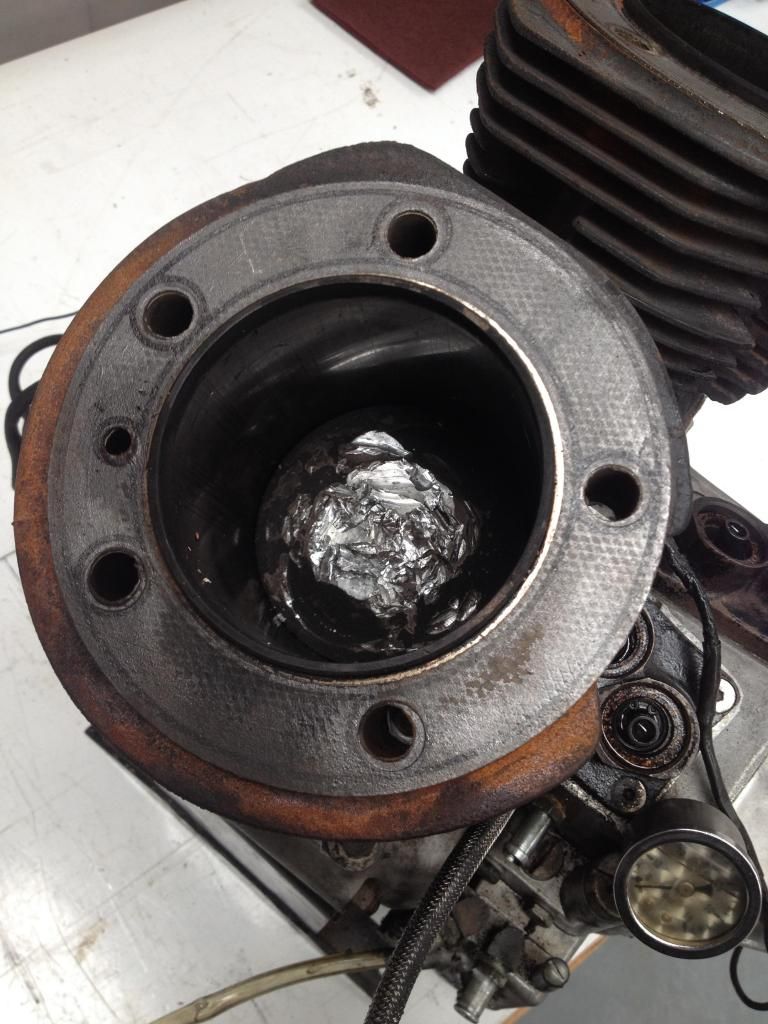
This is what we found. Dropped exhaust valve, lunched head. Bad times.
So we pulled the bike down immediately. At the end of the first day of Shovelhead ownership this is how my bike looked.
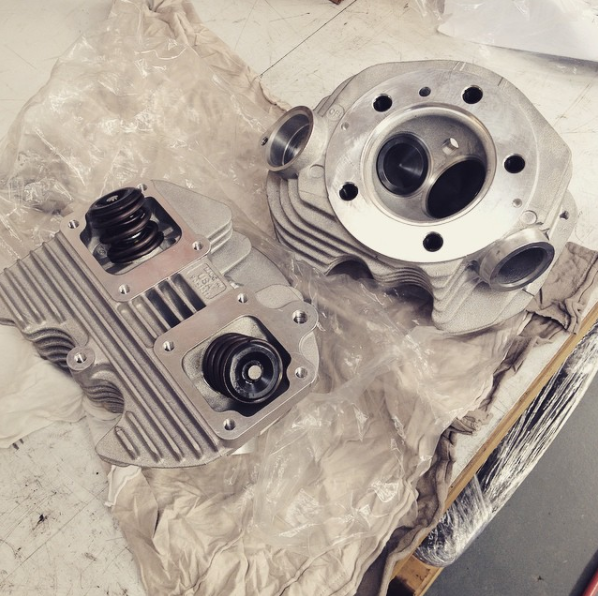
I rebuilt the motor, sent the whole thing to a specialist shop up North here in NZ. New bottom end to factory specs (it was well shot according to the builder), new S&S heads, a complete freshen up top to bottom. While it was apart i polished the rocker boxes and cam cover up too. I also did some research, motor should be an 80”, however, had 74” gear inside. We suspect the PO swapped out some good bits and slapped whatever he had laying around in for sale…lucky me. The motor was a real mismatch inside, different pushrods, wrong rotating assembly, valve retainers were different, not to mention the Timkens were knackered, apparently a rarity….yikes.
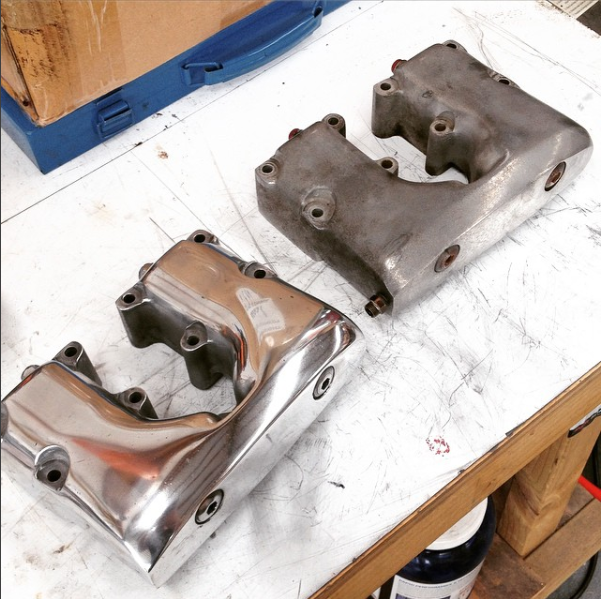
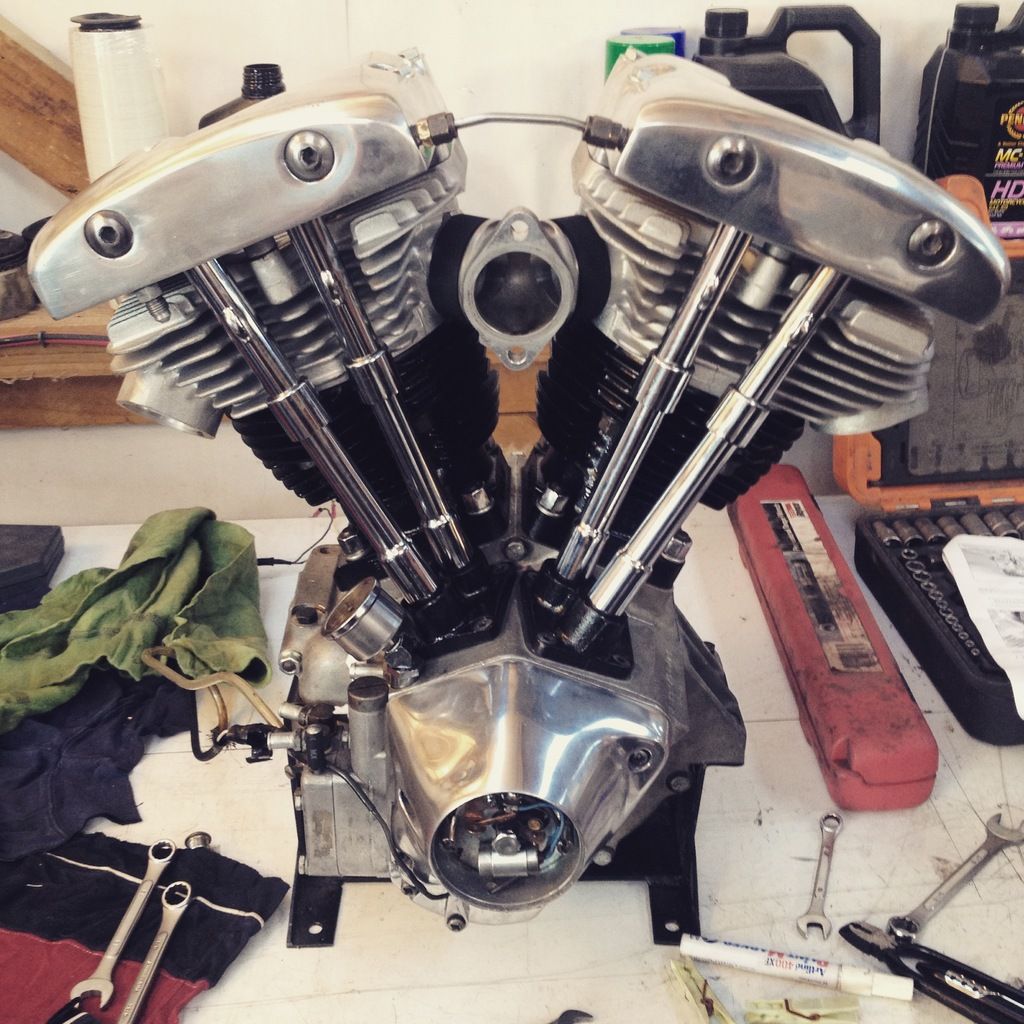
Got the bike running again after about a month, re-jetted the carb for the 74”, it ran mint, put new stainless bars on, got rid of some of the horrible bits on it, removed the dead electric start system and made some blanking plates up At this stage it looked like this..

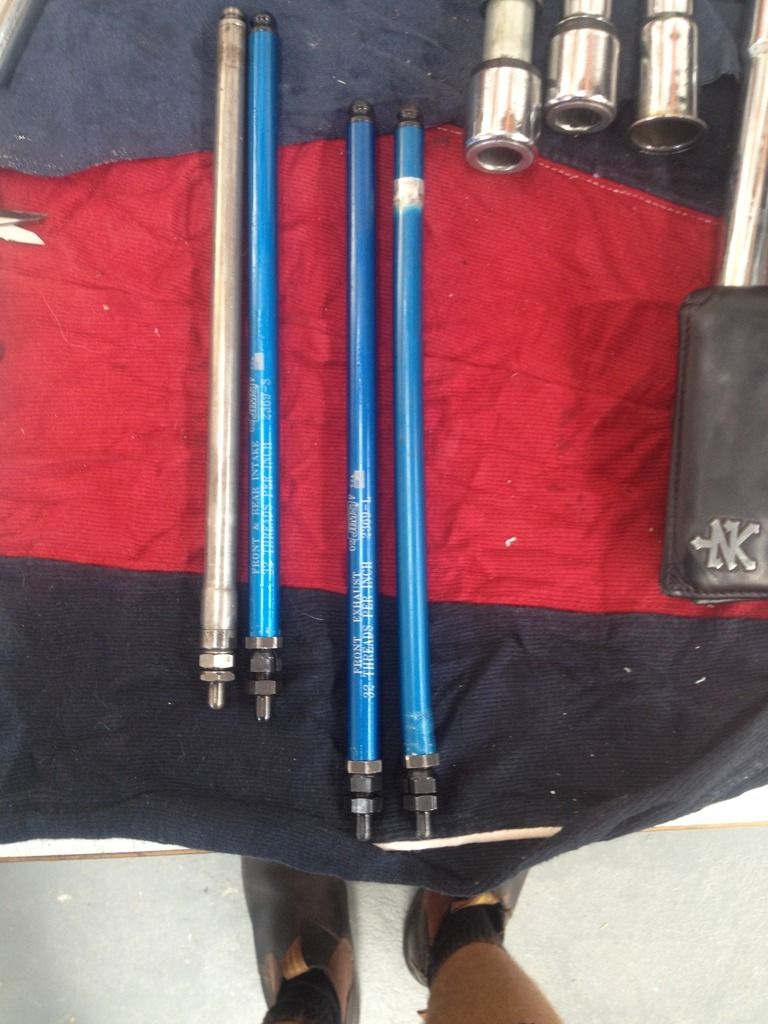
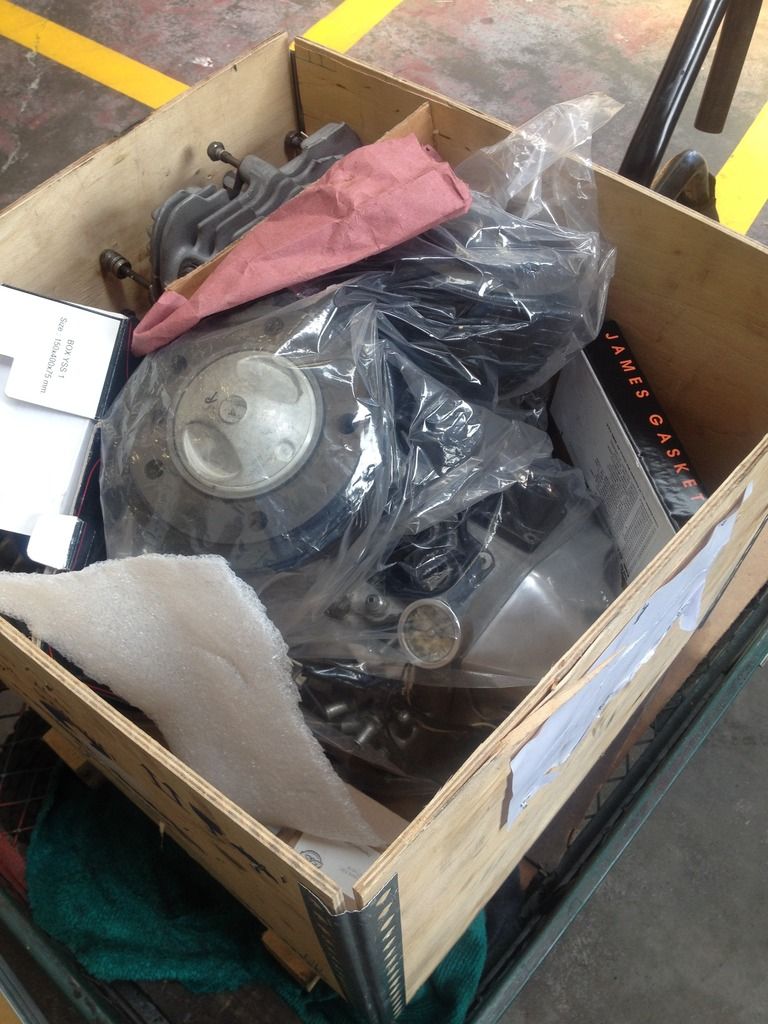
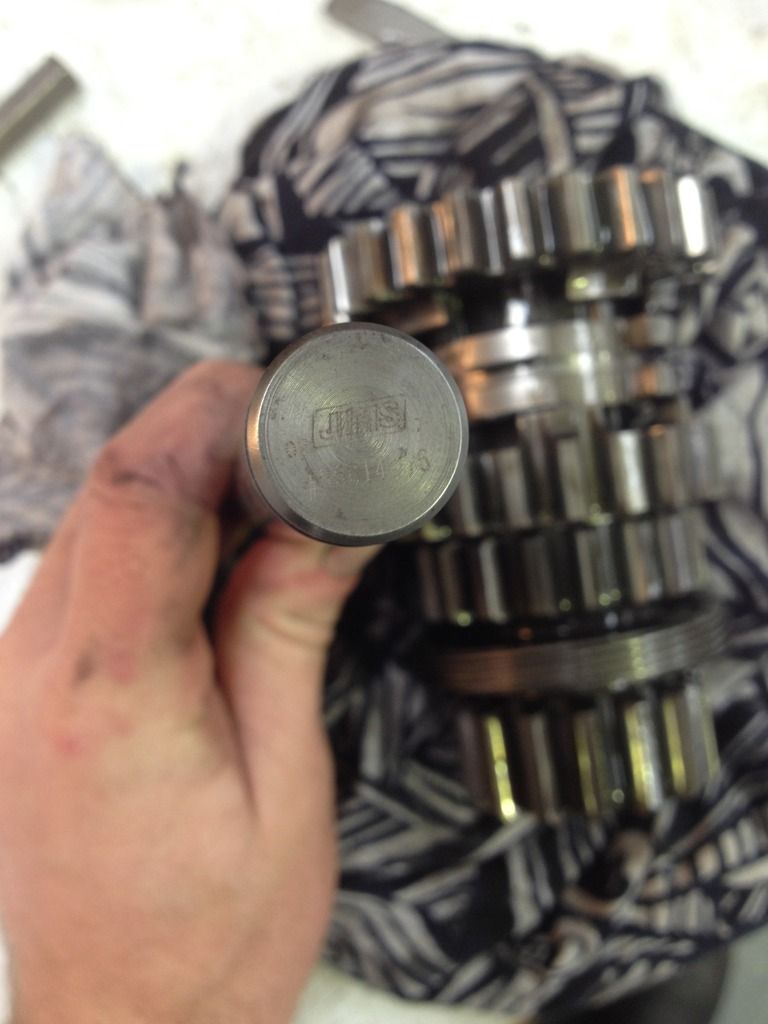
Life was good again. 500km later and I go to start it and the kicker goes to shit. Right, gearbox overhaul time. Pulled it down and found this..
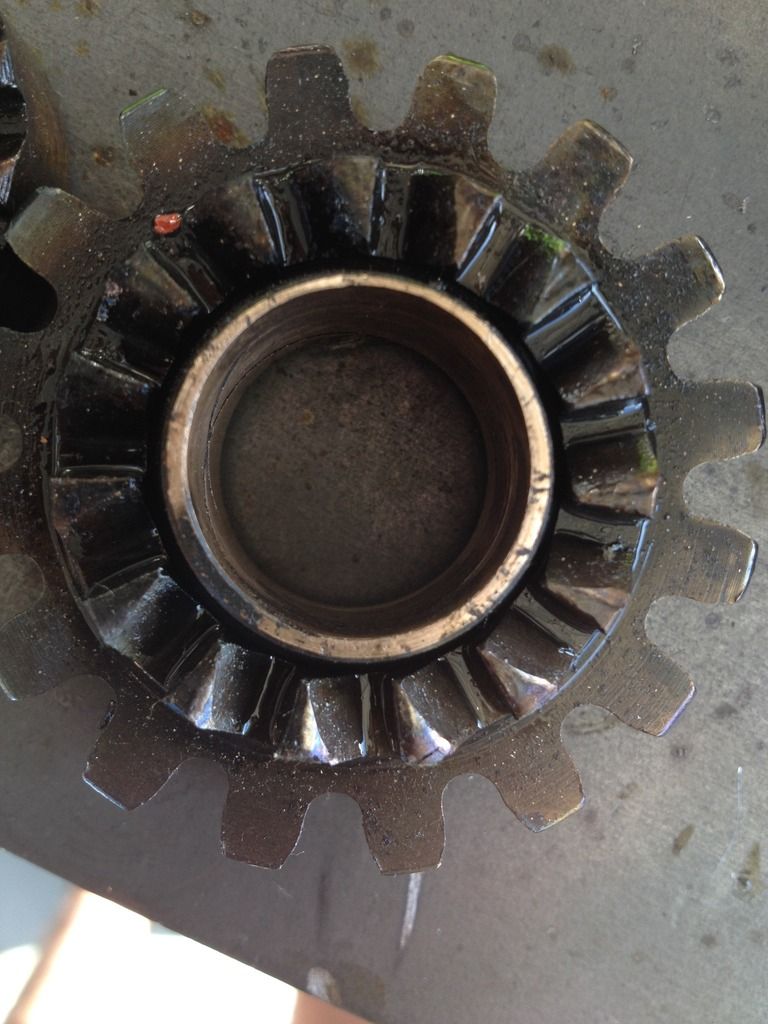
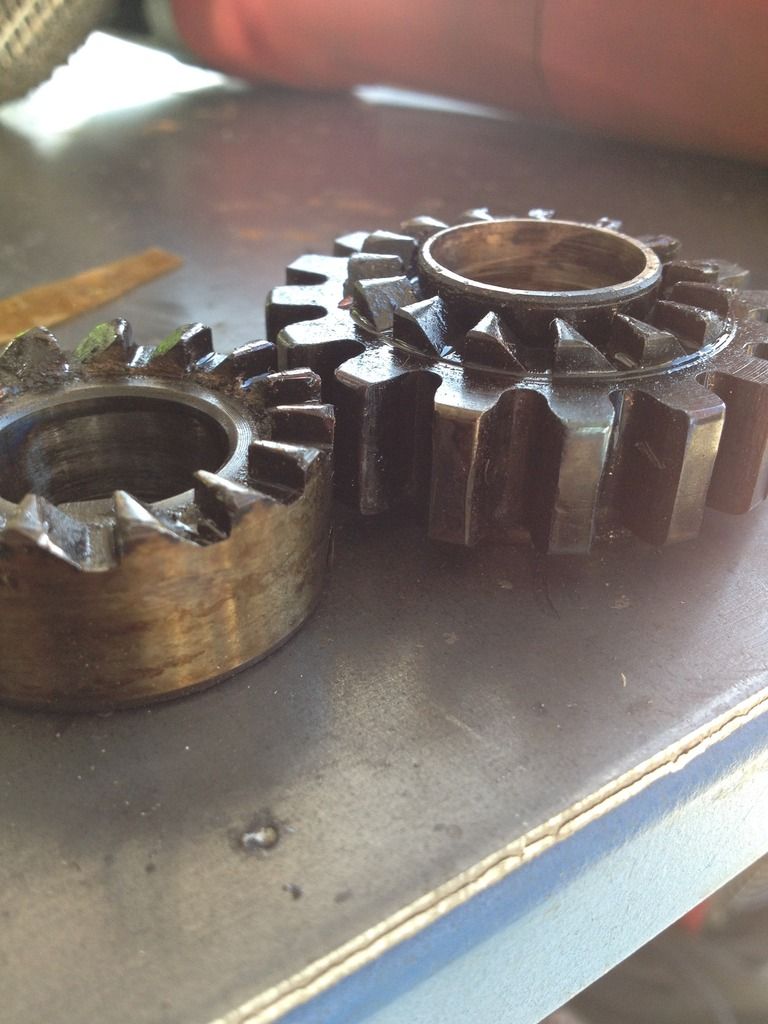

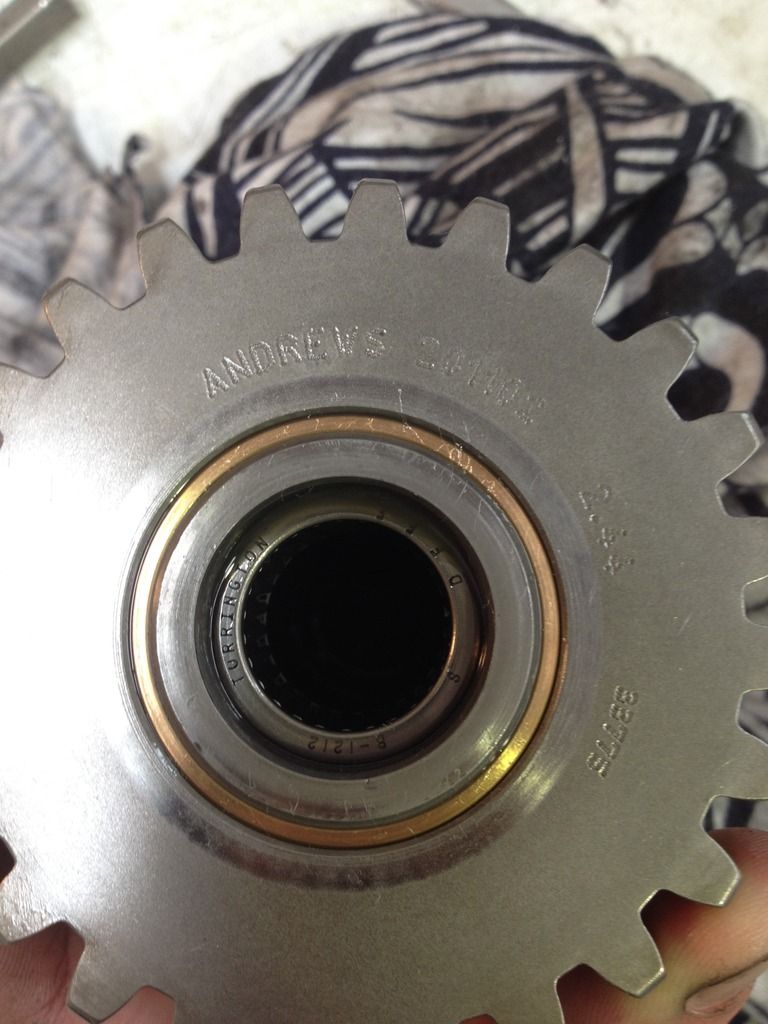
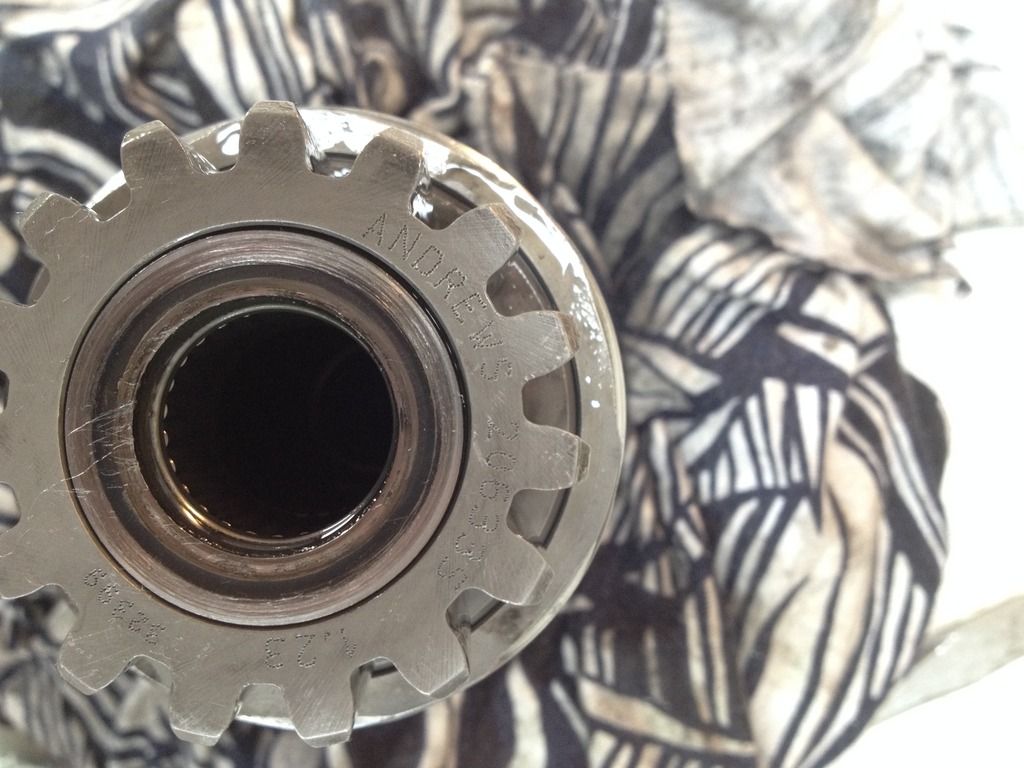
stripped kicker gears, worn bushing…big time. However, found some good, full Andrews gearset (like new) , Andrews mainshaft (stuffed), Jims countershaft. G-Box case is Custom chrome. It’s a bitsa. So, rebuilt that, machined the mainshaft spacer for an O-ring, new Andrews mainshaft and kicker gears, all new gaskets. Back in action.
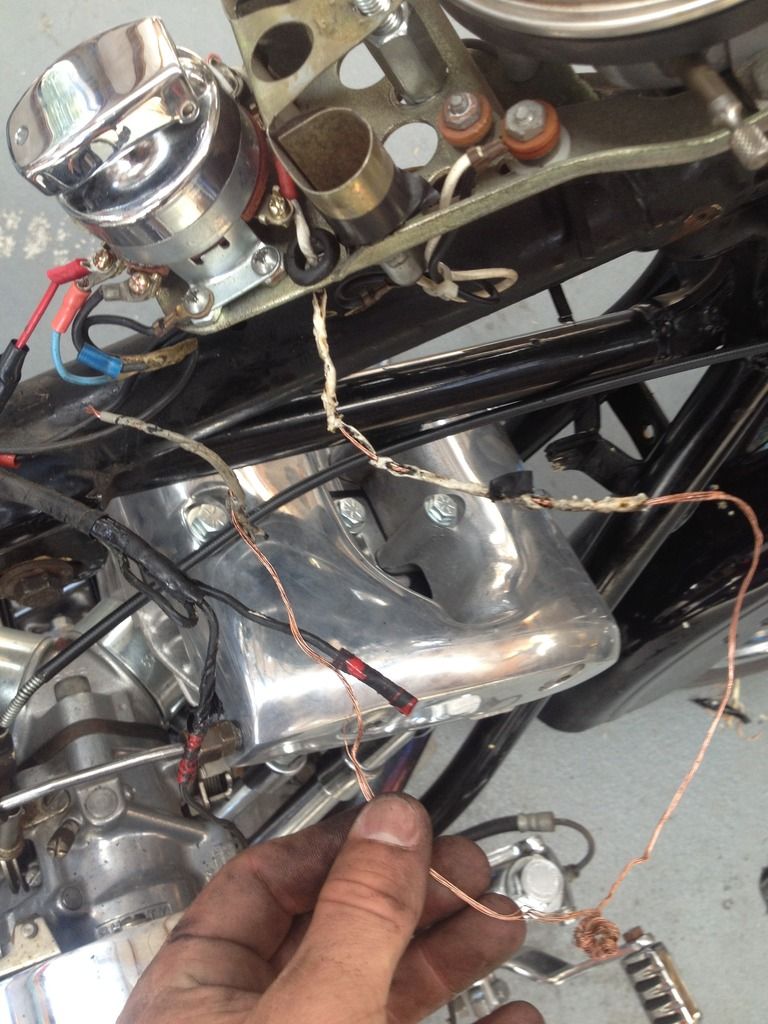
Couple more miles down the road, wiring goes bad. I’ve learnt to always have tools on me riding this thing, had enough electrical tape to get me home. Partial re-wire was no major.
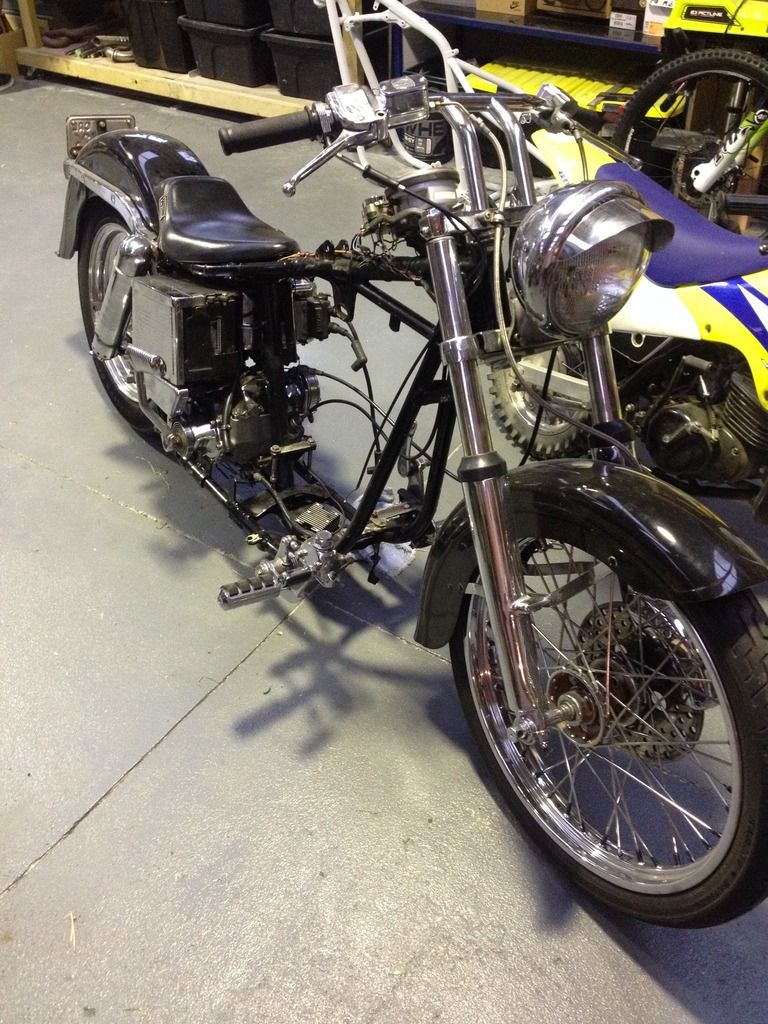
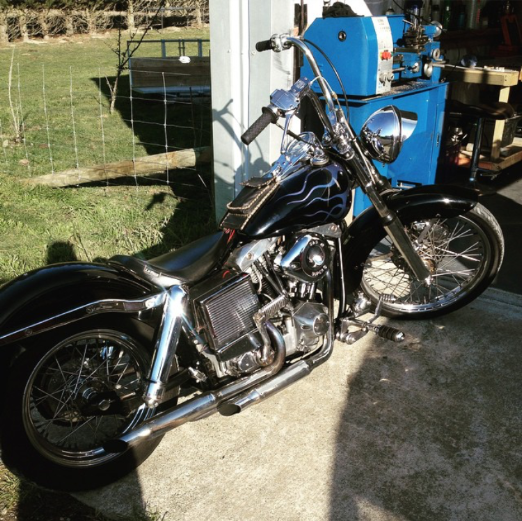
Right now this is how the bike looks. It was a bit of a “troublehead” for a while there.
Anyways, the bike now runs great and I love it, learnt a lot, but I’ve always had a plan and a purpose for this bike. This is the next part of the story and one that I’ll be keeping you up to date on. Chopper time.
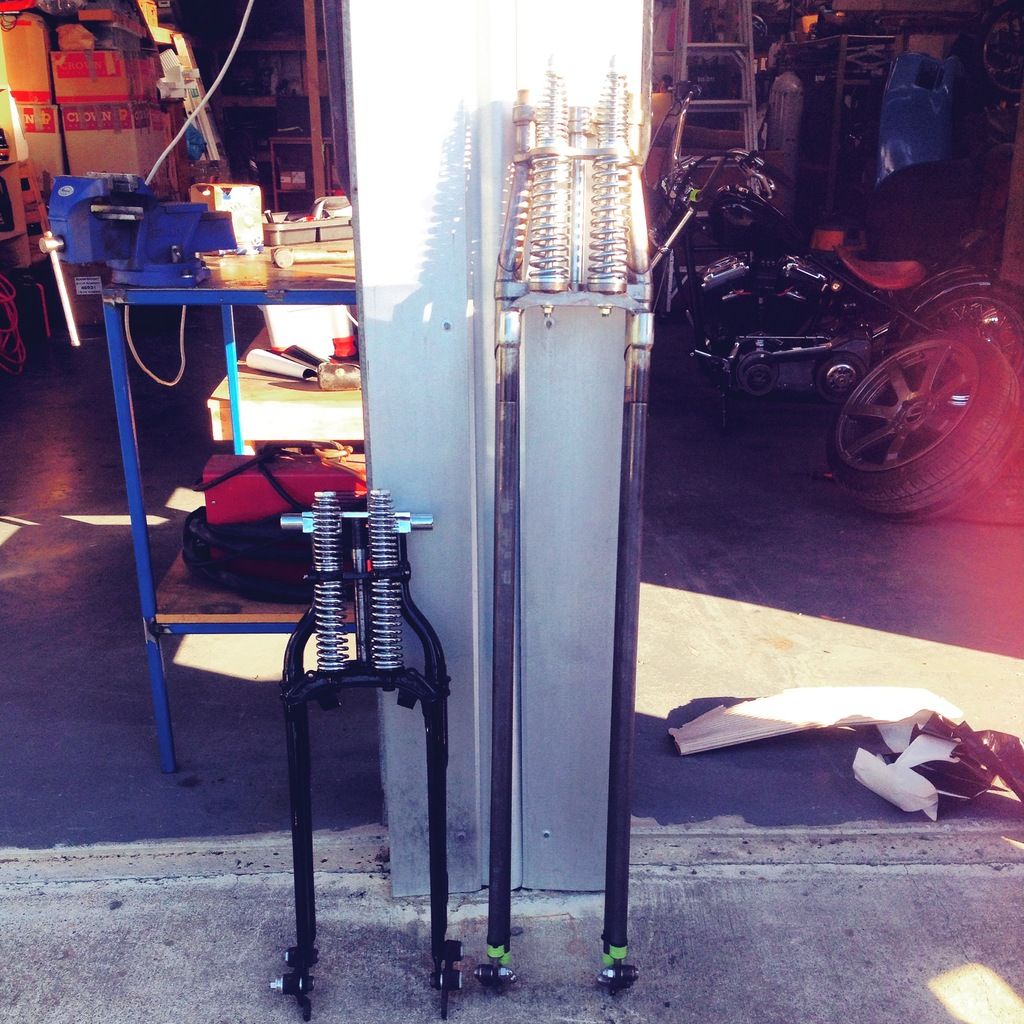
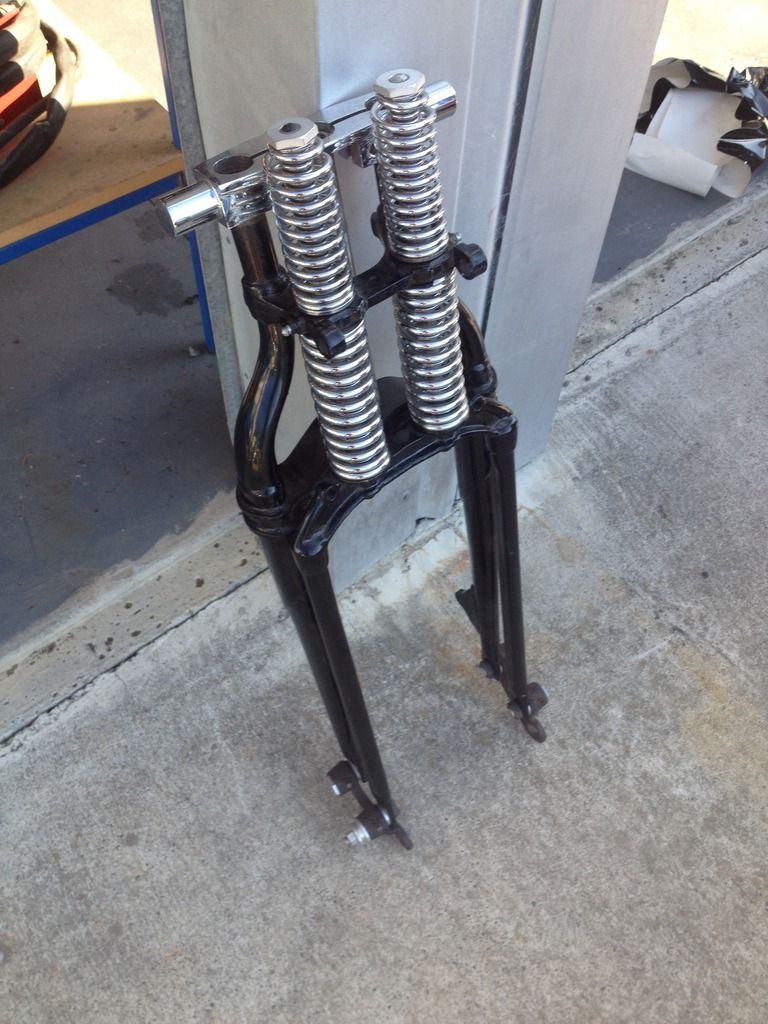
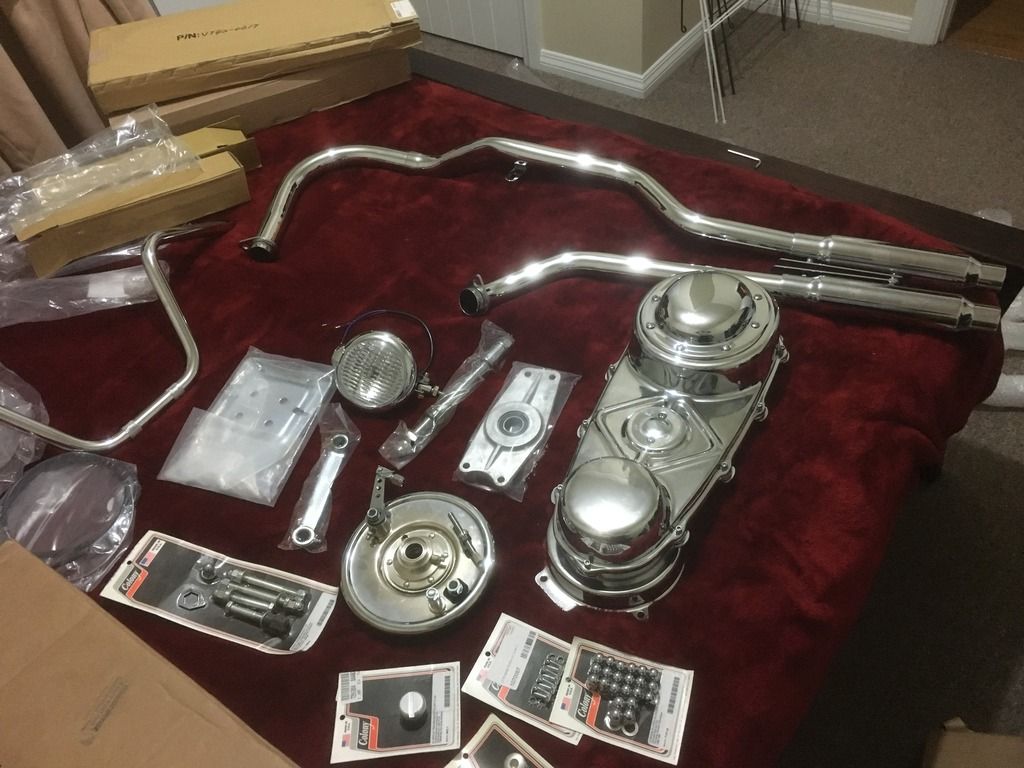
I’ve been collecting parts for a few years now. Some of them as below, HCI axle plates for the hardtail which we are building from scratch (Steves working on the jig right now, its a masterpiece), re-pop springer with Jammer top clamp (not using the long one, i built that for fun/another project, if you want the plans ask away!!), GME folded oil tank, 21” x 1.6” front wheel with Star hub (needs lacing) & drum brake, Wassell mid tunnel tank, NOS Avon Speedmaster 21” x 2.75”, Tin-primary setup etc, plus a heap of other bits as you can see.
I’ll be keeping a build thread going on here, I hope its interesting and fingers crossed I can put something cool together. This isn’t going to happen overnight, the bike will be at Steves and I now live in another city 4 hours drive away and don’t have a garage, I’ll be doing the 4 hour commute regularly to do this so bare with me. Luckily i work for a large engineering company so can potter with stuff here between weekends wrenching. I’ll do my best to capture all the cool small details of a project like this for you all.
Thanks for reading
So, I live in New Zealand and round here old Harleys are few and far between, so in 2014 I went looking to import a bike from the US. After a few months scouring Craigslist I found one I was pretty keen on, the money was right, I got it checked out and pulled the trigger. This is the pic of the bike on Craigslist,
 it had a few nice bits on it such as belt drive primary, early swingarm, juice drum brake, 21” front wheel, 3.5Gal tanks etc, rebuilt heads (apparently), I was pretty happy. I put it on a boat to NZ and after a 4 month wait it turned up.
All was good with the bike, it matched the pictures, was quite tidy, and ran. I had seen video of it run by the guy who picked the bike up and freighted it for me, but this was a relief to see it in person. The day I got it I changed the oil out, got it running, gave it a quick once over, and was off for a ride. Bear in mind this is the first time I’d ever ridden a HD….I was stoked and headed round to my mate Steves to show him. @Straightleg_steve on Instagram, he has a heap of cool old stuff and has been a mentor with the old HD big time for me. Cheers Steve for all your time and wisdom.

Here’s me arriving at Steves, this is about 30km from my house. Bike ran great on the ride over.
We hit the road, my shovel and Steves shovel. About 15 mins down the road i hear a faint tapping, just enough of a noise change to make me wonder, I pull over, we check It out, still running “fine”, but head back to check pushrod adjustment etc just in case. All checks out and we cant find anything obviously wrong, so back on the road. Noise goes away. So we make it about 30kms further from Steves to the pub, have a beer and then decide to head back. About 5kms back down the road the noise of a spanner being shaken in a tin can and a dead Shovelhead fills the air.
This is what we found. Dropped exhaust valve, lunched head. Bad times.


So we pulled the bike down immediately. At the end of the first day of Shovelhead ownership this is how my bike looked.

I rebuilt the motor, sent the whole thing to a specialist shop up North here in NZ. New bottom end to factory specs (it was well shot according to the builder), new S&S heads, a complete freshen up top to bottom. While it was apart i polished the rocker boxes and cam cover up too. I also did some research, motor should be an 80”, however, had 74” gear inside. We suspect the PO swapped out some good bits and slapped whatever he had laying around in for sale…lucky me. The motor was a real mismatch inside, different pushrods, wrong rotating assembly, valve retainers were different, not to mention the Timkens were knackered, apparently a rarity….yikes.


Got the bike running again after about a month, re-jetted the carb for the 74”, it ran mint, put new stainless bars on, got rid of some of the horrible bits on it, removed the dead electric start system and made some blanking plates up At this stage it looked like this..

Life was good again. 500km later and I go to start it and the kicker goes to shit. Right, gearbox overhaul time. Pulled it down and found this..


stripped kicker gears, worn bushing…big time. However, found some good, full Andrews gearset (like new) , Andrews mainshaft (stuffed), Jims countershaft. G-Box case is Custom chrome. It’s a bitsa. So, rebuilt that, machined the mainshaft spacer for an O-ring, new Andrews mainshaft and kicker gears, all new gaskets. Back in action.


Couple more miles down the road, wiring goes bad. I’ve learnt to always have tools on me riding this thing, had enough electrical tape to get me home. Partial re-wire was no major.

Right now this is how the bike looks. It was a bit of a “troublehead” for a while there.

Anyways, the bike now runs great and I love it, learnt a lot, but I’ve always had a plan and a purpose for this bike. This is the next part of the story and one that I’ll be keeping you up to date on. Chopper time.
I’ve been collecting parts for a few years now. Some of them as below, HCI axle plates for the hardtail which we are building from scratch (Steves working on the jig right now, its a masterpiece), re-pop springer with Jammer top clamp (not using the long one, i built that for fun/another project, if you want the plans ask away!!), GME folded oil tank, 21” x 1.6” front wheel with Star hub (needs lacing) & drum brake, Wassell mid tunnel tank, NOS Avon Speedmaster 21” x 2.75”, Tin-primary setup etc, plus a heap of other bits as you can see.


I’ll be keeping a build thread going on here, I hope its interesting and fingers crossed I can put something cool together. This isn’t going to happen overnight, the bike will be at Steves and I now live in another city 4 hours drive away and don’t have a garage, I’ll be doing the 4 hour commute regularly to do this so bare with me. Luckily i work for a large engineering company so can potter with stuff here between weekends wrenching. I’ll do my best to capture all the cool small details of a project like this for you all.
Thanks for reading


Comment