'95 Sportster build

Collapse

Desktop Ad Forum Top

Collapse

Mobile ad top forum

Collapse
X
 
  • Time
  • Show
Clear All
new posts
  • industrialmarshmallow
    Member
    • Aug 2017
    • 88

    '95 Sportster build

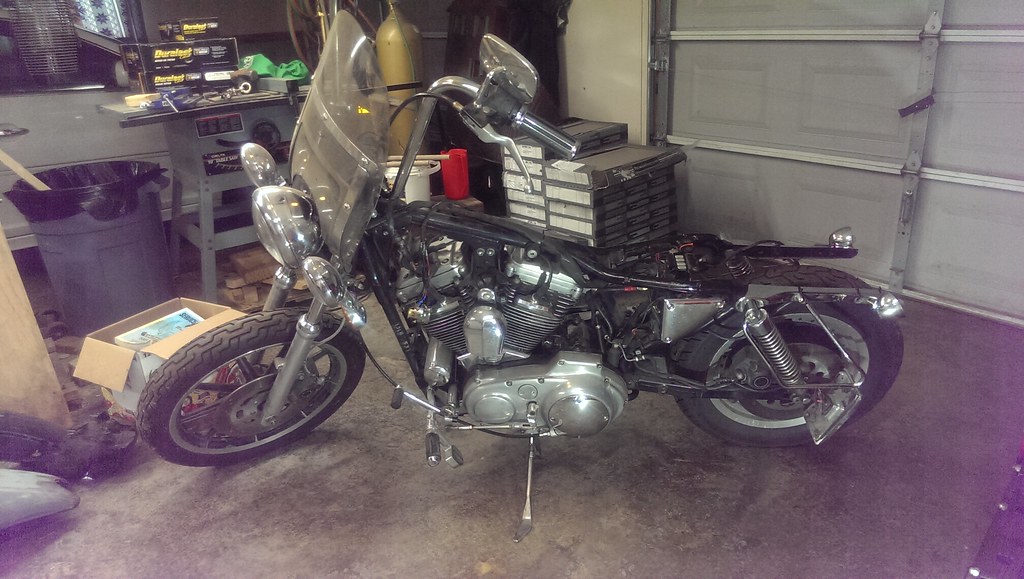
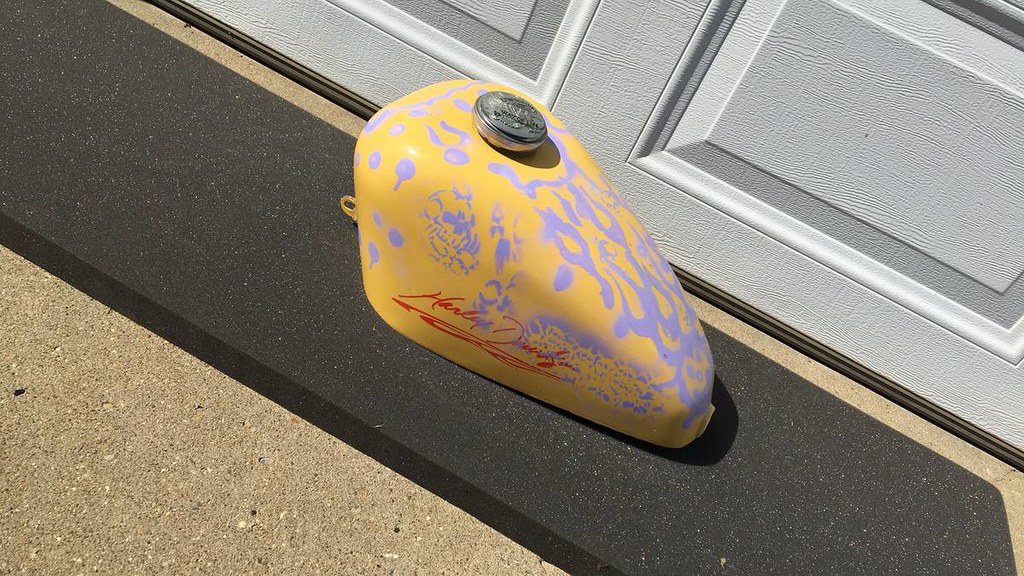
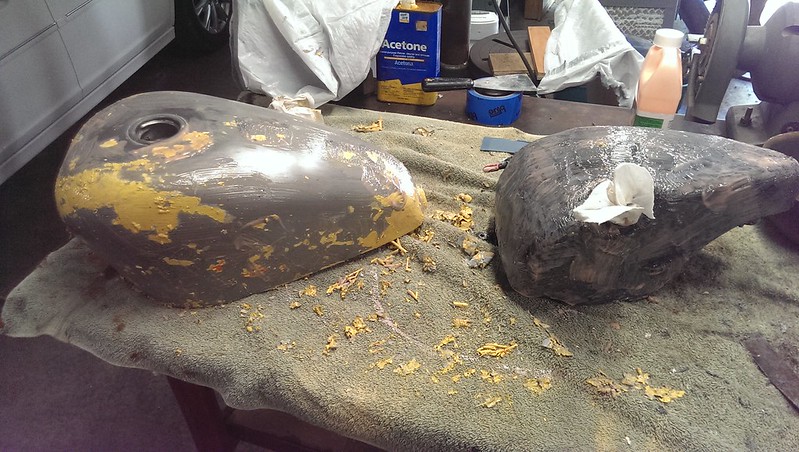
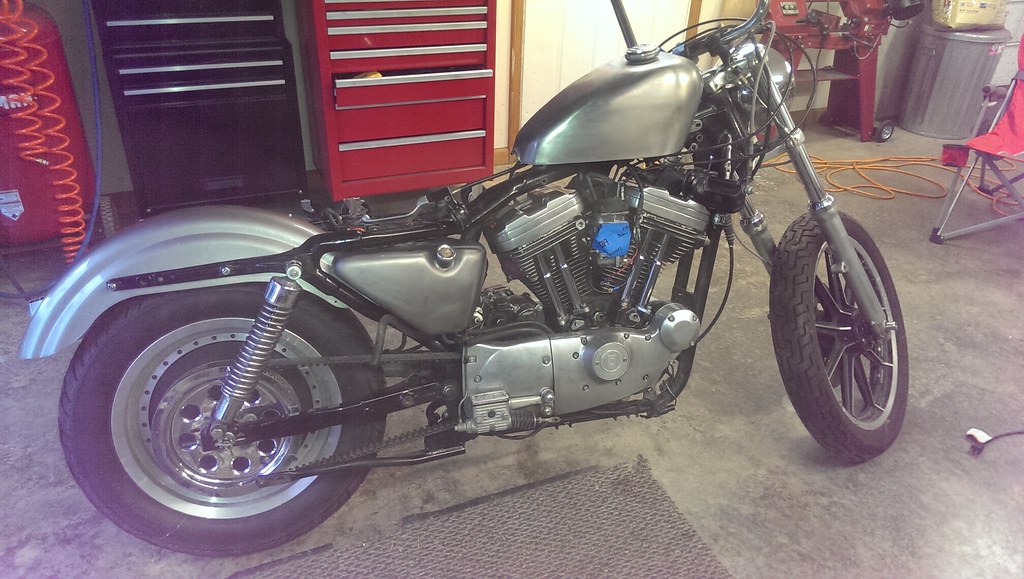
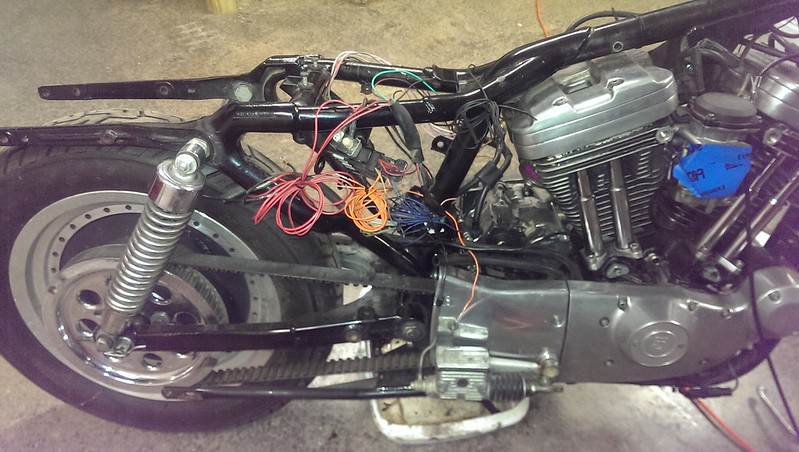
    I am the third owner, my PO bought it from the original owner (who was a friend of his) about 4.5-5 years ago. My PO took it apart about a year and a half ago after gas spilled on the tank and ruined the paint. He intended to repaint and add a wide tire kit, but one thing led to another and neither of those things happened.

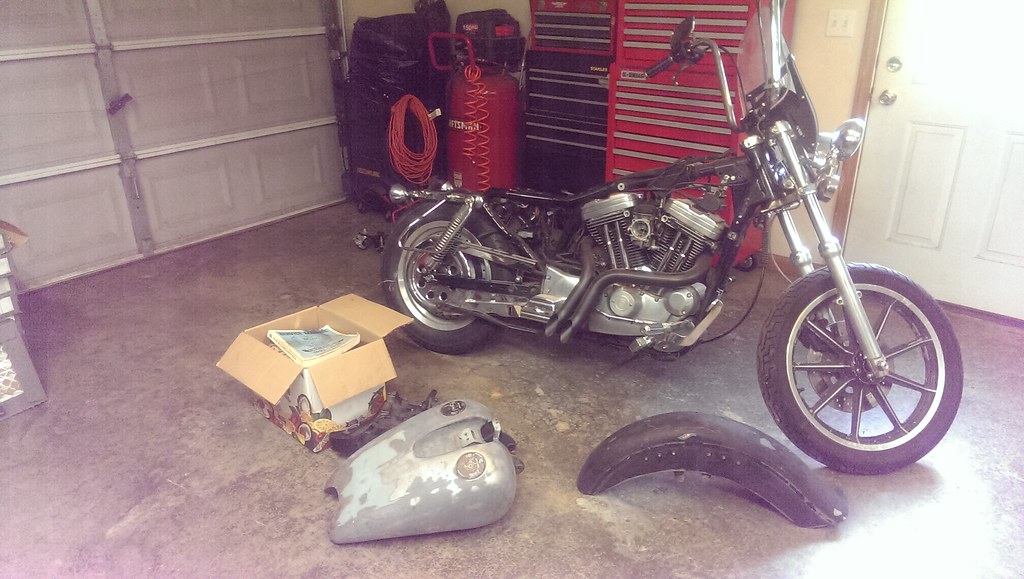
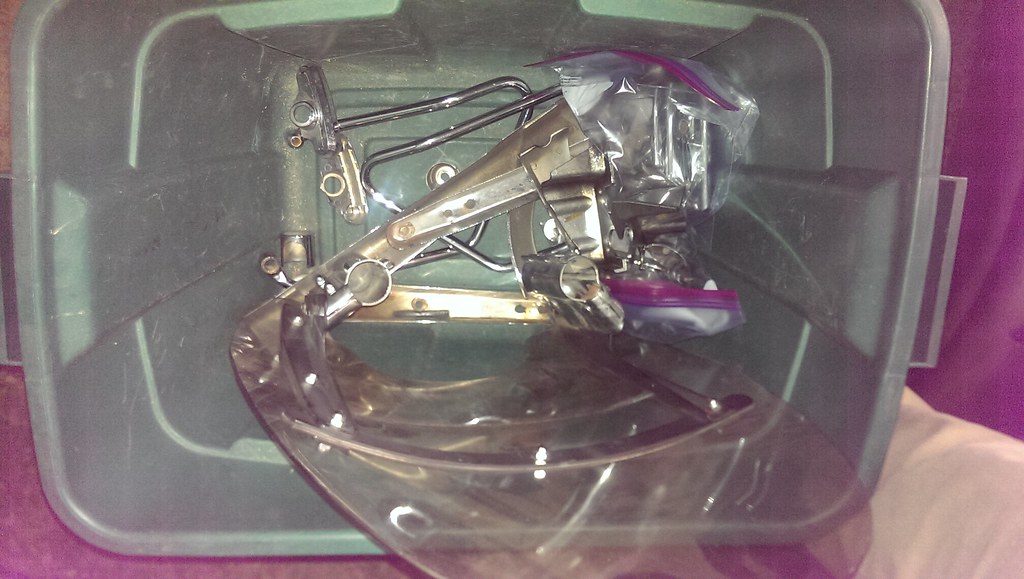
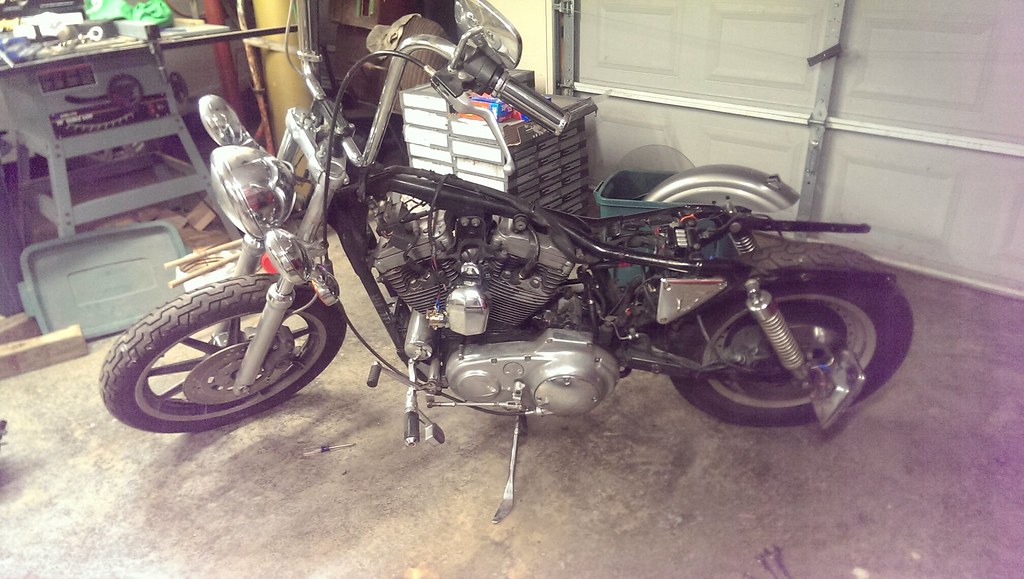
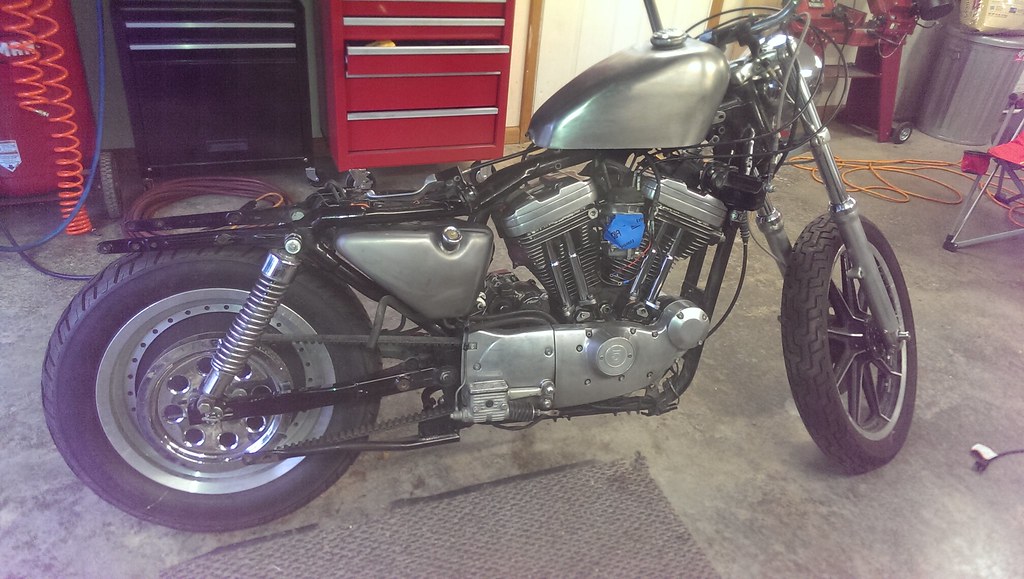
    The original owner was a big fan of chrome and accessories and I am not. I am a keep it clean and simple sort of guy so a lot of the first part of this project is going to be undoing much of what the two PO's did.

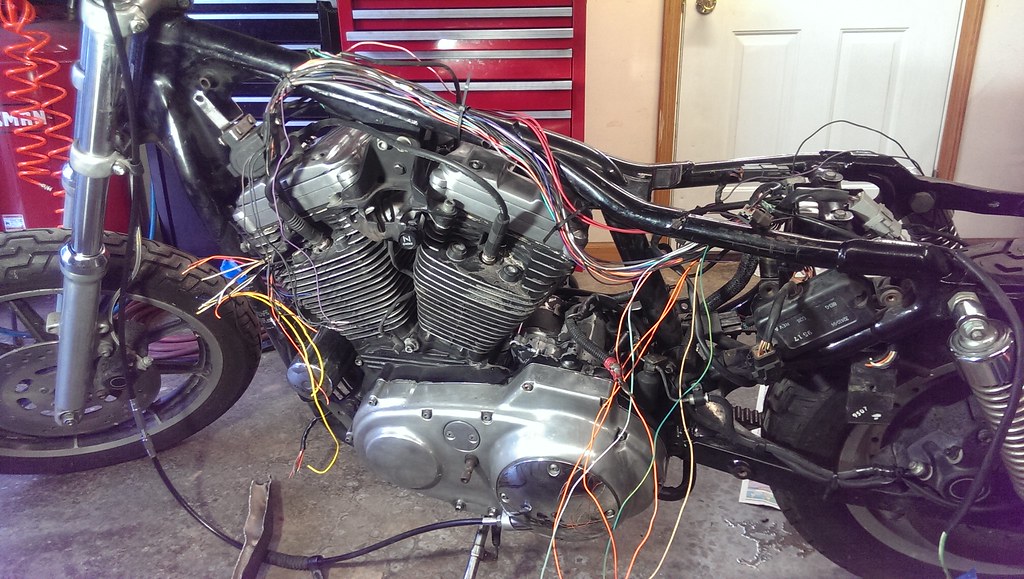
    The original owner did put in a 1200 kit with Andrews N2 cams,which is nice.

    If this looks familiar, I also have a thread running over at XL F. The first few posts here will be cut and pasted from that thread to get up to the present. Let me know if that's not cool and I'll cease and desist.
  • industrialmarshmallow
    Member
    • Aug 2017
    • 88

    #2
    I like pictures so ...

    The day I brought it home.

    [IMG]IMAG2016 by David Arens, on Flickr[/IMG]

    IMAG2010 by David Arens, on Flickr


    The PO threw in a Factory service manual and a Craftsman moto jack, both of which I appreciated very much. He sold the rear fender and seat back when he was planning on installing that wide tire kit so it came without. He also gave me an extra pair of lower progressive shocks, the fatbob tank that was on it, a "vintage" styled front fender and the original cams. Along with a cardboard box full of loose hardware and small parts.

    Comment

    • industrialmarshmallow
      Member
      • Aug 2017
      • 88

      #3
      My first task was to remove all the chrome covers that were on everything from the spark plugs to the lifter blocks. I also got rid of the windshield, the leather handlebar bag (which just about turned to dust when I touched it) and the saddle bag mounts. I removed the rear signals intending to go with a smaller, LED and non-chrome set, but I may just end up painting those and reusing them with LED innards.

      IMAG2026 by David Arens, on Flickr

      2017-07-28_12-42-26 by David Arens, on Flickr

      Comment

      • industrialmarshmallow
        Member
        • Aug 2017
        • 88

        #4
        I did pick up a like new rear fender and a stock Sporty tank off the local Craigslist. I think I did OK on the fender but I got too excited about buying parts and didn't realize until I got home that the petcock on the tank is on the wrong side and it sounds like it's full of sand. Not to mention it looks like it was painted as a kindergarten art project. Anyway, lesson learned, I can reroute the fuel line to use the right side petcock, seal it and paint it. Everytime I look at it while on the bike it'll remind me not to be an idiot. It'd do that even better if I left it looking like it does now, but that ain't gonna happen.

        00M0M_7omoR8R6ZNO_1200x900 by David Arens, on Flickr

        01212_lmvAw0CKK9T_1200x900 by David Arens, on Flickr

        Comment

        • industrialmarshmallow
          Member
          • Aug 2017
          • 88

          #5
          I'm not sure what I'm going to do with the speedo. The PO pretty much mangled the wiring adapting it to fit an aftermarket fatbob tank. I haven't studied the wiring diagram yet, but unless I need it for the bike to run, I might not put it back on. At least not right away.

          IMAG2061 by David Arens, on Flickr

          IMAG2058 by David Arens, on Flickr

          Comment

          • industrialmarshmallow
            Member
            • Aug 2017
            • 88

            #6
            I'm going to start this (re)build with fixing the wiring, It's been modified over the years to accommodate the gigantic headlight/auxiliary light bar and the apes. Since I'm leaning towards moto/tracker style bars and an LED light set I think I'm going to have to un-modify it and then modify it again.


            The silicone makes it all good.

            IMAG2068 by David Arens, on Flickr

            This is the + side of the horn feed. You can tell it was an amateur job because the nuts weren't taped.

            IMAG2069 by David Arens, on Flickr

            Comment

            • industrialmarshmallow
              Member
              • Aug 2017
              • 88

              #7
              Silicon, apparently they pumped a bunch of it into the bars as well. It took me 30min using a long pair of angled needle nose and a screwdriver to jam in there and pick enough of it out to where I could pull out the control wires. They were glued in there...

              I ended up making a copy of the main electrical diagram from the FSM that I keep handy. I just need a magnifying glass to read the color codes.

              I just ordered a set of TC Bros Tracker style bars, a set of Biltwell Thruster grips, a Biltwell throttle tube and a bunch of Deutsch connector stuff, crimper/male/female connectors and some sealing plugs.

              While I'm waiting for all that to come in, I started stripping the tin.
              IMAG2082 by David Arens, on Flickr

              Comment

              • industrialmarshmallow
                Member
                • Aug 2017
                • 88

                #8
                While waiting for the stripper to do it's thing, I started shopping for headlights. The bike came with a big 7in headlight and an auxiliary bar but I was pretty sure I wanted an LED. After shopping for LED lamp$ and housing$ I decided to stick the headlight back on without the aux bar. It's kind of big, but I think I like it. It looks a little vintage which will kind of go with the black tracker bars and the raw steel tinwork.

                IMAG2094 by David Arens, on Flickr

                IMAG2095 by David Arens, on Flickr

                I took off the forward controls and it visually lightened the bike up quite a bit. I like it, it looks narrow and lean. I need to find some stock foot controls. And lower engine mount hardware...

                After finishing up the gas and oil tanks I couldn't help setting them on the bike.

                IMAG2106 by David Arens, on Flickr

                I haven't stripped the fender yet but it's kind of a silver color. I'm planning on cutting it back to the end of the strut so I'll probably won't start stripping it until after that. I need to pick up the fender mounting hardware as well, the stuff it came with was extended to fit bag mounts.

                IMAG2107 by David Arens, on Flickr

                Comment

                • industrialmarshmallow
                  Member
                  • Aug 2017
                  • 88

                  #9
                  UPS brought two boxes of love today.
                  20170802_171817_1501709234680 by David Arens, on Flickr

                  20170802_172557_1501709171638 by David Arens, on Flickr

                  Got the TC Bros Tracker bars on and the controls mocked up. I added Biltwell's Whiskey throttle tube to replace the chrome (plastic?) and rubber one piece grip/tube that was on it.

                  I also got Biltwell Thruster grips, but after mocking it up, it looks like I might have to trim off the "flange" on the inside end of the grip. With the huge stock control pods and levers taking up a good chunk of real estate between the bar end and the first bend, the grip looks about 1/8 from bottoming out on the end of the bar with the switches pushed as far inboard as I can get them before the wires hit the end of the dimple.

                  I haven't cut anything yet, it was late when I was messing with it and I want to look at it with fresh eyes before I do anything permanent. I'll also need new cables and brake line since these bars are quite a bit shorter than the 15in apes that were on it.

                  I am pretty happy with the way it's shaping up.
                  IMAG2116 by David Arens, on Flickr

                  IMAG2114 by David Arens, on Flickr

                  Comment

                  • industrialmarshmallow
                    Member
                    • Aug 2017
                    • 88

                    #10
                    Long boring update ahead...

                    I haven't had a whole lot of time to work on the bike this past week. My parents were visiting over the weekend and I'm tearing up the kitchen floor in preparation for the tile guy this weekend.

                    That said, I have been researching electrical stuff and getting a plan together for what I want to do. So far,

                    Headlight: I'm reusing the headlight, it currently is a 7in housing with a HID lamp and reflector. I might use an LED lamp, but if the current lamp works I might just save my dough for a future LED headlight upgrade. I did have to pick up a new H4 pigtail. The stock Harley one had been spliced to death already.

                    Indicators: probably reusing the rear indicators although I might use LED replacement lamps and I want to figure out how to paint over the chrome. I need front indicators. Looking at something small and probably LED. I'm very interested in the Motogadget m-Blaze Pin: https://revivalcycles.com/collection...n-turn-signals due to the size. I like those for the back as well, but again, since I already have a usable set for the back I'm going to save that for a future upgrade.

                    Taillight- looking at an led strip https://revivalcycles.com/collection...-led-taillight which can also function as turn signals.

                    Speedometer: I have it, but the wiring was butchered when the PO installed it in the fatbob tank. They also got rid of the mount and dashpanel with the lights and everything so I'd have to replace all that. I'm pretty sure I'm not going reinstall it. I'll just remove the associated wiring so there are no hot wires floating around.

                    Ign switch: it was one of the type that is integrated on the fatbob tank so I'll need a new one. It doesn't have to be anything special.

                    Battery: looking at an Anti Gravity 12cell. Seen more good than bad on it so far. Unless I see something that changes my mind, it seems worth the investment.

                    I'm going to need some wire to repair sections that have bad spots or to replace circuits entirely if I need to. I'd like to source stock colors to keep the diagram accurate. If possible I'd rather replace the whole wire than add another splice. I did get a Deutsch crimper (no, not the $$$ one) and a bunch of pins and sealing plugs. I'm going to have to get a 12 port connector to replace a missing stock one where the hand controls connect to the rest of the harness. I can reuse the one from the speedo/dash circuit for the other side. The stock ones are missing from when the wires were extended by the PO to install the apes.

                    While I was researching all this I came across the Motogadget "M" series stuff. I was pretty impressed with that whole system, but I think it'll be a future upgrade. I want to get this bike back on the road and that control system would eat a lot of money I could spend on necessary stuff. But one day...

                    The only "actual" work I've been able to accomplish is cleaning up the wiring (literally, with degreaser and a small piece of scotch brite) because it was a mess to work with due to the silicone caulk and electrical tape residue everywhere.

                    I also started punching holes in the bars so I could run the wire internally. Initially, I wasn't going to, but damn, once I mocked them up, those huge stock controls along with the wiring and cables... there was just too much going on for my taste.

                    IMAG2124 by David Arens, on Flickr


                    IMAG2128 by David Arens, on Flickr

                    Comment

                    • industrialmarshmallow
                      Member
                      • Aug 2017
                      • 88

                      #11
                      After I drilled the 3/8" holes I deburred. First with a carbide bit in a die grinder which also opened the hole up a little more. Then I moved to a series of three round files, starting with the coarsest. Finally, a piece of rolled up 320 grit sandpaper. I tested by running a piece of scrap wire through and pulling it back and forth through the holes at various angles.

                      I had intended the largest hole in the center to be 3 slightly overlapping 1/2" holes for a total space of about 1 3/8" x 1/2" or so. Once I cut the first two holes it looked like it was going to be a lot bigger than I needed if I drilled the third hole so I stopped. The unfortunate result is that the hole is a little off center. Luckily, I'm not OCD and can deal with it.

                      IMAG2134 by David Arens, on Flickr

                      IMAG2139 by David Arens, on Flickr

                      For some reason this primer (Rustoleum gray Auto primer in a rattlecan) dried all crackled up. I hit it again and sanded it smooth before final painting with Rustoleum gloss black auto enamel.

                      IMAG2138 by David Arens, on Flickr

                      Comment

                      • industrialmarshmallow
                        Member
                        • Aug 2017
                        • 88

                        #12
                        After I was finished messing with the bars, I started messing with the wiring. The deeper I got, the deeper I went. This is where I ended up...

                        IMAG2145 by David Arens, on Flickr


                        Obviously, It's time to make some decisions. To me, if an engine is the heart of a bike, wiring is the nervous system. It doesn't make sense to slap everything back together knowing what I know about the wiring modified by the PO's. It wasn't dangerous, all (most of) the splices were with crimp and heat shrink style connectors and as far as I know it all worked, but while it was functional it wasn't neatly done or well thought out.

                        I'm looking at a whole harness kit from Ultima and the M-unit stuff from Motogadget. I really like the quality and simplicity of the motogadget stuff, but cost will set the build back some. I didn't like the connections on the Ultima, but I did like the price. I could also just rewire everything the way it came from the factory.

                        Decisions, decisions...

                        Comment

                        • industrialmarshmallow
                          Member
                          • Aug 2017
                          • 88

                          #13
                          Just to throw this in here, an unexpected result of running the wiring through the bars was that it allowed me to fit the controls where I didn't have to cut the grips. Not exactly the end of the world either way, but it was a plus.

                          Now that I'm current with these posts (typing this 8/21) I guess I should talk a little about what I want to end up with at the end of this. I'm not really going for any particular look or style, but just following a theme of simplicity and kind of a vintage aesthetic. Basically, if it doesn't need to be on the bike, then take it off. If it does need to be on there, simplify it, cut it down, make it smaller. These are kind of guidelines, not iron clad rules. (one exception to the "guidelines" I can already think of is rubber fork boots. I've just always dug the look and I'm gonna stick a set on there.) I think it'll probably end up looking something like a hooligan/tracker in the end. I'm not planning on paint, just keeping it dull raw steel with a clearcoat. Some accessories will be black, but not going for a murdered out look either.

                          Before all that though, I want to get it back on the road. I don't have a big budget for this. I'm not cheap, just poor. I got a family and bills I don't mind spending good money on parts if I think it's worth it, but it takes a while to save up enough for the next batch of parts. So far, I've been able to finance a good chunk of this from the sale of all the parts that I've taken off the bike. Forward controls, fatbob tank, aux light set, hyperflow air cleaner, LAF pipes as well as selling non bike stuff I have laying around the place and no joke, eating ramen noodles and baloney sandwiches for lunch instead of hitting the $9 Korean buffet multiple times a week.

                          Now that I've said all that, all the wiring stuff started coming in.
                          IMAG2165 by David Arens, on Flickr


                          And I picked up a couple things at a swap meet last weekend.
                          IMAG2164 by David Arens, on Flickr

                          I probably paid too much for the air cleaner ($45 I think) but the brake pedal was $3 so I'm calling it even.

                          Next thing is lay out a harness and fab a mount for the m-unit.

                          Comment

                          • industrialmarshmallow
                            Member
                            • Aug 2017
                            • 88

                            #14
                            I’m no expert when it comes to 12v systems but after years of being poor and having to work on my own POS vehicles, mowers, tractors etc.. I have a very basic understanding of it and can generally stumble through troubleshooting and repairs. I’m wiring my stock controls into an M-unit Blue and it’s a whole new thought process compared to traditional wiring.
                            In a traditional setup, the way I understand it, the handlebar switches have 12v power coming in one side and going out the other to it’s destination. Since the M-unit is really just a digital switch, there is no power coming from the control switches. You’ve got to set the switches up so one side goes to ground and the other side goes to the “input” on the M-unit for whatever circuit it is.
                            I’ll use the horn circuit as an example. With the M-unit, when you hit the horn button, it no longer sends 12v to the horn, it just connects the m-unit horn input to ground. The m-unit sees this and sends 12v to the horn through the horn Output. The horn itself has to be grounded. The way I have been working it is to take what WAS the 12v supply in stock form (On my ’95 Sporty it’s the orange and white wire) and connect it to ground instead. This grounds one side of the switch. Then, take the yellow and black wire coming from the horn button that originally went to the horn “+” and run it to the “horn” input on the m-unit.
                            Again, this is my kindergarden level understanding of how it works so take all this for what it’s worth. I’ve watched Revival cycle’s videos numerous times, I’ve watched the few other you tube vids out there that deal with the m-unit, I’ve studied my stock wiring diagram for hours, I’ve printed the M-unit instruction book on normal sized paper and tacked the schematics up on a corkboard for constant reference. I’ve taken apart my switches to see how they connect to everything and I’ve basically deconstructed my entire wiring harness with my factory diagram in hand to get a better understanding of what components look like, what goes where and what connects to what. I’ve set up a test station on my workbench where I hook the m-unit up to 12v, connect my switches and the horn and turn signals or whatever I’m working on and test out the circuits with a 12v test light and/or a multimeter to see what works and what doesn’t. I’ve got a ways to go with this, but I’m taking it circuit by circuit and making progress.
                            My advice… if you decide you want to install an M-unit, but want to do it the easy way, keep savin up until you can buy their switches too. And maybe one of those M-button devices. If you use the Motogadget switches, they plug right in to the m-unit inputs. Wire the outputs to whatever and you’re pretty much good to go. The M-button thing takes all the handlebar controls and feeds them into ONE wire that goes back to the M-unit input. I wouldn’t mind doing that eventually, but right now I need to spend the $$ on other stuff just to get on the road. And I value the knowledge I’ve gained by tearing everything apart and (hopefully) putting it all back together..
                            In other news, made a deal for a set of mid controls last week. They should show up Wednesday. I went in the hole to pay for those but made enough to cover it yesterday by selling a front fender, a H-D 40 spoke 19in wheel, LED tombstone tail light, set of 16in apes and a set of chrome and black rubber grips. So I’m back at zero balance in the bike acct. Gonna have to look around the house and sell some other stuff…

                            IMAG2174 by David Arens, on Flickr

                            IMAG2177 by David Arens, on Flickr

                            IMAG2175 by David Arens, on Flickr

                            Comment

                            • industrialmarshmallow
                              Member
                              • Aug 2017
                              • 88

                              #15
                              Well it was inevitable, really. The more I messed around with the wiring harness the smaller it got until tonight I just removed the whole thing. Some of it will be going back on, some of it won't. I'm going to try to stick to stock wire colors on the circuits as much as possible, just for ease of diagnostics in the future although it won't have much in common with the stock harness by the time I finish it.

                              It's a shame I have to put wire back on it at all, it looks so clean without it!
                              IMAG2184 by David Arens, on Flickr

                              Everything labeled and coiled in the bucket.
                              IMAG2186 by David Arens, on Flickr

                              Probably a good thing I'm going over everything, I found a couple like this one. It's the wire from the starter to the main circuit breaker.
                              IMAG2185 by David Arens, on Flickr

                              Comment

                              300 mobile ad bottom forum

                              Collapse
                              Working...
                              ;