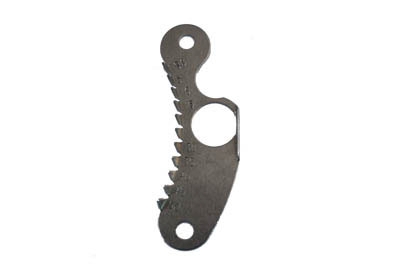
Shovelhead Points Timing

Collapse

Desktop Ad Forum Top

Collapse

Mobile ad top forum

Collapse
X
 
  • Time
  • Show
Clear All
new posts
  • Watson
    Junior Member
    • Mar 2011
    • 19

    Shovelhead Points Timing

    Lets start this off by saying I don't need any witty comments about how I should "start by throwing the points in the garbage" shenanigans. I had an electronic ignition and got rid of the thing because it wasn't working. Ignition is gone so there isn't any sense in having that conversation.

    So the bike is a kick only 71 FL with new points/coil/plugs and a complete new Shorty Super E carb setup from the o-rings to the air cleaner. I have the carb fairly dialed, it idles nicely. My plugs tend to come out a little on the blacker side of things. But I feel as I'm likely getting a little oil in through my valves. Its not a lot, just a little blue'ish smoke when I fire it up. I'm not smoking out people riding behind me or anything. And I usually have a little oil around the threads at the washer on my plugs when I pull them. Compression test last fall was 100 & 110 psi. Dumped a teaspoon of oil into the cylinders and it didn't make a difference so I'm assuming my rings are alright. That about sums up where I'm at.

    So the timing...I have had several people tell me variations on how I should time this thing. I have timed it so that the line was dead center and when I manually advance the cam it is just about to open the points (from the right side). I have had a guy put the line on the right side of the timing hole (1/4'ish) and manually advance the cam to where it juuust opens the points (from the right side). Right now I'm somewhere between the two previous attempts.

    So finally to get to the point, my wife always says I take the scenic route. With any and all of the above, the bike is a bit of a prick to start. Enricher on, two prime kicks, ignition on and I almost always get a bit of a rumble but very rarely does it fire. I commence to kick a few times and then turn the ignition off, drop the enricher, hold it wide open and kick through 3 times to clear it out. Then I start the sequence over. Usually I end up just kicking over and over and then it will just grab and fire randomly. Usually totaling 8-12 kicks total before it fires. But once it's warm, it will fire first kick every time. And it runs down the road pretty well. I tend to get a few misses while holding the throttle trying to warm it up. I don't run the enricher to warm it up because I don't wanna foul my plugs. And I get a miss once it a while running down the road. But very few and far between. Any suggestions? Different timing techniques, starting sequences, etc? I'm open to hear what has worked for you.
  • FooDog
    Senior Member
    • Feb 2014
    • 427

    #2
    Whats your gap set at?

    Comment

    • Watson
      Junior Member
      • Mar 2011
      • 19

      #3
      .020" off the tall(front cylinder) lobe.

      Comment

      • FooDog
        Senior Member
        • Feb 2014
        • 427

        #4
        I have my points at .018 (recommended by Shovelhead.us) bike starts pretty easily. Maybe it's just that simple.

        Also they suggest trying to have the gaps within .004 on both lobes.

        Comment

        • Langmire
          Member
          • Dec 2014
          • 42

          #5
          Try timing it with your advance line in the center again or just past center to the front side of the hole. I had a similar scenario with my bike and that's how I timed it. Advance mark (line) just to the center or left of center (forward), manually advance cam, rotate plate until points just open. tighten that fucker down. I also set my gap to 0.018 and make sure its as close as possible to that on both the skinny and the fat lobe. I'll fine tune the carb again just so I know its good. From what I've read and experienced having the timing slightly on the retard side makes for easier kicking. My start "ritual" is pretty much the same as yours, Gas on, enrich on, couple prime kicks, shot of gas if I feel like it, ignition on, kick and she fires right up. Usually 1st kick, maybe two or three after a three week work shift and its been sitting. Might as well check your pushrod adjustment while your at it too. Good luck

          Comment

          • farmall
            Senior Member
            • Apr 2013
            • 9983

            #6
            I don't run the enricher to warm it up because I don't wanna foul my plugs.
            You can run adjustable enrichers and not foul plugs. Been doing that for many years on Bs and Es.

            Comment

            • JustJ
              Member
              • Aug 2009
              • 39

              #7
              points have worked best for me. I have a 73 kick only shovel. invest in an accu timer, it really helps with setting up

              Comment

              • JustJ
                Member
                • Aug 2009
                • 39

                #8
                gap also needs to be set at .018 on both lobes within .004

                Comment

                • Dragstews
                  Senior Member
                  • Sep 2010
                  • 13739

                  #9
                  You would not believe how easy that job would be using this tool...


                  PLEASE FOLLOW THESE SIMPLE INSTRUCTIONS FOR THE CORRECT TIMING OF YOUR MOTORCYCLE.
                  Installation instructions:

                  Setting of the points:

                  1. Remove the spark plugs to allow your motor, to turn over easily.
                  2. Remove the circuit breaker inspection cover.
                  3. Turn over your engine In the direction of running by using your kick start pedal. For electric start bikes, put the bike in
                  4th gear and nudge it forward. you are looking for the wide high point of the point cam to open the points fully.
                  4. Now you must set the Gap of the points at .018 using feeler gauge. This is accomplished by loosening the
                  lock screw and then sticking a screwdriver Into the adjusting notch and then moving the contact point
                  plate in the direction required. Now tighten screw and recheck the gap.
                  5. Next turn the engine over until the narrow lobe of the point cam opens the points fully. Now check your gap with feeler
                  gauges. If this gap is also .018 you're perfect. If the gap is not .018 you must follow these additional steps to insure
                  accuracy.
                  6. After you have take the second reading and you have determined you have your wide lobe at .018 and for example your
                  narrow lobe is at .026, you must even out these gaps.
                  7. Now take a drift and a small hammer and strike the head of the bolt securing the point cam in the direction toward the
                  point cam lobe with the smallest reading until you have split the difference. Ex .. 018 + .026 = , 044 divided by 2 = .022.
                  8. When the readings are the same on both point cam lobes you start again to set the wide lobe at .018. If these two point
                  readings are not the same or within .002, it is impossible to get accurate timing in both cylinders. You must get them
                  within .002.


                  Timing the Engine:

                  1. Remove the screw plug from the timing hole on the left side of crankcase.
                  2. Remove the front intake push rod cover so that the opening and the closing of the valve may be observed.
                  3. Now turn your engine over very slowly until the front intake push rod goes up and then down again. Now go to your
                  timing inspection hole and begin turning your engine over very slowly again, less than 1/2 of a revolution until the
                  timing mark is aligned in the hole as shown in the illustration.
                  4. Now at this point the narrow cam lobe is supposed to be at approximately the point where the contact points
                  begin breaking open.
                  5. Now install your ACU-TIMER on the cam lobe from the condenser side and turn your ACU-TIMER using light finger
                  pressure in a counter-clockwise direction until it stops. Hold it in this position and secure it with the locking screw. This
                  now locks your automatic advance unit into the correct position. If the point cam lobe does not move with a spring
                  action, this means it is worn out and must be replaced.
                  6. Now loosen the point backing plate screws and turn the point backing plate counter-clockwise all the way into full
                  retard position by placing a screwdriver in the adjusting notch and prying the point backing plate.
                  7. Next and last place a circuit tester light across the points and turn on the ignition switch, rotate the backing plate
                  clockwise until the light just begins to come on. If a circuit test light is not available turn on ignition switch and rotate.

                  This is only the static method .... A more accurate way is dynamic timing...

                  This also can be made easy to do without an eye full of motor oil....


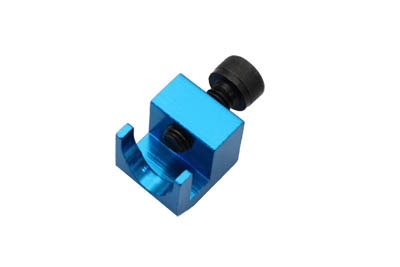
                  Requires this gizmo ...

                  This E-Z timer tool bolts inside the primary cover. After installation, only inspection oval of outer primary has to be removed for accurate timing.

                  Now if your one of those lucky few that can sense what the motor needs are, there is what's called "Power Tuning" ...

                  This is peaking the timing for the best results for the state of build of your motor .... You must have the feel to do this type of tuning, Not recommended for the novice's..!!!!


                  ................. Luke ..................
                  .........................................
                  Last edited by Dragstews; 07-09-2015, 6:09 AM.
                  Take my 45 and outrun em all ..

                  Comment

                  • Watson
                    Junior Member
                    • Mar 2011
                    • 19

                    #10
                    Thanks guys, I'm thinking my problem may be the stroke I've been setting the timing too. I'm basically following the exact instructions you laid out, except I'm removing the condensor and manually advancing the cam with my fingers. But, I had been pulling the plugs, putting my thumb on the front plug hole and turning over the motor until I juuust start to feel pressure and then stopping. Then I would slowing rotate the motor until I got the advance timing line. When I do this, even if I turn the plate completely counterclockwise AND manually advance the cam, I can't get the points to close (with the tall lobe on the left side side). Right now it had been set so when I manually advance the cam it just opens the points from the left edge of the tall lobe, which is clearly wrong. I will try tonight by watching the pushrods and see if it makes a difference, though I'm not too confident it will.

                    Another way I have learned to advance the timing weights is to drill a 3/8" hole in the plate at about 7 o'clock. That way you can stick a little flathead in and push the weights out to full advance. I'm going to try that technique since I would have to order the tool you talked about Dragstews.

                    Comment

                    • Dragstews
                      Senior Member
                      • Sep 2010
                      • 13739

                      #11
                      Originally posted by Watson

                      Thanks guys, I would have to order the tool you talked about Dragstews.

                      I would sale you the one I have for a $20 bill and shipping ....
                      If you see the need, the offer is solid...
                      Take my 45 and outrun em all ..

                      Comment

                      • Watson
                        Junior Member
                        • Mar 2011
                        • 19

                        #12
                        Thanks Dragstews. Just more a timing thing. I will try my idea tonight and if it doesn't work out, I will let you know.

                        Comment

                        300 mobile ad bottom forum

                        Collapse
                        Working...
                        ;