JDH Greasy Dozen Builder

Collapse

Desktop Ad Forum Top

Collapse

Mobile ad top forum

Collapse
X
 
  • Time
  • Show
Clear All
new posts
  • JimmyBK
    Senior Member
    • Apr 2012
    • 266

    JDH Greasy Dozen Builder

    First let me start by thanking Bear and the sponsors, and I am excited to be apart of the dozen this year.

    I will be posting regular build updates here, on my blog, and on instagram(@jimmydeanhorn).

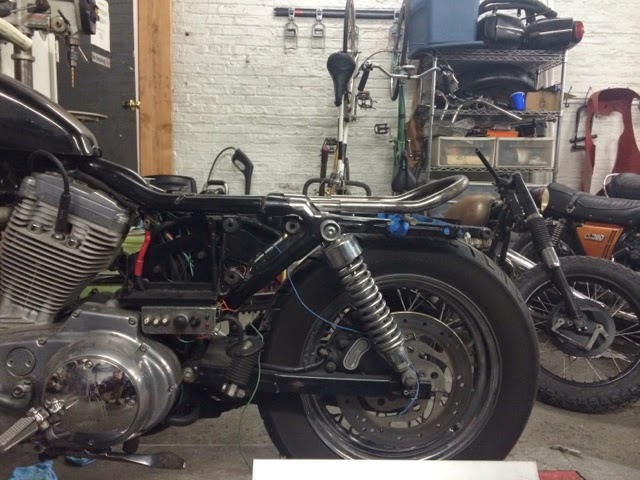
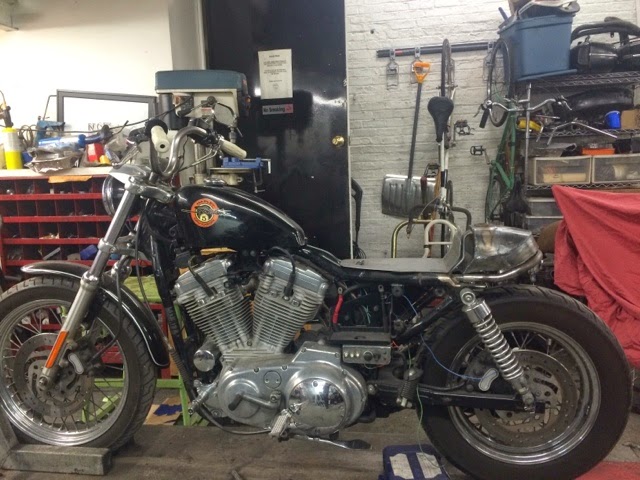
    I have a mostly stock 01 883 sportster that i will be building in to a classically inspired racer, that is completely street legal (last year new york was just looking for reason to impound bikes, i'd like to avoid the impound)

    Currently the bike is still all together in running condition waiting for me to take it apart, i rode it and my 76 triumph most of summer, but ended up picking up a 77 FX, since then the sportster has been dormant. I kept it around because I was trying to work out a build for it, i finally decided that I would build this bike for my cousin who is in the Air Force, he wants a bike but doesn't have time to build one.

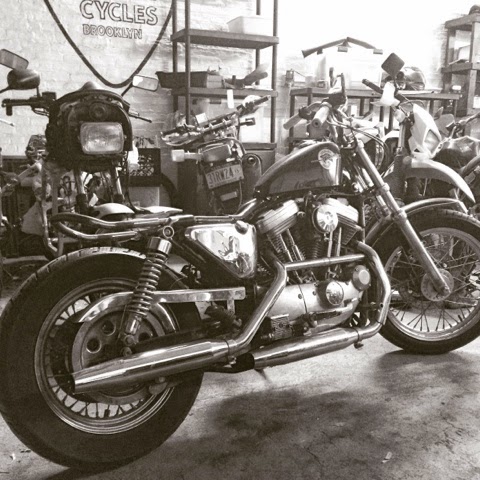
    This will be my second full build, my first was 79xlch Ironhead that i built last year.
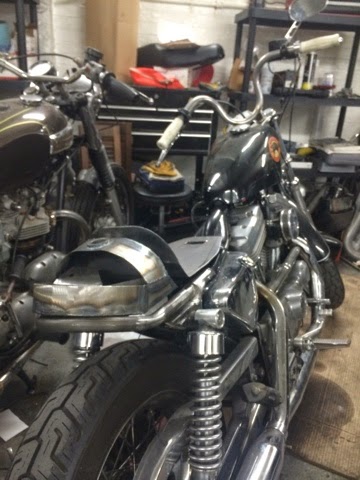
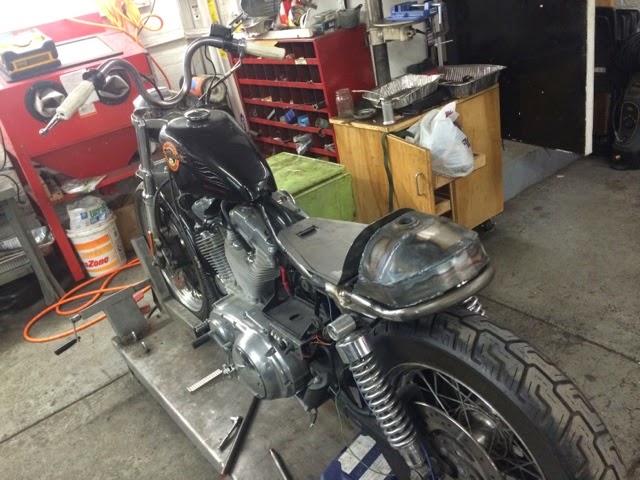
    bike as it stands
    Click image for larger version

Name:	unnamed-7.jpg
Views:	1
Size:	87.1 KB
ID:	1337462
    Click image for larger version

Name:	unnamed-6.jpg
Views:	1
Size:	83.6 KB
ID:	1337463

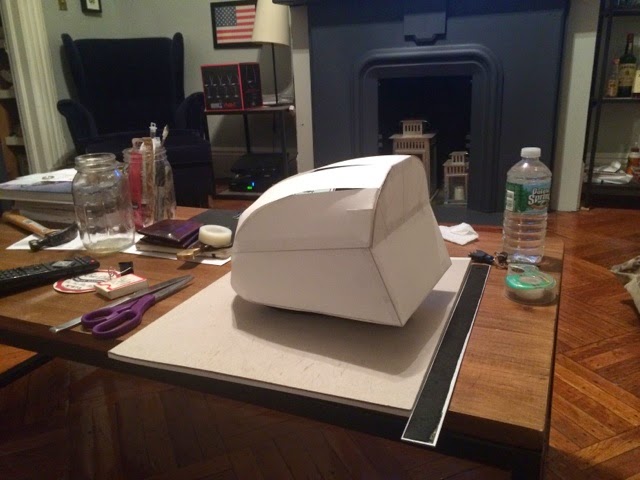
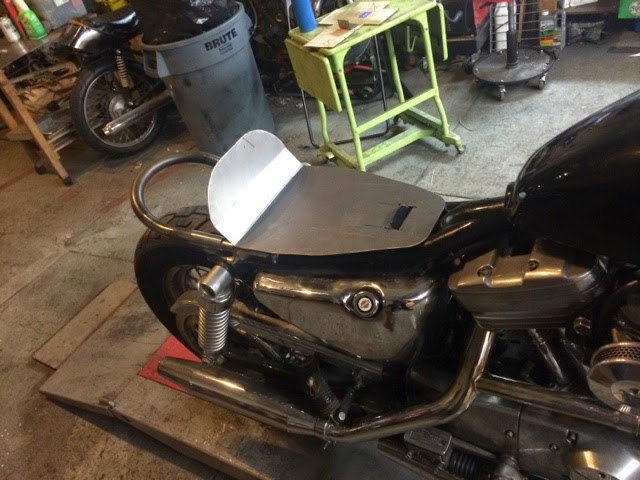
    sketch for some direction
    Click image for larger version

Name:	unnamed-8.jpg
Views:	1
Size:	52.4 KB
ID:	1337461

    79xlch
    Click image for larger version

Name:	Ironhead_front_view.jpg
Views:	3
Size:	128.9 KB
ID:	1337464
  • JimmyBK
    Senior Member
    • Apr 2012
    • 266

    #2
    I spend saturday brushing up on my tig welding attaching everypiece of scrap metal i could find together. And today i started the addition of the rear frame loop to the speed racer.

    I picked up a rear frame loop section from dime city cycles, it would have cost more to buy the proper equipment to bend it up myself. Then i grabbed some steel rod that would slide right in the frame loop and could make a nice slug out of it. Chopped it to lenght and cleaned it off.


    Then i had to figure out where i wanted the loop to attach, which was unfortunatally not exactly how i sketched it out. So it goes. There is a bit of an akward space between the bottom of the loop and the shock mount. I think ill probably round it out and try to mimimize it as much as i can visually.

    To make sure everything lined up just right i left the slugs in the frame loop and supported the loop at the height i wanted. Then i cut and shaped the slugs to match the frame.


    Then tacked the slugs to the frame. After that i moved on to completing the welds.

    After everything was welded up i moved on to removing the stock fender struts.


    Now im sleeping on how to make the frameloop fit seamlessly with the stock mounts.

    After i settle on how to do that, ill weld the frame loop to the slugs. And start on the seat pan, oil bag/cowl, and electric box.

    Attached Files
    Last edited by JimmyBK; 03-04-2015, 9:53 AM. Reason: swapped out the tiny photos for larger ones

    Comment

    • JimmyBK
      Senior Member
      • Apr 2012
      • 266

      #3
      So last night i had a few beers over razorblades and bristol paper.
      I mocked up an oil tank cowl. hopefully tonight ill see how accurate my measurements were, and if this shape will actually work on the sporty.


      Comment

      • JimmyBK
        Senior Member
        • Apr 2012
        • 266

        #4
        I cut out a seat pan today, and reworked the paper model of the oil tank(forgot to photograph).


        The pan still needs a bit more work. But it's pretty much there

        Comment

        • JimmyBK
          Senior Member
          • Apr 2012
          • 266

          #5


          Cut out a seat pan and a base for the oil tank/cowl section.

          You'll notice the gap between the seat pan and the face of the oil tank, thats to avoid as much as possible heating up the rear seat, I will also run some hard lines in the gap.


          just showing off some welds, before this build, i hadn't touched a TIG welder in over 8years. Last year i briefly used a Harbor Freight gas-less mig welder, those were some nasty welds.


          building up some walls, and I'm starting to see the shape that the oil tank wants to take.


          I put in a 'mouse trap' (not sure if thats the actual name but its what I've been calling it) that will hopefully help the oil slow its sloshing around and not allow the motor to starve.


          I scavenged the filler cap off a failed oil tank from my previous build.
          I will also need to cut out this stock frame support so the tank can sit properly. I will put a new support in an inch or so back that will clear the oil lines, and then remove the original one.


          Here is a rough look at it.


          The seat pan still needs some rubber feet, and a proper way to attach it, I am thinking the new frame support will have a mount to attach the seat pan. The oil tank will most likely attach to the rear frame loop.

          Comment

          • JimmyBK
            Senior Member
            • Apr 2012
            • 266

            #6


            I want to personally thank all the sponsors again for all their support.
            I don't want to say it wouldn't be possible without them, because I would still be building this without their help. But fuck thank you for the support, every bit helps, and its so amazing to see companies this day and age actually care about some random asshat in a garage doing what they love, and want to support them.

            So from this asshat, Thank You, Thank all of you!

            Comment

            • JimmyBK
              Senior Member
              • Apr 2012
              • 266

              #7
              I was able to sneak out and do very little on the bike the other day. The oil box is taking shape, still needs a ton of work. but I am digging the shape.


              Attached Files

              Comment

              • JimmyBK
                Senior Member
                • Apr 2012
                • 266

                #8
                I started on installing the kickstarter... well all i did was remove and disassemble the transmission. So I will so be installing a kickstarter. why? because i want to. and that for me is reason enough.


                I also picked up a new 18" rim up from the old 16" and a new 15" suspension up from 12.5"
                The stance is so much better.


                Comment

                • JimmyBK
                  Senior Member
                  • Apr 2012
                  • 266

                  #9
                  Recently this build has been put on the back burner while I focus on building a race car for an upcoming race(early may). A few guys at the garage and I are partaking in a Lemons endurnace race, basically you buy a car for under $500 get it ready to race, and race for 24 hours, over the course of 2 days.

                  Here is the car as we got it. It was raced dirt track by a 14 year old girl who is much more badass than I, and probably you.


                  We stripped the old numbers and sponsors, and I have started to do some hand lettering and painting on the car to make it feel like our race car.


                  Comment

                  • JimmyBK
                    Senior Member
                    • Apr 2012
                    • 266

                    #10
                    With race prep slowing down (or at least my portion of race prep) the week before the race, I was able to touch my build again.

                    Swapped out the mini apes for the clip ons


                    Comment

                    • CBobber13
                      Junior Member
                      • May 2012
                      • 25

                      #11
                      Looking great man, amazing what a different size wheel and shock combo can do the stance. That oil tank is coming out sick... Looking forward to watching this one !!!

                      Comment

                      • JimmyBK
                        Senior Member
                        • Apr 2012
                        • 266

                        #12
                        Finally got around to putting the tire on the rim. It really straightens the whole bike out.


                        Comment

                        • JimmyBK
                          Senior Member
                          • Apr 2012
                          • 266

                          #13
                          Originally posted by CBobber13
                          Looking great man, amazing what a different size wheel and shock combo can do the stance. That oil tank is coming out sick... Looking forward to watching this one !!!
                          Thanks! yeah the new rim/tire and shocks really leveled out the stance of the bike. It's a pretty aggressive stance, might be to aggressive for getting out of nyc traffic. we will see.

                          Comment

                          • JimmyBK
                            Senior Member
                            • Apr 2012
                            • 266

                            #14
                            I have been away for a while due to a motorcycle accident. I damn near broke my hand, all in all very lucky. But I couldn't use my hand for about a month even to write. As of last week, I am back on the bike and back in the garage. I started on my exhaust pipes.


                            I still have to make a tab to hold the pipe, and cut out the slash... or ill put a slight turn out on them.

                            Comment

                            • JimmyBK
                              Senior Member
                              • Apr 2012
                              • 266

                              #15
                              Here is a quick progress update. I cut the eyebrow down so i could mount it below the top tree, a quick relocation bracket for the coil and key switch, made an electrics tray that is tucked neatly under the seat, and added on an integrated tail light.


                              Its almost ready to be wired. still gotta put the bottom end back in, I just got a full gasket kit for this guy.
                              Installing the kicker kit with the rear sets is going to be a challenge.

                              Comment

                              300 mobile ad bottom forum

                              Collapse
                              Working...
                              ;