1985 Maxim XJ 700 Craziness

Collapse

Desktop Ad Forum Top

Collapse

Mobile ad top forum

Collapse
X
 
  • Time
  • Show
Clear All
new posts
  • johnquincy
    Junior Member
    • Nov 2014
    • 18

    1985 Maxim XJ 700 Craziness

    Ive been thinking about a bobber build for a while now and couldnt resist the deal i got on this bike. i found it on craigslist for $450 and talked the guy into bringing it to me an hour away for $400. He said it ran about a year ago but he lost interest and built another bike.. hmm.
    Click image for larger version

Name:	image(4).jpeg
Views:	1
Size:	80.0 KB
ID:	1336714
    First, i got a battery since it didnt come with one then had to clean the rust out of the gas tank. i put some gas and some gravel in and shook it around then rinsed it out with more gas. i then put a fuel filter inline to the carb for anything that didnt get rinsed out. had to put some oil in it and hook up the battery and she was ready to start. which she did in the first few turns of the motor, even held an idle for a little bit but for some reason would bog down when i twisted the throttle about half way.. i pulled the carbs off and cleaned the bowls and did what i could with the jets which looked pretty clean.
    Click image for larger version

Name:	image(11).jpg
Views:	1
Size:	27.2 KB
ID:	1336713
    my brothers friend was selling some home made 12" apes that are pretty sick.
    Click image for larger version

Name:	image(9).jpg
Views:	1
Size:	41.2 KB
ID:	1336715
    one of the first things i did was take off the back fender and bobbed the frame.
    Click image for larger version

Name:	image(8).jpg
Views:	1
Size:	45.1 KB
ID:	1336716
    and painted the tank somewhere in between.
    Click image for larger version

Name:	image(6).jpg
Views:	1
Size:	52.8 KB
ID:	1336717


    i think i am going to leave it a soft tail bike for comfort and to be different. i like the apes but i need to find a cheaper way to do the cable extensions than buying the kit for $175 so ill probably just use the stock bars for now. also still on the fence about a rear fender, not sure yet. just trying to keep it simple-ish and low budget. ill have a lot of questions in the near future!

    i am also new to the chop cult forum so be nice to me haha
  • johnquincy
    Junior Member
    • Nov 2014
    • 18

    #2
    i had a local machine shop make some pieces for me to close up the frame where i chopped it off
    Click image for larger version

Name:	image(13).jpg
Views:	1
Size:	52.3 KB
ID:	1277484
    and the bar where i plan on mounting an LED tail light with integrated signals. found one for $50 on the interweb.
    Click image for larger version

Name:	image(14).jpg
Views:	1
Size:	45.8 KB
ID:	1277486
    Click image for larger version

Name:	image(15).jpg
Views:	1
Size:	50.2 KB
ID:	1277485

    another little project is the air box. im using the top section (that connects to the carbs) of the stock air box, which was way too big. i used some fiberglass cloth to make the basic shape then cut a cross where i could stick the section of pipe that i have into and 'mold' it into the box too (this is where im going to mount my 4" air filter). i wanted to use 4 of the pod air filters that stick onto the carbs but was advised that by doing that all the carbs could have different vacuum pressures causing the bike not to run correctly. anyway, heres what i did.
    Click image for larger version

Name:	image(16).jpg
Views:	1
Size:	29.0 KB
ID:	1277487
    Click image for larger version

Name:	image(17).jpg
Views:	1
Size:	32.9 KB
ID:	1277488
    then i covered it all with that fiberglass resin stuff and let it harden, then rattle canned it black and it looks like shit. i should have taken the time so sand it down and put another coat of resin on it but its not a huge deal to me and its kind of hidden anyways. im happy with it but if you're picky you wouldnt like my hastiness...

    Comment

    • johnquincy
      Junior Member
      • Nov 2014
      • 18

      #3
      heres a pic with the apes on
      Click image for larger version

Name:	image(2).jpg
Views:	2
Size:	44.3 KB
ID:	1277489
      i now have a cool faux leather seat that i rigged up out of the original seat pan. i just trimmed the plastic down and stuck a piece of 1" foam in then wrapped it in some cheap fake leather. looks pretty good though! just dont have a picture of it yet.

      still on the list of things to do is:
      move foot controls forward (cheaply)
      extend hand control cables/wires (cheaply)
      find a smaller speedo and get rid of tach/etc
      install brake light
      rig up a way to mount the tag
      find out why the headlight doesnt work

      Comment

      • johnquincy
        Junior Member
        • Nov 2014
        • 18

        #4
        tc bros sells a +5" cable set (throttle and clutch i think) for an xs650 and im wondering if they will work for me? does anybody know the length that i would need on my xj or should i just pull the cables and measure before i make any decisions?

        also, is there anything i should know before removing the speedo/other things around it? i may leave the key where it is for now but will relocate that soonly.. i wish it had a kickstart.

        Comment

        • johnquincy
          Junior Member
          • Nov 2014
          • 18

          #5
          soooooo... i take off the speedometer/tachometer/indicator lights and theres a few fuses in there.. this has me wondering how hard it would be to just take out the old wiring harness (since i dont need half of it anyway) and rewiring the whole bike and moving the ignition switch and making a few other functions operate off of a simple switch.

          is this way harder than im thinking? im a pretty smart guy but havent messed with a motorcycle before (its always been jeeps)

          also, what gauge of wire should i use? and what do ya'll think about this wiring diagram? http://cycles.evanfell.com/wp-conten..._Evan_Fell.png
          would it even work on my bike?

          Comment

          • chetmotox
            Member
            • Jul 2014
            • 36

            #6
            They aren't too complicated. That diagram seems to sum it up pretty well. I'm thinking on doing the same to my Maxim when I strip it down to the frame just to simplify things. I am planning on reusing the existing wire where I can. You would probably be safe using 14 gauge copper but I always like 12 gauge copper just because its very common and I have lots around.

            Comment

            • johnquincy
              Junior Member
              • Nov 2014
              • 18

              #7
              And for the fuses I would just have to remove them from the circuit and "hardwire" them in?

              Comment

              • johnquincy
                Junior Member
                • Nov 2014
                • 18

                #8
                how necessary are the diode assemblies and relays if im deleting the turn signals, the horns, the high beam, kickstand switch, etc.? if im thinking right, which usually doesnt happen, i can pretty much just hard wire everything in with the 30A and 10A fuses in the correct spots so everything doesnt get tooooo much power. ive rigged up plenty of lights on jeeps and fourwheelers just never completely destroyed a wiring harness like im about to. does anybody know if the above wiring diagram will work perfectly for my 1985 Yamaha XJ700N or is that removing too much?

                Comment

                • johnquincy
                  Junior Member
                  • Nov 2014
                  • 18

                  #9
                  Intimidated by the thought of messing with your motorcycle wiring? Then follow our expert-written guide to fixing issues with electrics.

                  good kinda how-to wiring page

                  Comment

                  • johnquincy
                    Junior Member
                    • Nov 2014
                    • 18

                    #10
                    now i have a few questions about wiring, coils, and electronic ignitions. please help!

                    i have removed the factory wiring harness and am now wondering how to put my electronic ignition back in place.
                    1) are the two wires from each coil picky as to which one goes to the power and which goes to the points? dont the coils have to connect to eachother?
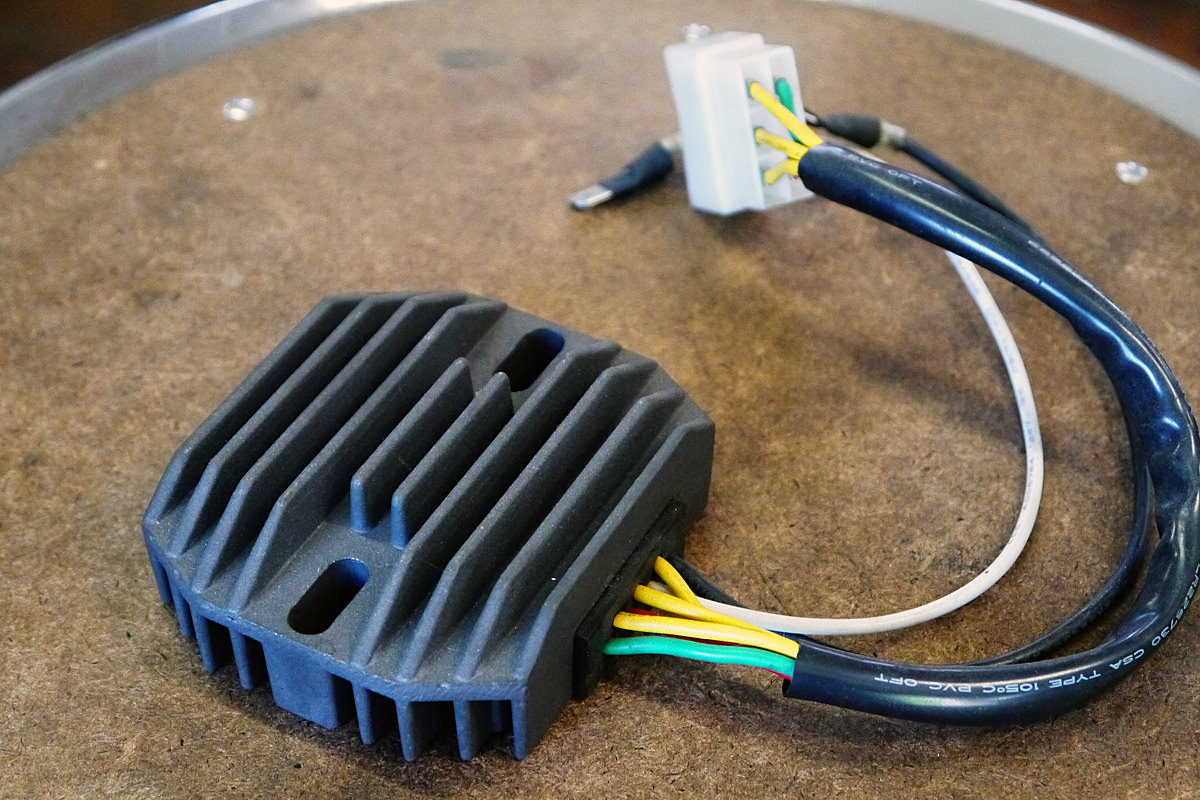
                    2) out of my regulator/rectifier i have 3 white wires (that go to the stator), a red wire (positive), a black wire (neg), a brown wire (?), and a green wire (?). what are the brown and green for?
                    3) how do i know which wires go where on the ignition box thing? should i order a new one that is more simple since i dont have any 'extras' left on the bike?
                    4) how much does my xj700n have in common with the xs650? any of these kinda parts interchangeable?

                    i am just going to put in a 2 position key and a start button.

                    any help is greatly appreciated!! theres not much info on this kinda stuff even on the xj forum..

                    Comment

                    • johnquincy
                      Junior Member
                      • Nov 2014
                      • 18

                      #11
                      1) there is also a connector with green and red wires coming from the stator as well? is this where the green and brown wires connect?
                      2) from the 'alternator'/points/side of the motor there are 5 wires: 3 to a connector- 1 black, 1 orange, and 1 grey. then 2 other wires with male push in connectors 1 black and 1 blue. the 3 wires in the connector go to the ignition module but what about the other connector (5 wires) that comes out of the module and into the abyss of the stock wiring harness?

                      Comment

                      • chetmotox
                        Member
                        • Jul 2014
                        • 36

                        #12
                        So reading through what all you have done here are a few suggestions and also a few questions.

                        So first, when you removed the wiring harness, did you label what wires went where?

                        I am very anal when it comes to taking things apart. I always have a clean bench/table to lay all my parts on in order of assembly and also, I label anything I may question later. Masking tape and a sharpie are your best friends and with today's technology, take a ton of pictures with a phone or tablet for later reference so if you question what you are doing, you can look back at a picture of it. Any project that I think might take longer than a couple days, I take pictures of every step and save them in a folder on my laptop so when I go to put it back together, I can look at the pictures and refresh my memory of how it went together. Even when you customize things, knowing how it went together originally can save your ass more times than not. Wiring is very simple, if you disconnect wires, at the point of the 2 connectors or cut, put a piece of tape on each wire and label it with either the part or a corresponding number (#1 connects with #1, #2 connects with #2, etc.). That way, when you have questions where a wire went, you just match up the labels.

                        So as far as me being able to just say this wire goes here and here, I honestly can't. I've messed with wiring but I'm very hands on and if I question what a wire does, I can usually test it with a light or multimeter and figure out what each one does. But I will tell you what I can.

                        I would say you can hard wire everything using inline fuses. If you don't have diodes or relays that shouldn't be an issue with what you are planning. Just keep in mind, some states require horns, turn signals, etc. Horn is simple with a momentary switch and positive and negative wire but turn signals do require a relay.

                        Your coil wires will be picky on which goes where so make sure to wire them how they were if you can remember.

                        Your regulator/rectifier will be 3 white wires to stater, red to battery (positive) and black to ground. One of the other wires will go to the ignition switch(I'm thinking brown) and the other will also connect to the stater (I'm thinking green). The extra wire on the stater will go to ground. (check out this link http://cyclepsycho.com/yamachopper/w...gingsystem.jpg)

                        If you want to change the ignition switch to something simpler that is fine. You can reuse the one you have but keep in mind, if you just cut the wires you aren't using, make sure to "cap" them so they don't short something out.

                        I'm not sure on compatibility on your bike vs xs650. Technically, you can make anything work, it just might take more work than its worth.

                        As far as your other wires you have coming from the alternator side of your engine, I'm not 100% on what they are. I just Googled a stock wiring harness for your bike and stumbled across this (http://www.eserviceinfo.com/equipment_mfg/Yamaha_6.html) a service manual download. Might check it out and see if it can help you. I'm thinking they might be oil pressure sensor, temp sensor and such but without seeing it and messing with it myself, I'm not sure.

                        Check out this diagram as well, might be helpful for you. http://www.xs650chopper.com/wp-conte...ingdiagram.jpg

                        Hope this all helps, I subbed so I can see how things go for you man and good luck!

                        Comment

                        • johnquincy
                          Junior Member
                          • Nov 2014
                          • 18

                          #13
                          thanks man! very helpful!

                          i am also pretty meticulous about labeling and organization so i have the harness pretty well labeled. i was looking at it this morning before work and was tracking those green and brown wires and just figuring stuff out. the green out of the stator goes to the green on the reg/rec. the brown out of the reg/rec goes to the red out of the stator and then to the ignition switch. im getting closer and closer to having this thing figured out its just taken a bit of time and research.

                          i dont have time right now but i will check out those links above and let ya know if they help!

                          if you're ever around boone, nc let me know man i owe you a 12 pack

                          Comment

                          • Westboundbiker
                            Senior Member
                            • Oct 2014
                            • 377

                            #14
                            @ chetmotox- thanks for the rectifer/regulator explaination, I'm using a honda one on my gs450 build, and there were more wires than my stock one, that gives a good idea of what they do.

                            @johnquincy
                            your build is looking great man, the stock wiring guide is a great friend, What I'd say to do is to make a new wiring diagram in paint or something and then post it, we can look it over, then test bit by bit, then make it! I'm in the middle of all that now.

                            Comment

                            • chetmotox
                              Member
                              • Jul 2014
                              • 36

                              #15
                              No problem guys. I am no expert with wiring and such but I understand the basics and when I don't know an answer, I Google! If I'm ever near Boone, NC I'll probably be pretty lost, Montana is a bit of a drive

                              Comment

                              300 mobile ad bottom forum

                              Collapse
                              Working...
                              ;