Brad's '75 Shovelhead Chopper Build Thread

Collapse

Desktop Ad Forum Top

Collapse

Mobile ad top forum

Collapse
X
 
  • Time
  • Show
Clear All
new posts
  • jbswear
    Senior Member
    • Jul 2013
    • 337

    #31
    I picked up the engine from the shop yesterday. It seems the oil pump rebuild kit I had been given had the wrong sized parts in it; the shop got it sorted and it's now assembled and good to go. I watched a few YouTube videos in the interim and learned how to disassemble conventional fork legs. I had NO clue it was actually so friggin' easy. I've ordered new seals for the lowers and will likely assemble them in the coming weeks; going on vacation soon and won't be able to finish until after that's done.

    I'll just use the legs I have now until I get the whole bike built to see if the length will work. No being able to roll the lift under the bike isn't that big a deal right now.
    Comment

    • brooklynbomber
      Senior Member
      • Sep 2011
      • 1944

      #32
      You'll certainly want a bit more ground clearance. The only thing is that an extra 4" with that amount of rake wont lift it up an extra 4".

      Comment

      • jbswear
        Senior Member
        • Jul 2013
        • 337

        #33
        Oh, I know. I'm not looking for an additional 4" of clearance. I'll do the math once the engine and transmission in place.

        Comment

        • jbswear
          Senior Member
          • Jul 2013
          • 337

          #34
          Aside from over running your budget...or taking forever...or breaking expensive parts because you're a dumbass and don't pay attention to proper orientation...you know what ELSE really screws with your build?

          Buying the wrong parts because you don't know what the eff you're doing.

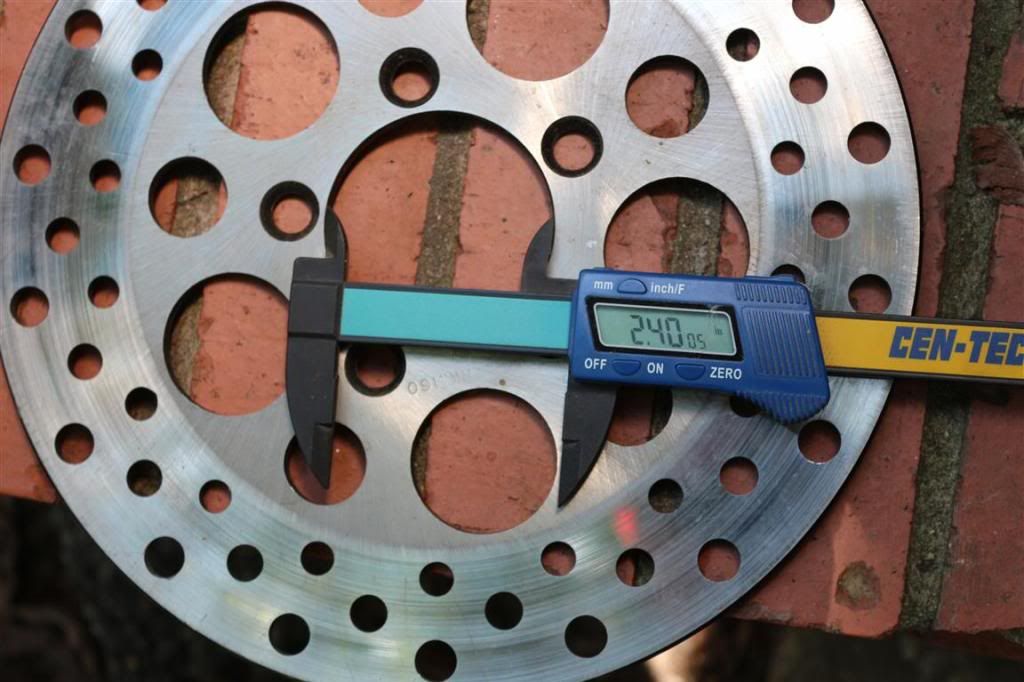
          Exhibit A:


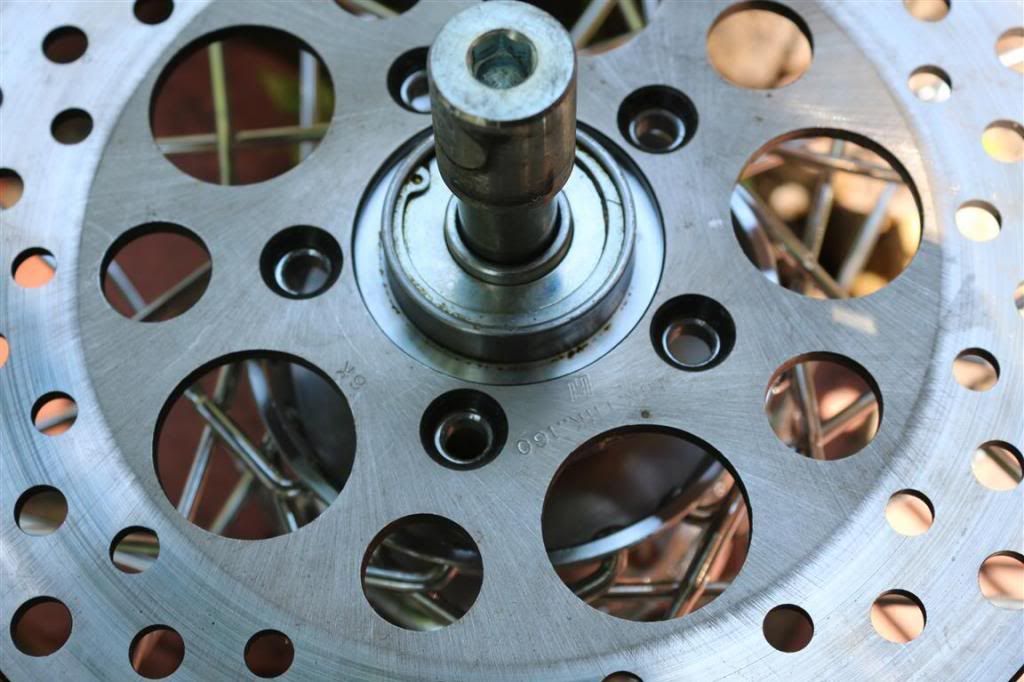
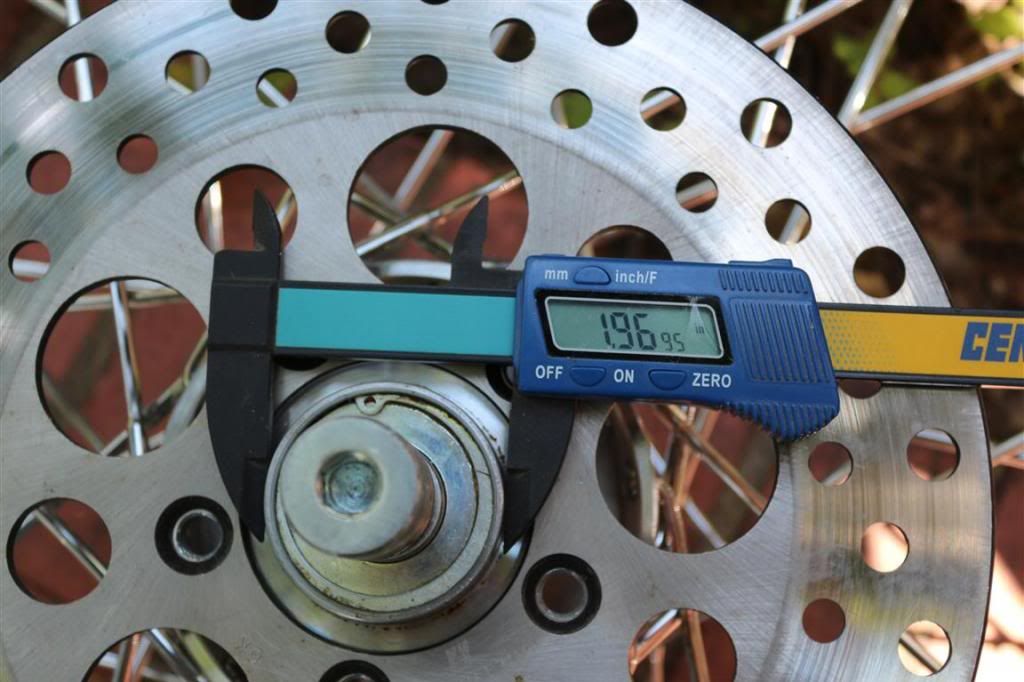
          Apparently I need "older" style rotors to match my "older" style hub. I'm guessing that means a certain year range. So...I'm waiting on some Harley gurus to get back to me to let me know which year range of rotors I need.

          Comment

          • TheSandman
            Senior Member
            • Apr 2011
            • 722

            #35
            You need a 99 and older rotor. Older ones had a 2" bore, 2000 up had 2.5" center bore. Also, front rotors have different bolt sizes then the rear. I think the rears are 7/16" and the fronts are 3/8".

            Comment

            • jbswear
              Senior Member
              • Jul 2013
              • 337

              #36
              Originally posted by TheSandman
              You need a 99 and older rotor. Older ones had a 2" bore, 2000 up had 2.5" center bore. Also, front rotors have different bolt sizes then the rear. I think the rears are 7/16" and the fronts are 3/8".

              Yup...I know that *now*. Dangit!

              Comment

              • TheSandman
                Senior Member
                • Apr 2011
                • 722

                #37
                Originally posted by jbswear
                Yup...I know that *now*. Dangit!

                I've ran late model rotors on early model hubs with no issues. It was temporary but still worked.

                Comment

                • TheSandman
                  Senior Member
                  • Apr 2011
                  • 722

                  #38
                  For future referenece, hub bearings also changed from a bearing and race type
                  To a sealed bearing. Same time as the rotor changed. Hub dimensions also changed.

                  Comment

                  • jbswear
                    Senior Member
                    • Jul 2013
                    • 337

                    #39
                    Originally posted by TheSandman
                    For future referenece, hub bearings also changed from a bearing and race type
                    To a sealed bearing. Same time as the rotor changed. Hub dimensions also changed.

                    Looking at the images I put up, is there a way to tell which this has?

                    Comment

                    • TheSandman
                      Senior Member
                      • Apr 2011
                      • 722

                      #40
                      Originally posted by jbswear
                      Looking at the images I put up, is there a way to tell which this has?
                      Is it a steel hub or forged aluminum? It's definitely a bearing/race style bearing. You take the c-clip and pull the dust shield and the bearings under that.

                      I don't know the exact years but it looks like a stock shovelhead style steel hub. JUST from the pics you took.

                      I could probably look it up in my vtwin catalog when I get home.

                      Comment

                      • GermanG
                        Senior Member
                        • Apr 2013
                        • 347

                        #41
                        Apparently I need "older" style rotors to match my "older" style hub. I'm guessing that means a certain year range.

                        You can also use brake rotor apadters. Aluminium ring that are a press fit on the hub and have the outside diameter of the rotors 2000 up. Easy to get here in Europe, they are listed in the Motorcycle Storehouse online catalog # 933463. Hope that gives you an idea what they look like. I tried to find a supplier in the USA , but I´m not good on google search functions.
                        Last edited by GermanG; 07-26-2013, 11:39 PM.

                        Comment

                        • jbswear
                          Senior Member
                          • Jul 2013
                          • 337

                          #42
                          Thanks, but I was able to get a set of lightly used rotors to fit for pretty cheap.

                          Comment

                          • jbswear
                            Senior Member
                            • Jul 2013
                            • 337

                            #43
                            I haven't worked on the bike in a few weeks because I've been suffering from a really bad bout of sciatica. I have to admit that I've *never* felt so much pain for such an extended period. For the first two days, walking nearly brought tears to my eyes. Today is the *first* day in three and a half weeks that I'm *almost* walking without a limp.

                            Self pity party over!

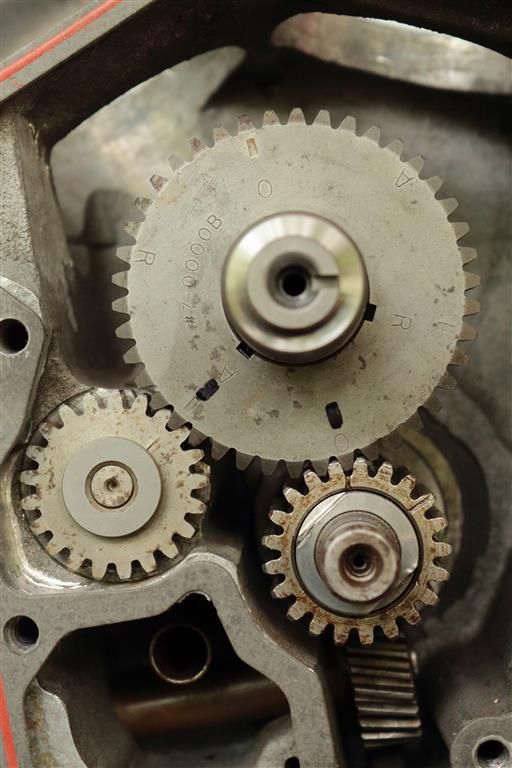
                            I installed my cam and ignition over the weekend:

                            (Note the angle of the pic. The cam is actually correct but my camera was tilted when I took the shot.)


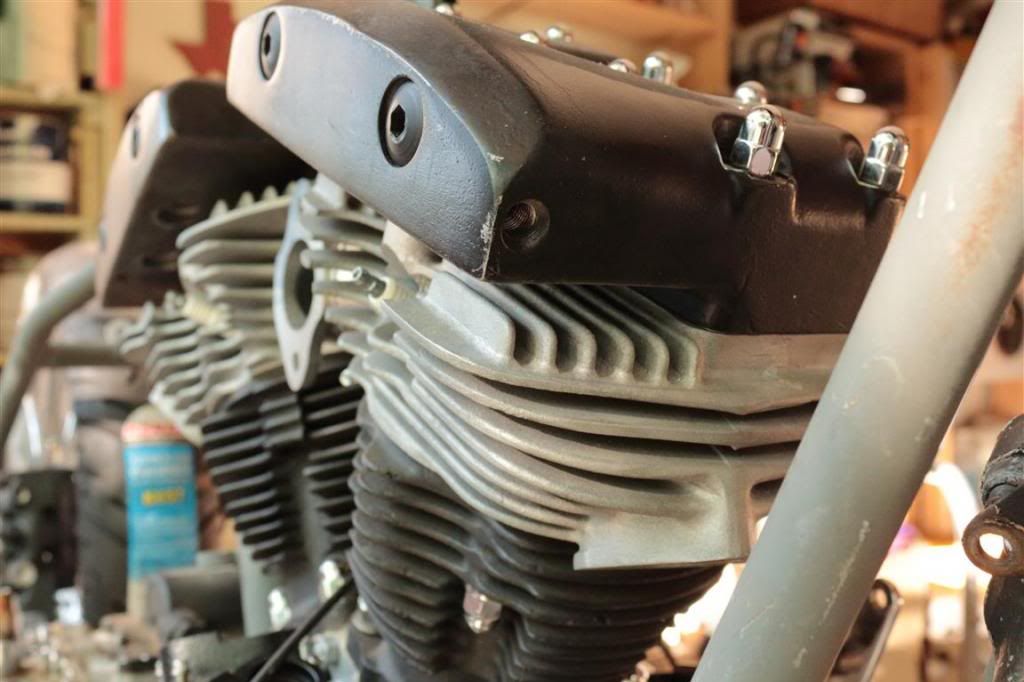
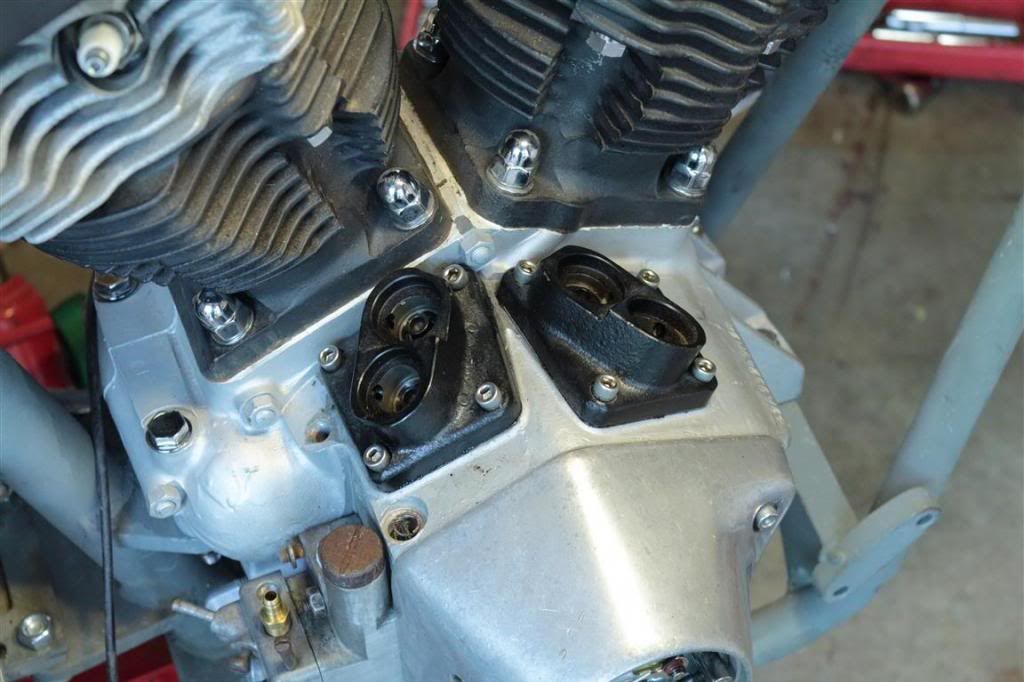
                            I started looking at the oil lines to the rocker boxes and noticed a slight error that I need to fix. Can you spot it?


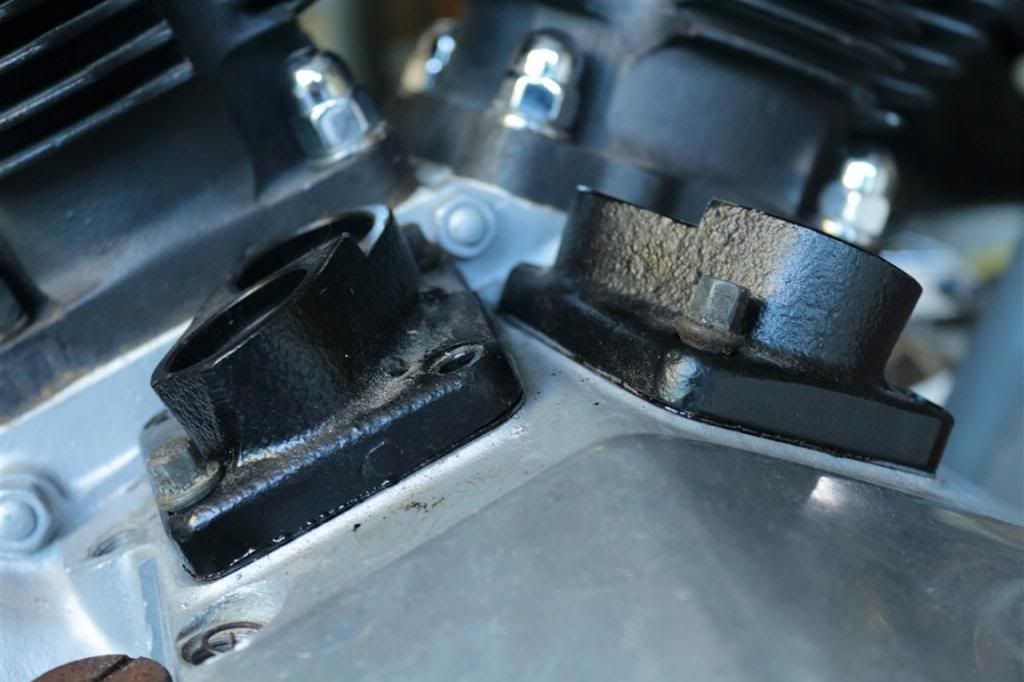
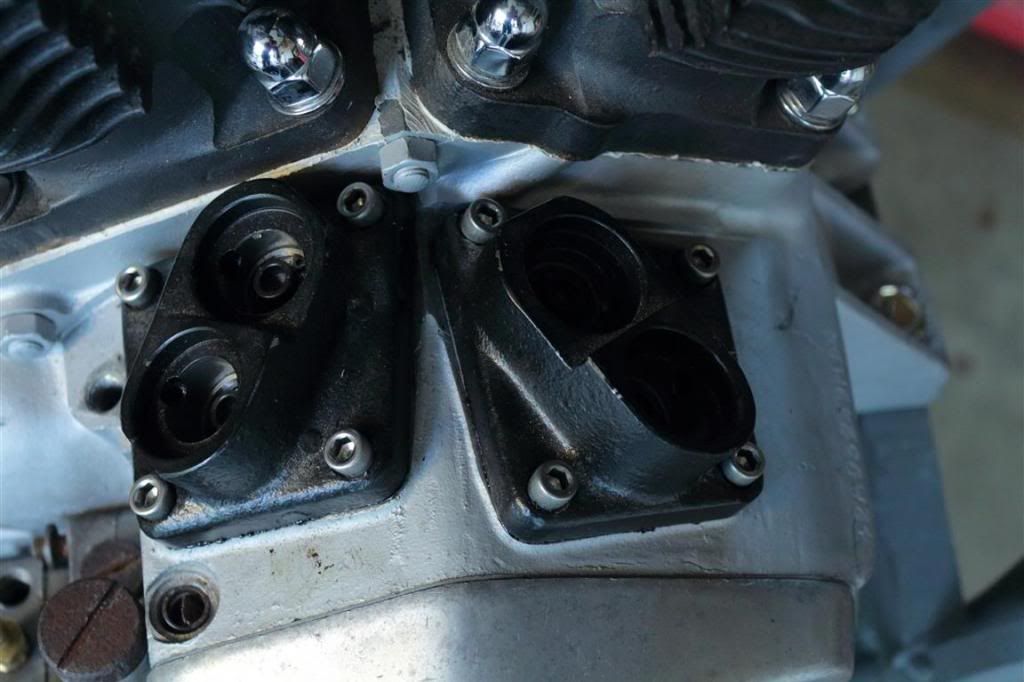
                            Hint: I installed the rocker boxes backwards. Sure, I *could* run it this way, but the oil lines running to them would be ugly and messy. See the threaded hole on the forward face of the front rocker box? That should be facing forward on the REAR cylinder.

                            I pulled them off (had to remove the heads to pull them off; not enough frame clearance otherwise) and am currently waiting on some new rocker box nuts to be delivered. You see all those acorn nuts? Aside from looking cool, they're a huge PITA to reach with tools and aren't worth the looks, so I'm replacing them all with standard hex head nuts/bolts.

                            I'm glad I pulled the heads, for I found something pretty bad in the front cylinder--rust on the lip of the cylinder wall. A bit of scale, too. I have no clue what caused it; the valves are sealed (no push rods installed), one plug hole has a spark plug in it, and the other plug hole was taped over. It was stored in my dry shed. I *knew* I should have poured some oil into the cylinders before putting it away. Hindsight is *always* 20/20.

                            I rotated the engine to take the piston down to its lowest point, and with a brass brush, scraped the rust away from the wall. The wall feels smooth, and I see no scoring running down, so I'm hoping there's no major damage. I vacuumed everything out. I'm sure I'll find out whether a ring was damaged when I (hopefully) get it running later this year. If there's excess smoke, I'll have to pull the cylinders and send them back out to T&O for a .020" bore with matching cylinders and rings. They currently have a .010" bore.

                            On a good note, I was able to repaint the rocker boxes yesterday to repair scratches and scuffs caused by my ham fists.
                            Last edited by jbswear; 08-19-2013, 8:22 AM.

                            Comment

                            • dondoucette
                              Senior Member
                              • Nov 2011
                              • 218

                              #44
                              Subscribed!
                              Great thread dude.

                              Comment

                              • jbswear
                                Senior Member
                                • Jul 2013
                                • 337

                                #45
                                The original lifter blocks on the Shovelhead used counter sunk 1/4-24 screws...not a problem if you're running Shovelhead style lifter blocks. I've switched mine over to Evolution style (the engine after the Shovel; has a nearly identical bottom end, but the cylinders and heads are very different) lifter blocks. The Evo cases use the more popular (and easy to find) 1/4-20 flat screws. I switched because the Evo lifter blocks they offer better push rod geometry and quieter running.

                                To do this, though, I had to find flat head screws in 1/4-24 thread...not even McMaster-Carr makes them. I had a friend custom make a set of Allen head screws from 1/4-20 that had a long length of unthreaded section under the head--he cut off the threaded part and cut 1/4-24 threads into the shanks with a die.

                                Another problem...one needs a counter sunk pair of bolts to center the lifter blocks in the mounting holes. You can buy them in 1/4-20, but nobody makes them in 1/4-24. I figured out that I could use my original counter sunk screws to center the lifter blocks in place and then insert the Allen head screws.

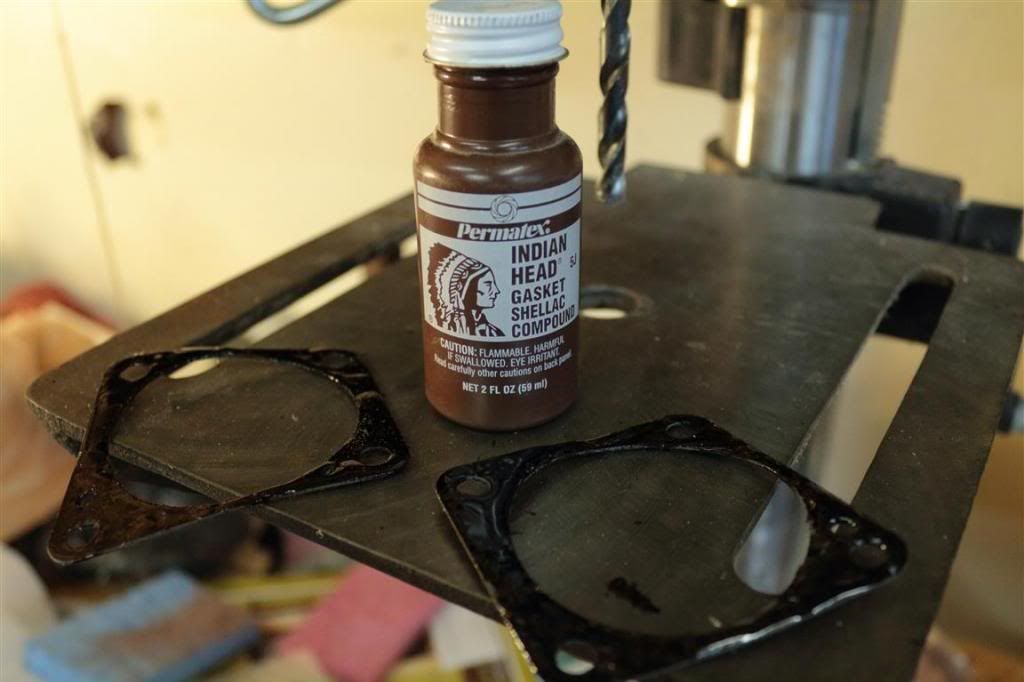
                                First I applied a foul-smelling gasket sealer to both sides of the lifter blocks' gasket surfaces and allowed them to dry.


                                Then I slipped the gaskets onto the lifter blocks and put them into their respective holes on the lower end. I put two of the OEM screws in place, on opposite corners:


                                And then I inserted and tightened down the 1/4-24 Allen screws:


                                Nothing too exciting, but it's a bit of progress...

                                Comment

                                300 mobile ad bottom forum

                                Collapse
                                Working...
                                ;