
 Tweet
Tweet
Alright I have got my first customer. I have a thread on here showing my first attempt at a K&Q seat. It turn out alright for just going for it. http://www.chopcult.com/forum/showthread.php?t=28516. It is not much of a how to in my opinion. Just a few pictures of the steps I took. This seat that i am making now is for my friend to go on his panhead. Need to get it done so he can get his bike ready for bornfree 5. I will be posting more pics and more detail on the steps I take. Hopefully it will provide needed info for other to build one. Later.
-
-
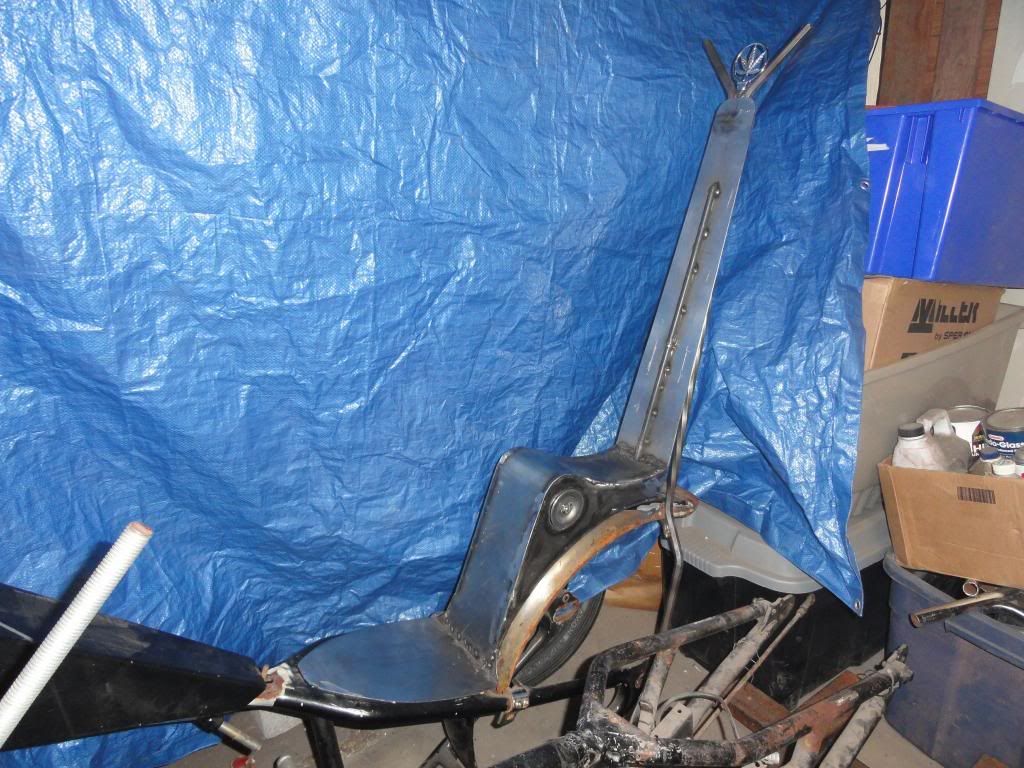
The first step i do is to make a paper template of the pan. I use this as a pattern for the pan and for the upholstery. I like to tape it together to see what the pan many look like. I am modeling this on of the aluminum pan its next too. Making the king seat a little wider and the rest more narrow. Also a high back.Attached Files -
-
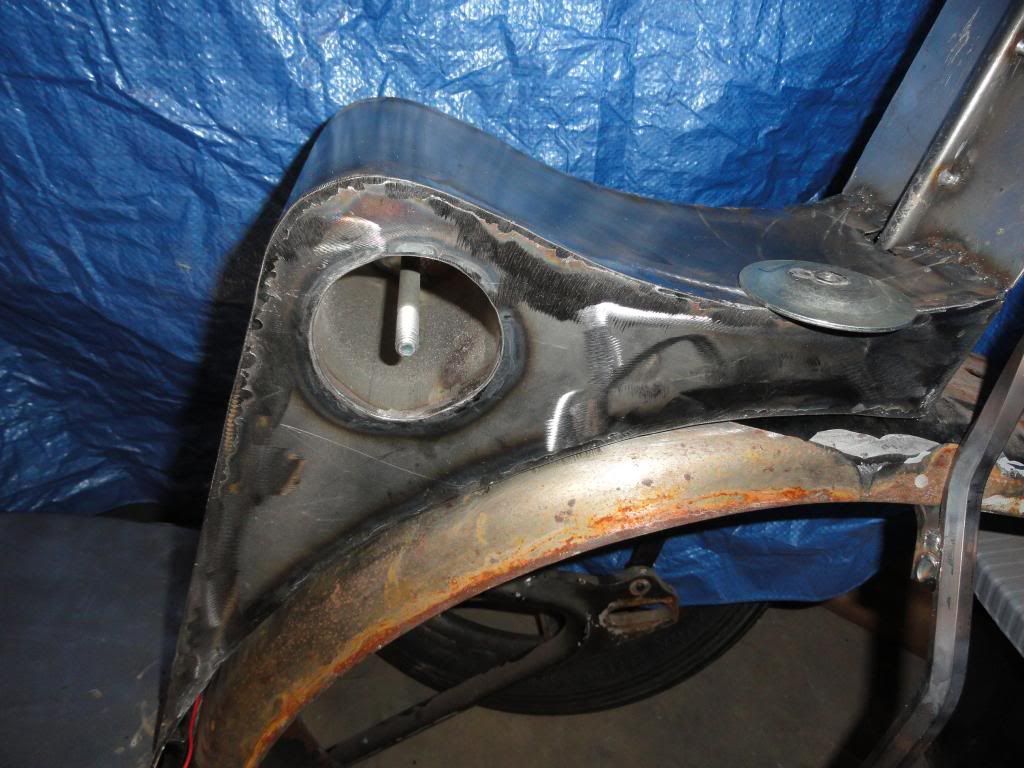
I cut the bottom pan and the hump out of 16g steel. On my first one i use 12g and it made the seat really heavy. 16g is a little flimsy but i will be welding a support strap down the center of the pan. Then i hand bent the hump.Attached FilesComment
-
-
I drilled out 1/2 holes for top hat thread bungs for the mounts of the pan. I have two on the king seat for a bracket and then i have one under the queen to mount to the fender. Then one at the top of the back for mounting to sissy bar. Masked out edge and marked every 1.5 inches for the holes for the rivets.Attached FilesComment
-
-
Thanks man. I bought a king queen but it doesn't really fit well so I'm going to try and give this a try.Comment
-
Well here is the pan done. I cut the pan put using a jigsaw with a metal blade. After cut out i hand bent them. i cut a small strip and welded it down the center to give the pan some strength. Then I welded in some top hat bungs for the mounting to the sissy bar and the seat bracket.Attached FilesComment
-
-
I edged the pan with car door trim that i found at the local auto parts store. i had a few wrinkles on the corners. To flatten them i heat them up with a lighter and pressed them flat.Attached FilesComment
-
-
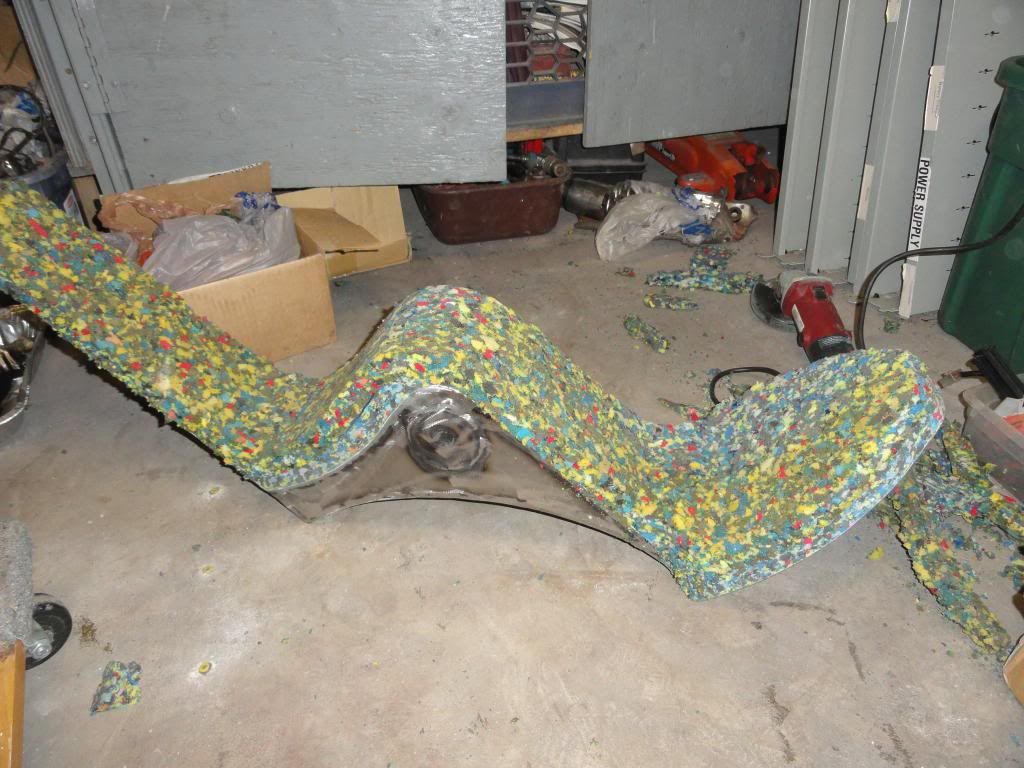
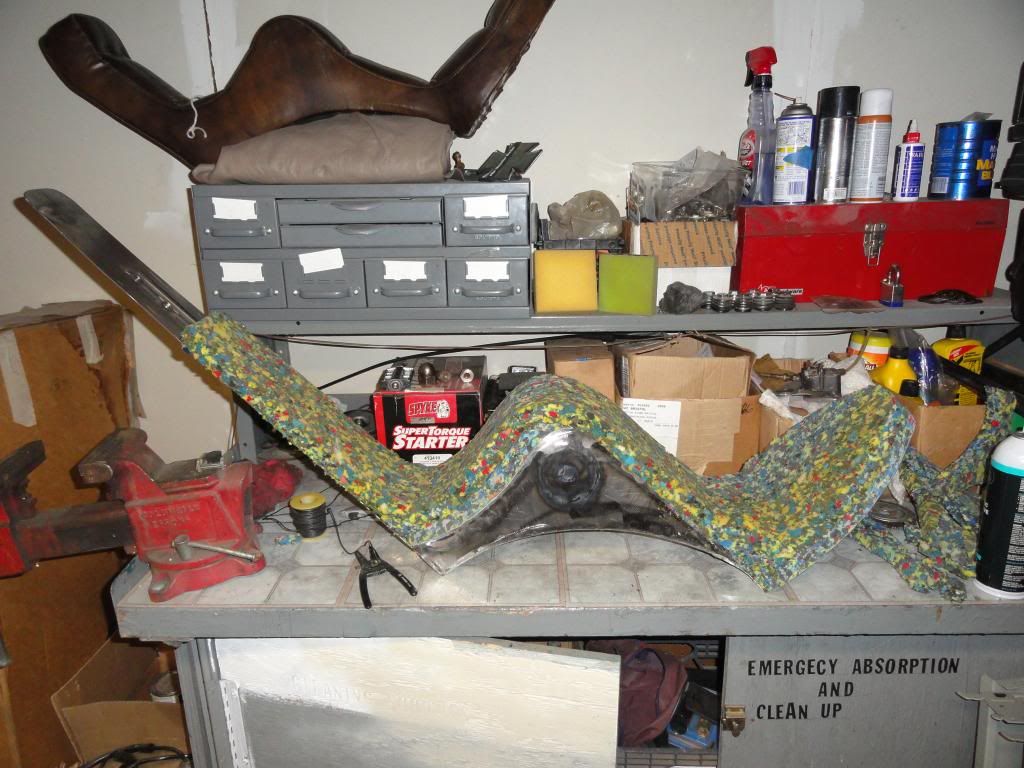
Foam
I glued two layers of closed cell foam down. I started the pleat pattern for the top. Then shaved the foam to shape. I use a automatic carving knife to trim the foam . Then use a small rasp plane tool from harbor-freight the round the edges.Attached FilesComment
-
-
Fantastic work!
You inspired me to just "go for it" and attempt my own K&Q seat. I'm waiting to see how you do the riveting, because my first attempt at it didn't go so well.
Keep it coming!
-FranComment
-
This should really be titled, "How to born free-ify your ride"
Great work. In my eyes, a chops not a chop untill its king and queened.Comment
-
Well the final assembly. I cut out the side piece in on continuous piece. I stitched welting along the edge and glue a piece of vinyl to the bottom.Attached FilesComment
-
-
Well she is done. I stitched a back piece to it so not rivets are needed. I then stretched and riveted to the bottom. Side project was my signature brain pleats seat for my bike.Attached FilesComment
-
-
THANKS BROTHA!! this seat is gonna look tits on my chop!Comment
-
here's the one I made.


Comment
-
here is the one I just started making..
almost finished....will make the cover in a week or two..Comment


Comment