TECH: Make an Air Suspension Seat

Collapse

Desktop Ad Forum Top

Collapse

Mobile ad top forum

Collapse
X
 
  • Time
  • Show
Clear All
new posts
  • edward
    Senior Member
    • Aug 2009
    • 104

    TECH: Make an Air Suspension Seat


    Why?
    Why not just use springs and call it a day? I could not bring myself to put a spring seat on a Buell based chopper. Probably just me but springs look good on a nice Trump, Pan, Knuck, etc…

    Benefits?
    Fully adjustable
    No lateral movement
    Cool and functional

    What’s the big idea?
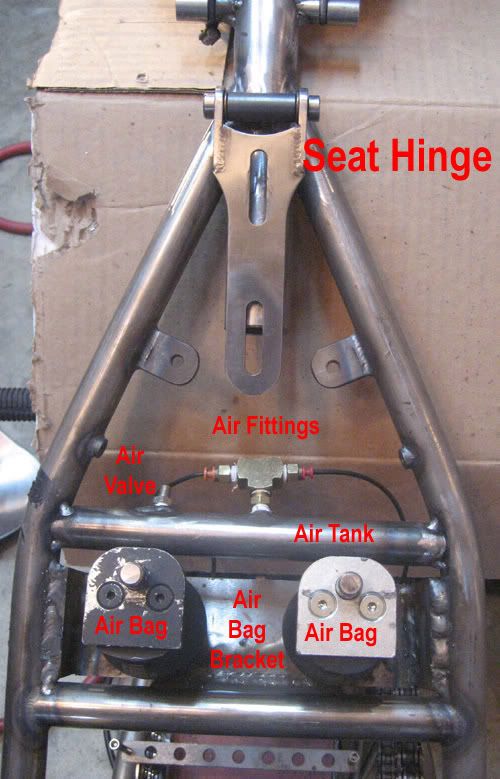
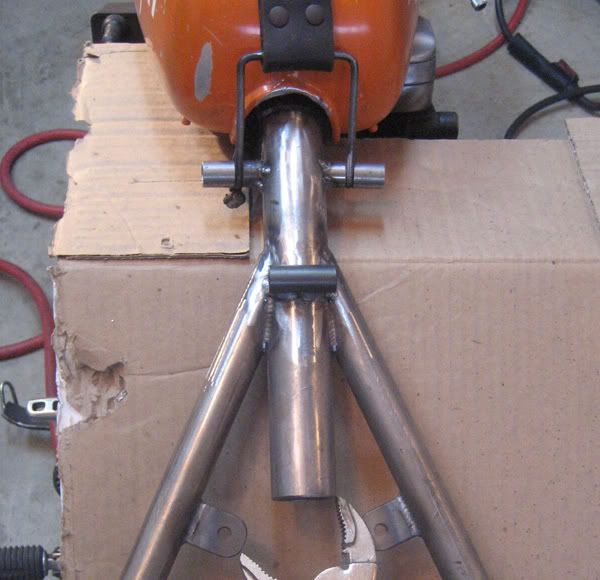
    Basically you create a simple closed air system composed of a small air tank welded to your frame and two little air bags connected to the air tank via thin plastic tubing. No compressor, wiring and such. Here’s the top view:


    Parts?
    You can buy the air seat set up for mucho $$$ but that’s no fun.


    Here are the parts you need to make your seat. The items in ( ) are what you’ll see in my build.
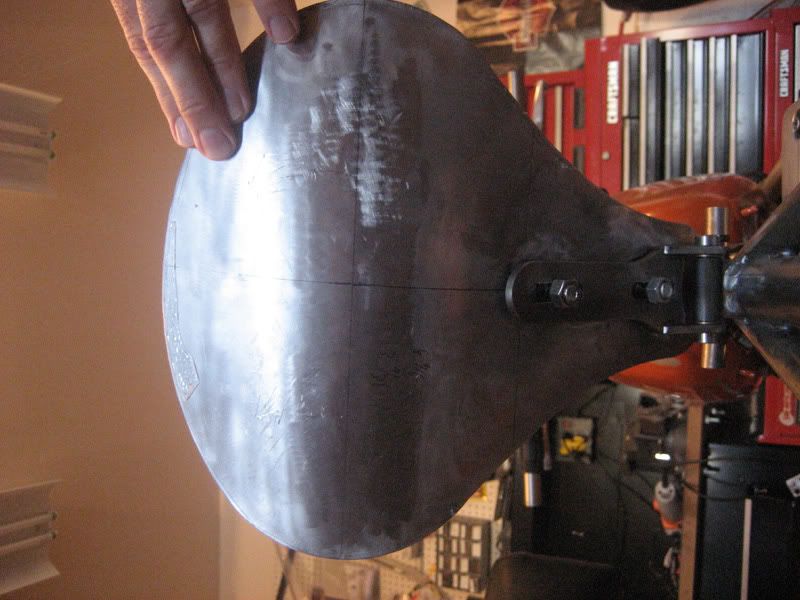
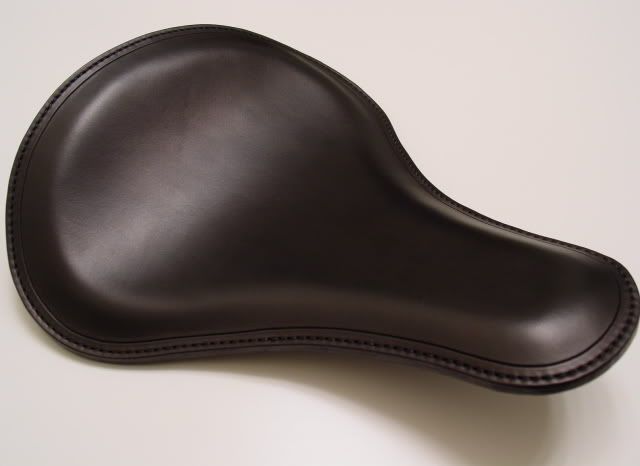
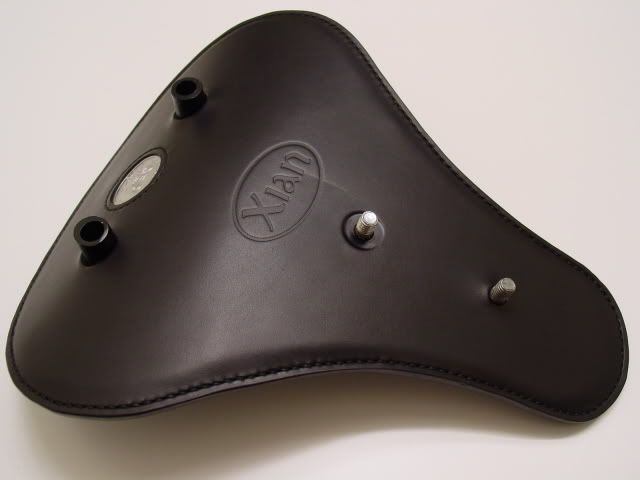
    Seat pan (BaasMetalcraft)
    Seat hinge (Fab Kevin)
    Air bladders (HD police road king)
    Air fittings (HD)
    Air tubing (HD)
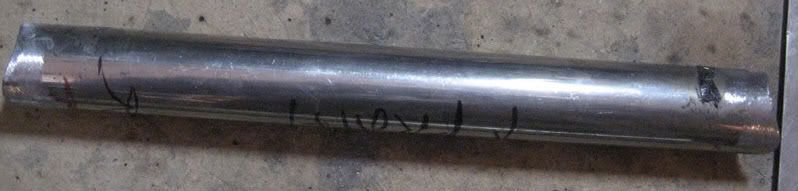
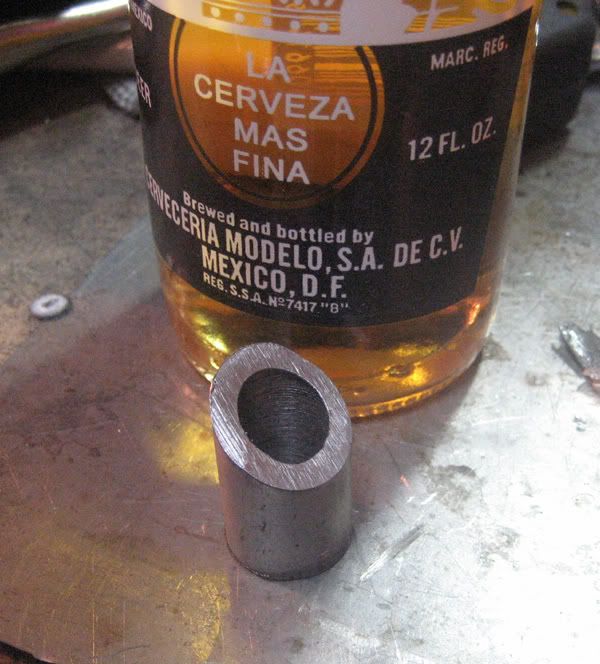
    Metal tubing that matches the diameter of your frame (Home Depot)
    1/8” NPT bungs (BunkKing.com)
    Schrader valve (HD)
    Flat bar (McMaster Carr)
    Round stock (Home Depot)
    1/8 NPT T fitting (Home Depot)
    1/8 NPT fitting (Home Depot)

    How to?
    1. Mock up seat location on bike.

    2. Mark where the front of the seat hinge will mount to frame.

    3. Mark where the rear of the seat hinge will mount to seat pan.

    4. Ensure you have enough room between your frame rails to accommodate the air bladders.

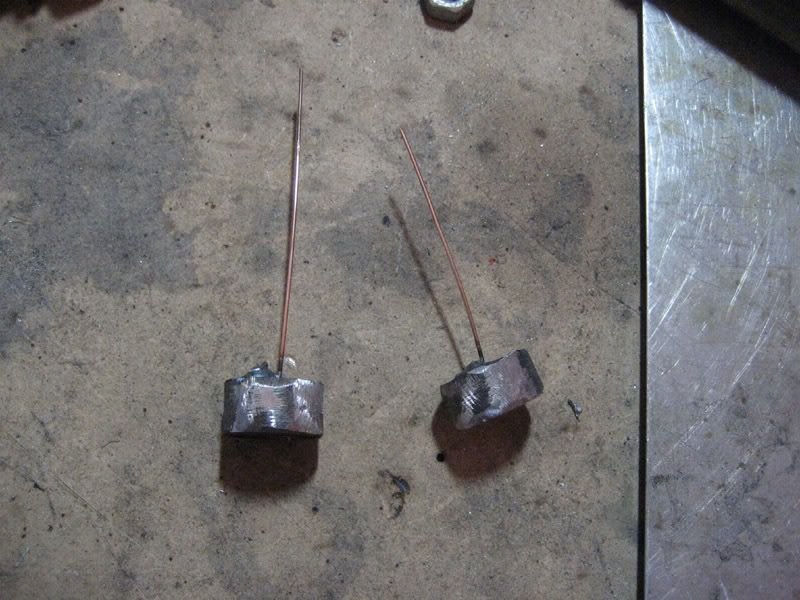
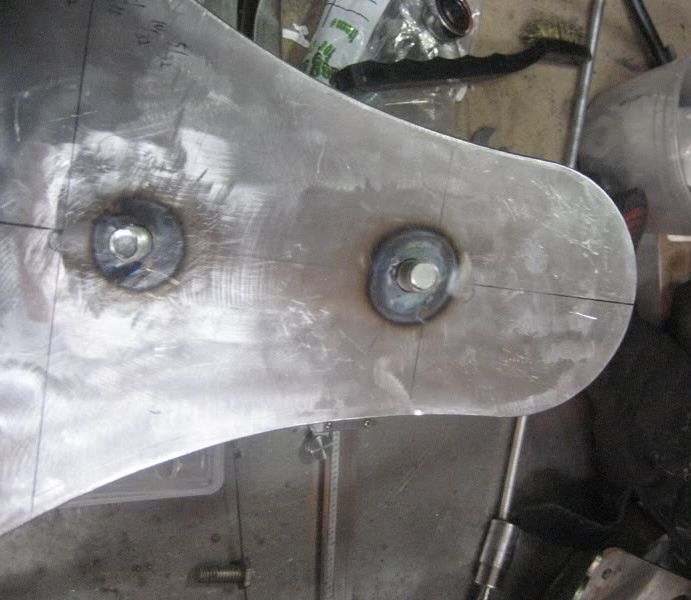
    5. Mount air bladders to flat bar.

    Inflated air bladders mounted to flatbar


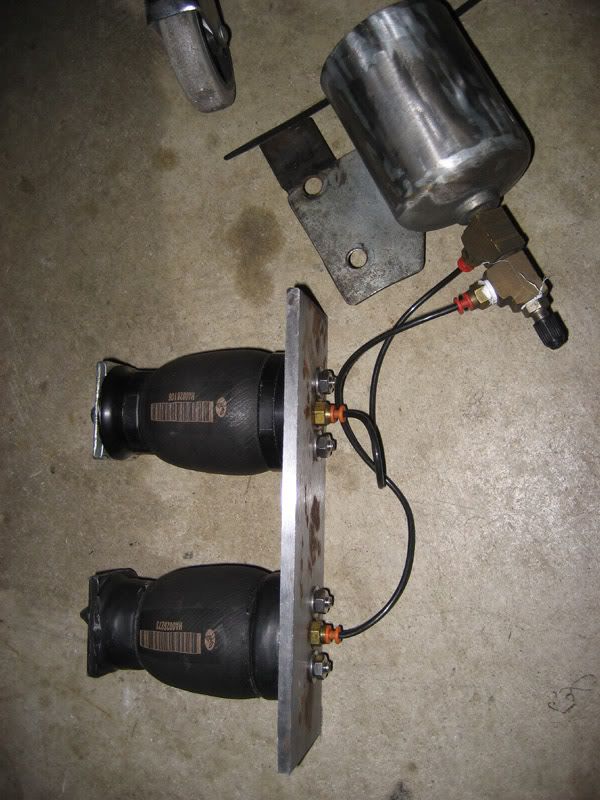
    I had the stock HD air tank so it helped with the mock up. The bladders shrink when filled with air.

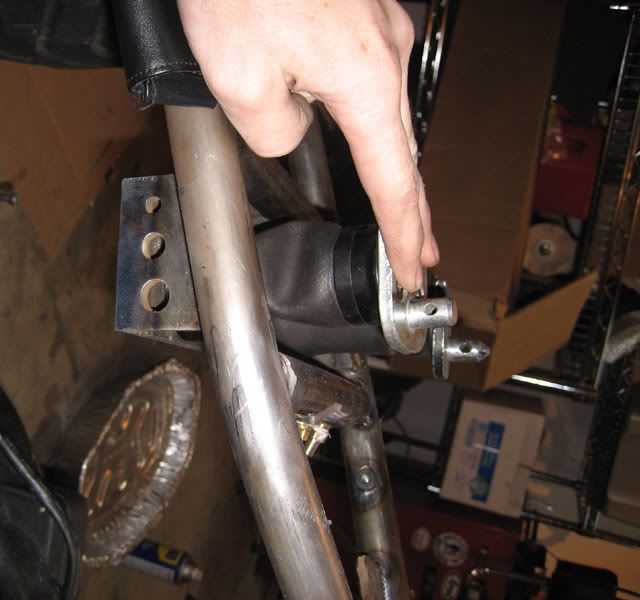
    6. Mock up again using the air bladders mounted to flat bar. Ensure the proper vertical placement of the air bags so you get the right seat angle. Your seat pan should rest on the tops of the air bag posts.

    7. Ensure you will have enough room to mount the mini air tank that will be disguised as a frame rail. Your air bladders will sit behind this mini air tank.

    8. Make your air tank. Since the air tank will be in front of the bladders, mock up your bladders again and mark where the tank will connect to the frame. Cope the edges of the air tank so that it fits nice and tight between the frame rails.


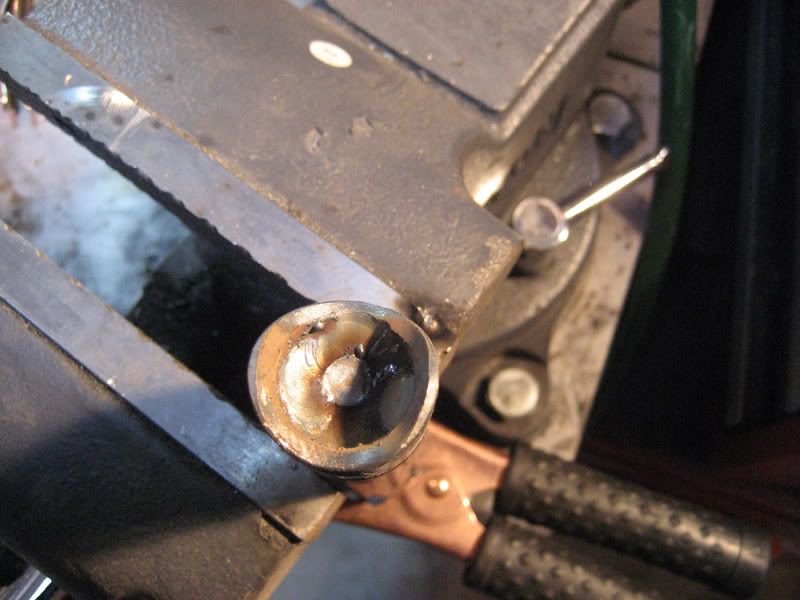
    9. Weld slugs inside the mini air tank. This will allow you to test for air leaks before you weld to frame.

    slugs


    slugs welded inside mini air tank


    10. Drill two holes in the mini air tank to house the two 1/8” NPT bungs. One bung will house the Schrader valve and the other will house the air fittings. Remember that you will need to place the Schrader valve in a location that’s easy to access since you’ll be adding air now and again.

    11. Weld in the 1/8” NPT bungs.

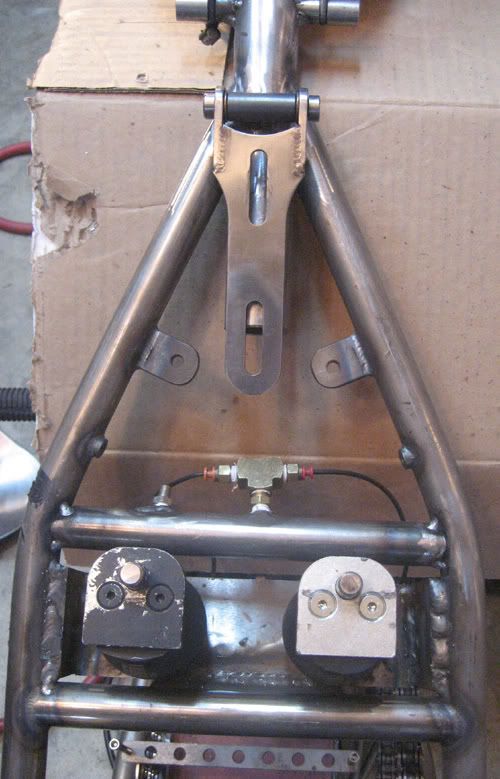
    12. Assemble the entire system on a bench and test for air leaks. Screw T fitting into air tank. Connect the air fittings to the T fitting. Connect air tubing to air fittings and air bladders. Screw Schrader valve into air tank. Fill the tank with air (your air bladders should inflate) and stick the system in a bucket of water.

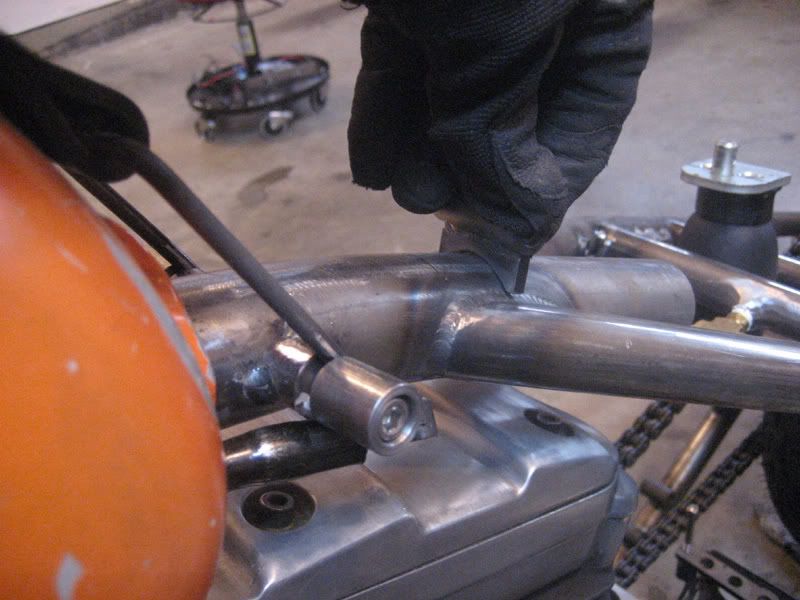
    13. Tack your air tank to frame.

    14. Add two side pieces to the bladder bracket. If you’re not sure about the exact height of the bracket, give yourself some extra metal.

    15. Put the seat pan on the hinge and rest the seat pan on the tops of the air bladders. Ensure proper seat angle.

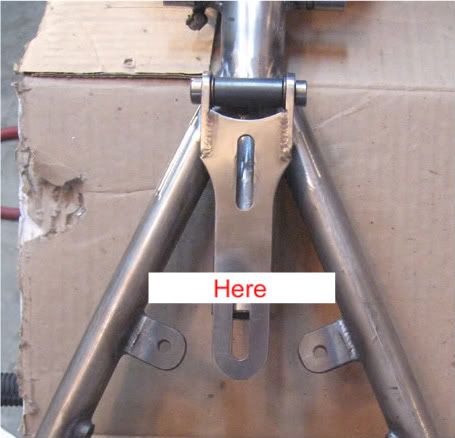
    16. Tack bracket to frame.


    17. Review seat hinge post placement (step #2).


    18. Tack seat hinge post to frame.


    19. Attach seat hinge to seat hinge post.
  • edward
    Senior Member
    • Aug 2009
    • 104

    #2

    20. Place seat pan on seat hinge. Ensure the top posts on the air bladders touch the back of the seat pan.

    21. Drill two holes in the seat pan


    22. Weld two bolts to seat pan


    23. Attach seat pan to seat hinge


    24. Mock up placement of seat posts (the two posts that connect your seat pan to the air bladders)

    25. Make two posts using the round bar.


    26. Tack seat posts to seat pan


    27. Attach air bladders to seat posts.

    28. Sit on your beloved air suspension seat and ensure proper placement.

    29. Weld everything up.

    30. Get your seat pan covered. I went to best guy on the planet (Christian at Xian Leather) and he treated me right.


    31. Ride!

    Comment

    • Clutch
      Senior Member
      • Oct 2009
      • 106

      #3
      Wow, that turned out awesome!

      Comment

      • 73Harley
        Member
        • Aug 2009
        • 54

        #4
        I just finished mine - I was going to use the compressor as I bought the complete kit but there was far too much to try and conceal so I dumped the compressor and have gone the manual pump route, which takes all of 2 secs to fill both bags and is far neater.

        BTW good work - one question though, have you made a hinge so that when your bags are fully defalted the bags drop down inline as obviously the angle is increased/decreased when the bags are at the highest and then lowest point? If so how did you get around this?

        Comment

        • jamesgs4
          Senior Member
          • Oct 2009
          • 1064

          #5
          that is rad! and btw thanks for tucking ur shirt in

          Comment

          • edward
            Senior Member
            • Aug 2009
            • 104

            #6
            Originally posted by 73Harley
            I just finished mine - I was going to use the compressor as I bought the complete kit but there was far too much to try and conceal so I dumped the compressor and have gone the manual pump route, which takes all of 2 secs to fill both bags and is far neater.

            BTW good work - one question though, have you made a hinge so that when your bags are fully defalted the bags drop down inline as obviously the angle is increased/decreased when the bags are at the highest and then lowest point? If so how did you get around this?

            Good question. If for some reason I lose all air the second nut (attached to the bolt on the seat) will hit the back bone.


            Yet another reason to go with a thick seat pan and thicker seat hinge.


            Comment

            • Markee
              Senior Member
              • Sep 2009
              • 263

              #7
              Excellent. Bike from what I can see turned out great

              Comment

              • Chuck
                Member
                • Aug 2009
                • 73

                #8
                very nice but too difficult for me !!! I only can bolt springs....I saw a custom bike with an air spring saddle suspension taken from a mountain bike (like a Fox air spring).

                Comment

                • 73Harley
                  Member
                  • Aug 2009
                  • 54

                  #9
                  yeah I have a Fox Float R on my other bike.

                  Comment

                  • mjasen10
                    Senior Member
                    • Aug 2009
                    • 583

                    #10
                    great set up and tech write up man. def a good how too!

                    Comment

                    • lobstermobster
                      Senior Member
                      • Aug 2009
                      • 518

                      #11
                      Originally posted by 73Harley
                      yeah I have a Fox Float R on my other bike.
                      It would be cool to see this set up too.

                      and Edward.. how much did your HD air bag setup end up costing you? not including the seat pan and getting it covered.

                      Comment

                      • JPWilliams
                        Senior Member
                        • Nov 2009
                        • 321

                        #12
                        Very nice. Where did you score the HD Police bags and how did it set you back, if that's not too rude to ask. The set-up from custom chrome or somebody was like $1500 bucks and figured a guy could take all of this BT stuff and stuff into soft tail frame for that much.

                        Comment

                        • edward
                          Senior Member
                          • Aug 2009
                          • 104

                          #13
                          i probably have a few bags left over. i'll check.

                          other info:
                          $179 for the bag on ebay.


                          same basic bag at mcmaster carr $42
                          McMaster-Carr is the complete source for your plant with over 595,000 products. 98% of products ordered ship from stock and deliver same or next day.


                          $328 from the makers (justified defiance) of the most stinky helmet on earth

                          http://cgi.ebay.com/ebaymotors/Chopp...item53dc44449b


                          shop around

                          Comment

                          • 73Harley
                            Member
                            • Aug 2009
                            • 54

                            #14
                            Originally posted by lobstermobster
                            It would be cool to see this set up too.

                            and Edward.. how much did your HD air bag setup end up costing you? not including the seat pan and getting it covered.
                            here's the fox float on my Enfield.

                            Comment

                            • RK1962
                              Member
                              • Nov 2009
                              • 52

                              #15
                              That seat looks great. Bet it rides well.

                              Comment

                              300 mobile ad bottom forum

                              Collapse
                              Working...
                              ;