TECH: Make an affordable leather seat that looks pro!

Collapse

Desktop Ad Forum Top

Collapse

Mobile ad top forum

Collapse
X
 
  • Time
  • Show
Clear All
new posts
  • tobiism
    Senior Member
    • Aug 2009
    • 1252

    TECH: Make an affordable leather seat that looks pro!

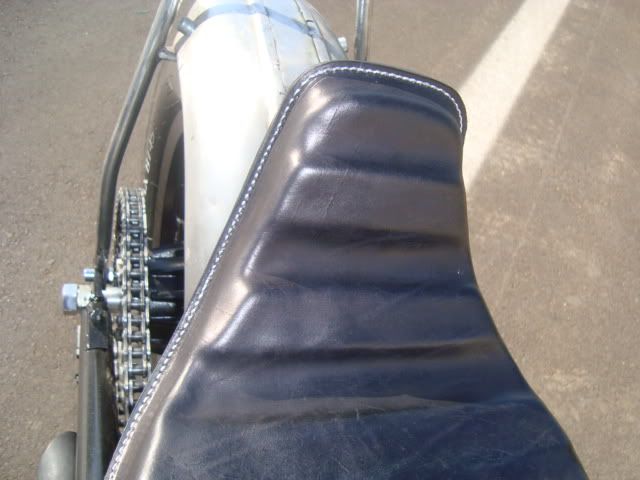
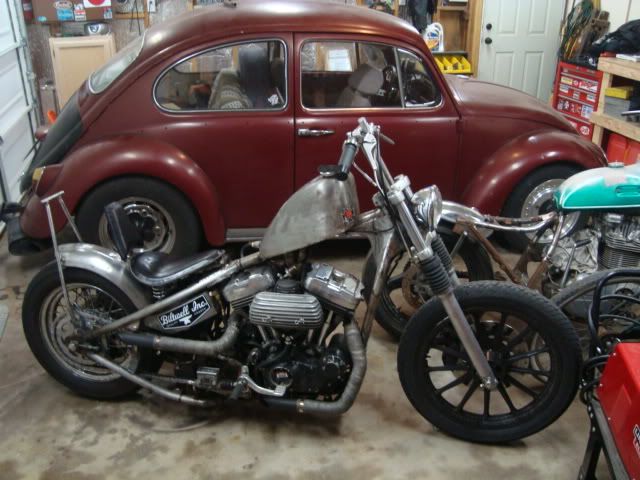
    If you've ever wanted to make your own seat but think you can't, you're dead fucking wrong. You don't even have to know how to sew! I found an old-world leather shoe craftsman in my area and he does awesome work. He runs all of my seats through his industrial sewing machines for $20-35 bucks, depending on the size.
    The leather I get at the local Tandy Leather, usually for around $35. The dye is about $8 and the glue is about $10. The foam is whatever you have available, but I like old pool floaties, yoga and camping mats from Walmart for $10.

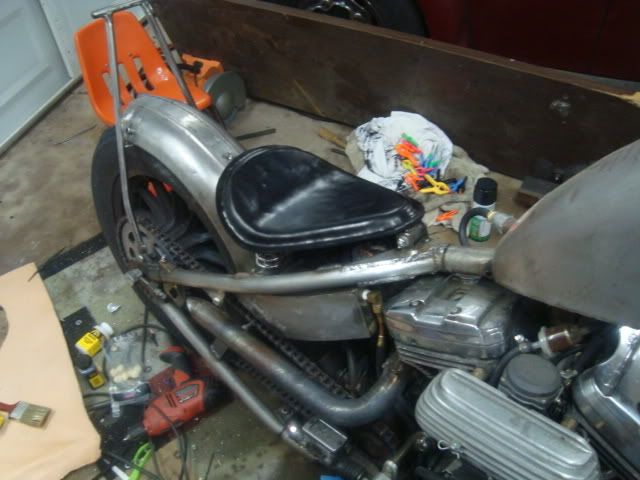
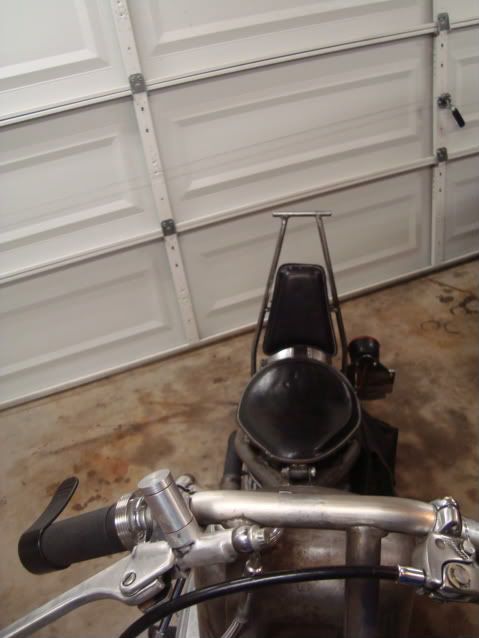
    First thing is make your pan, I usually use 10-11 guage sheet metal for sprung seats, and now prefer fiberglass for rigid seats.
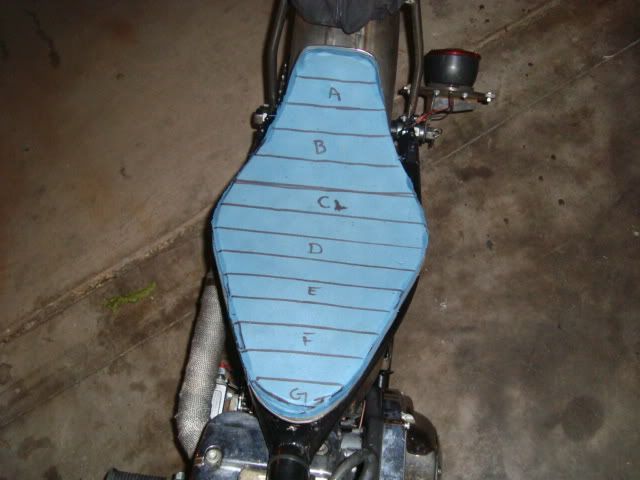
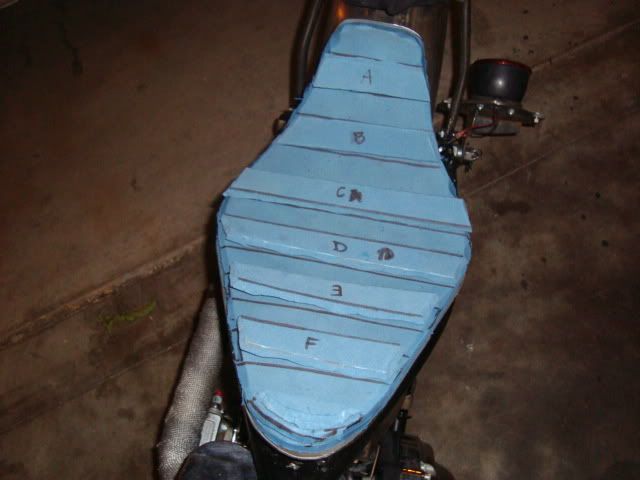
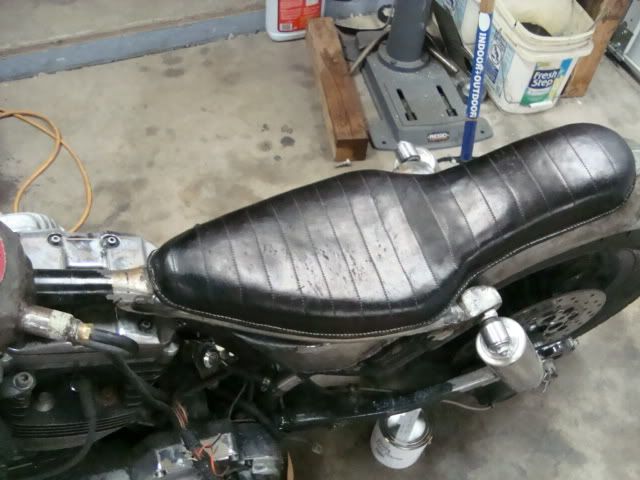
    Lay out your pan and cover it with foam. Shape it how you want. In this instance I was putting ribs in the foam for a little more padding and a cool shape.

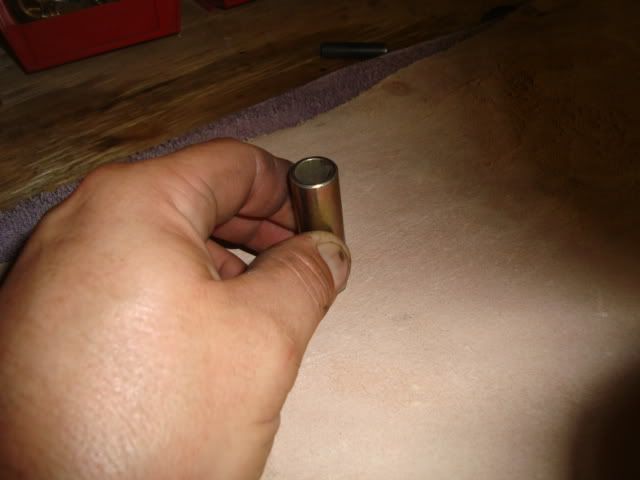
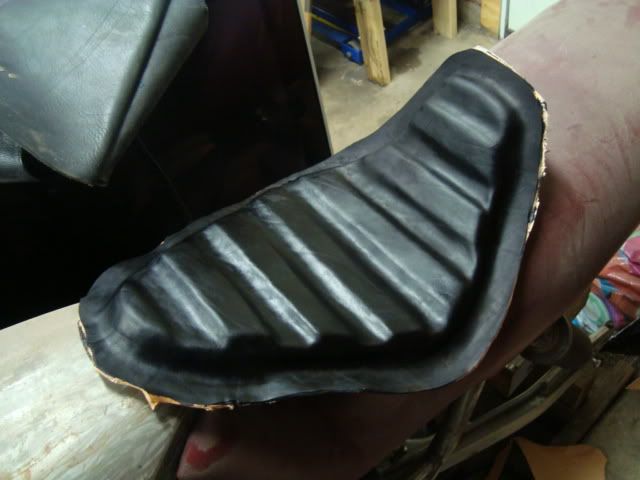
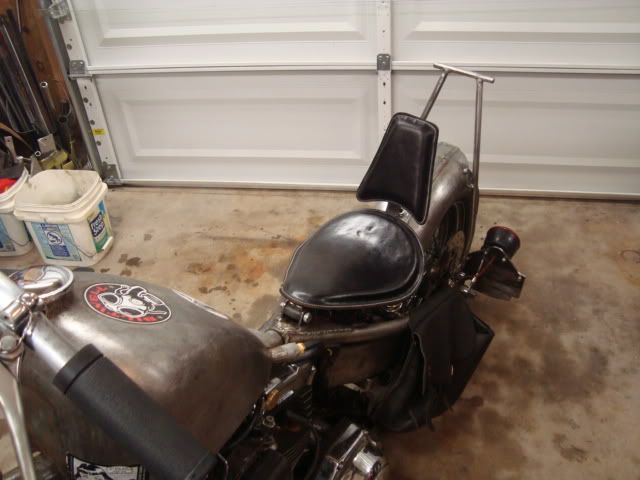
    Then cut enough leather to cover the bottom of the pan. Push the leather against your hinge and spring studs to know where to cut them out. Then use a punch to cut the holes for the studs to poke through


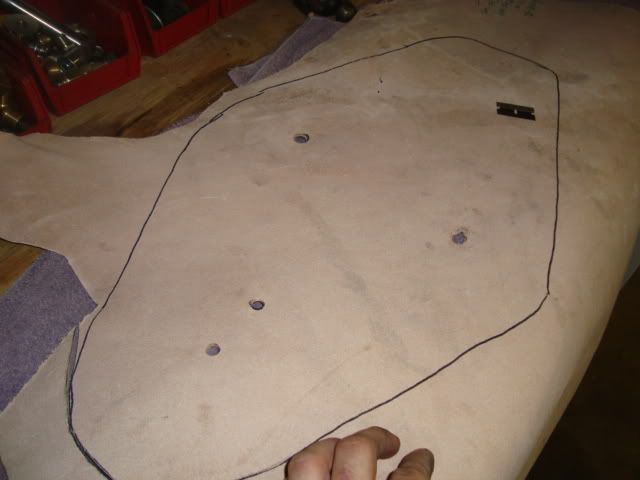
    Cut the leather for the bottom of the pan out, about 1" wider than the seat pan.
    Glue that leather to the bottom of the seat pan.

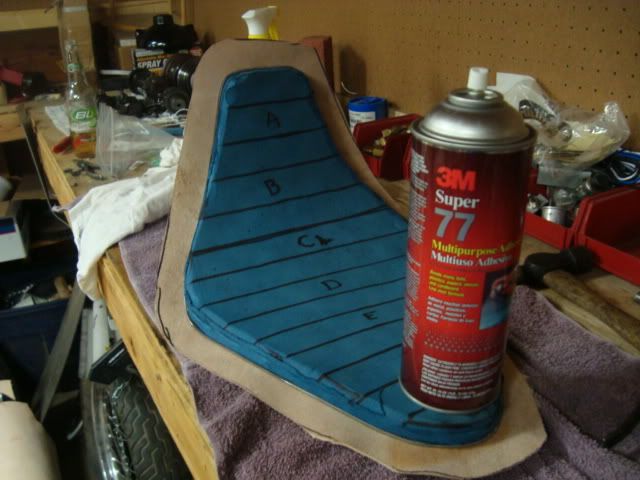
    This Super 77 glue wasn't as effective, because it will seperate after a little bit in hot environments. Contact cement does work well however.
  • tobiism
    Senior Member
    • Aug 2009
    • 1252

    #2
    This shot shows the extra strips of foam glued in place

    Comment

    • tobiism
      Senior Member
      • Aug 2009
      • 1252

      #3
      Okay, here comes the hard part. You need to mold the top piece of leather to the shape of the seat. I "case"(wet) the leather under warm to hot water. Even though it is wet, you can still apply adhesive to the underside of the leather. Apply glue to the center of the leather, and the center of the top of the seat pan.
      Push the top of the leather into place and start molding and pushing the leather into place all around the seat pan.

      Once the leather is fully molded into place you can apply adhesive to the inside of the flange area all around the seat. Clamp it together and let it dry.


      Once it is completely dry, I like to dye it before the stitching. I like the look of the white stitching against the black leather. Rub the leather into place, let it dry for a few minutes and then buff off the remainder. Do that like 5 or 6 times.

      Comment

      • tobiism
        Senior Member
        • Aug 2009
        • 1252

        #4
        Then have your favorite shoe repair guy stitch it up!

        Comment

        • imtheslime
          Senior Member
          • Aug 2009
          • 1206

          #5
          Perfect timing. Thanks for your post, just answered a question I had. Looks good. You have photos of the other one you did?

          Comment

          • tobiism
            Senior Member
            • Aug 2009
            • 1252

            #6
            There have been a few-
            My latest

            My first

            with P-pad I made

            And with a backrest I made cuz I got sick of sliding off the back

            Comment

            • earz
              Senior Member
              • Aug 2009
              • 286

              #7
              F'n awesome. What do you clamp the two pieces of leather with to let it dry?

              Comment

              • Metalismo
                Senior Member
                • Aug 2009
                • 117

                #8
                Damn! Those look kick ass! I used to make those leather wallets and stuff from Tandy when I was in the 7th grade. I still have a leather visor from those days! Hummm...now you have me thinking.

                Comment

                • earz
                  Senior Member
                  • Aug 2009
                  • 286

                  #9
                  any other pics of that backrest? That's a good idea for those long hauls. Is it removable or permanent.

                  Comment

                  • tobiism
                    Senior Member
                    • Aug 2009
                    • 1252

                    #10
                    that backrest is removable It screws into the underside of the seat. Sorry I don't have any more close up pics of it.

                    Comment

                    • tobiism
                      Senior Member
                      • Aug 2009
                      • 1252

                      #11
                      Originally posted by earz
                      F'n awesome. What do you clamp the two pieces of leather with to let it dry?
                      I bought a packet of spring loaded clamps from Harbor Freight. There is something like 25 in a tube for $3 or so. Those and some rulers laid on either side of the flange work well.

                      Comment

                      • YcMatt
                        Member
                        • Aug 2009
                        • 47

                        #12
                        what kind of leather did you use? ive wanted to do this myself but wasnt sure what leather to use.

                        Comment

                        • earz
                          Senior Member
                          • Aug 2009
                          • 286

                          #13
                          I think he used vegetable tanned leather, but I'm not sure. I was talking to a guy today who recommended using upholstery leather instead of tooling leather because the tooling leather doesn't stretch as well. But then again you can't carve or imprint or decorate the upholstery leather.

                          Comment

                          • tobiism
                            Senior Member
                            • Aug 2009
                            • 1252

                            #14
                            Originally posted by earz
                            I think he used vegetable tanned leather, but I'm not sure. I was talking to a guy today who recommended using upholstery leather instead of tooling leather because the tooling leather doesn't stretch as well. But then again you can't carve or imprint or decorate the upholstery leather.

                            I used vegetable tanned leather in 4/5oz and 6/7 oz. Both sizes can be tooled and also stretch very easily.

                            Comment

                            • redletter
                              Junior Member
                              • Sep 2009
                              • 4

                              #15
                              Good job man, I have been making some seats also, and my sewing machine is out of commission. Good idea about the shoe repair man.

                              Comment

                              300 mobile ad bottom forum

                              Collapse
                              Working...
                              ;