
 Tweet
Tweet
Man, you're worse than a slutty virgin on prom night with these pics.... Hurry up and put out already!!!
-
-
I wish I could show her off, only time and $$$$ are holding me back at this stage.
Cheers
Steve
Comment
-
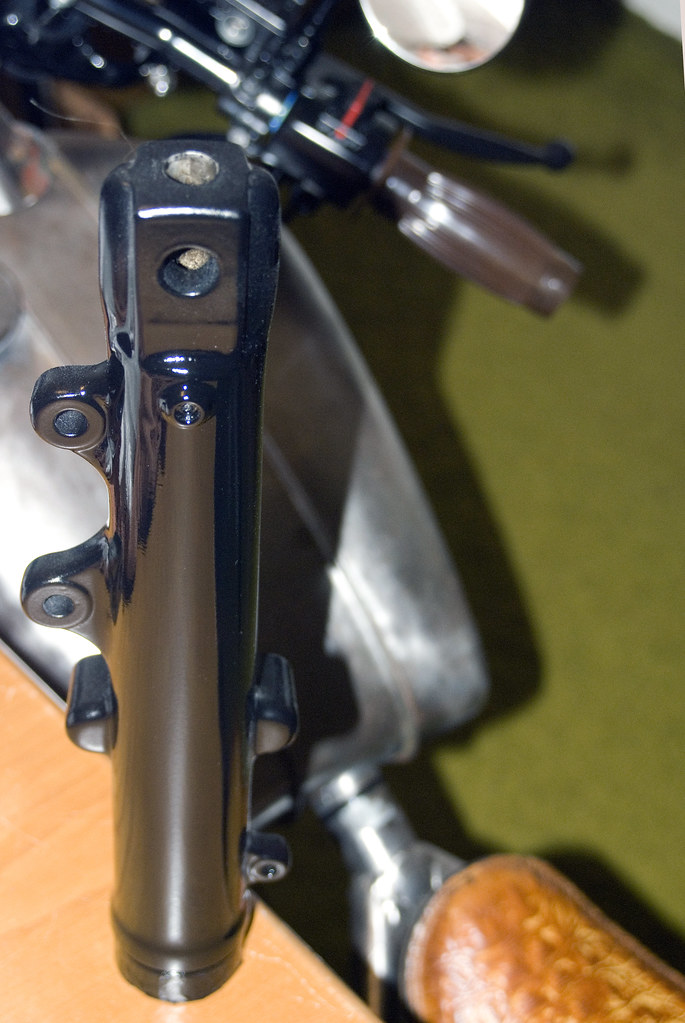
All Forked UP! - Sunday, 13 November 2011
After a lot of effort, I've finally got the lower fork tubes very close to a finish that I am happy with.
It took close to six attempts including a failed powder coating effort to get them to where they are now.
Unfortunately the original plan of powder coating them gloss black failed due to an out-gassing issue that created a significant amount of bubbling upon the finish. After having them powder coated by a friend of a friend, it was all too messy to get my back up over the situation, so I attempted to fix them myself.
I decided to simply sand back the powder coat with 600 grit wet and dry, to get it back to the blemish free surface that I'd originally had.
I utilsed the VHT roll bar spray paint and subsequently covered it as directed. I did however, manage to stuff up my hard work (more out gassing) after deciding to bake them in the oven to try to obtain a better gloss result.
Needless to say, after much trial and error, I now know the correct recipe to getting the quality of finish that I require. This process also includes a liberal coating of clear coat.
All that's left now is to remove any tape, install fork seals and re-assemble the front end.
DSC_0606

DSC_0610
Cheers
Steve
Last edited by inmotionphotog; 01-03-2012, 3:28 AM.Comment
-
So did you end up putting them in the oven a second time Steve or did you paint them, wait a week and then apply the clear???
They turned out really well mate.Comment
-
G'day loco59, sorry about the slow reply and thanks for the feedback.
Yes, I did throw them into the oven at home at a very low temperature (painted with spray can).
Unfortunately, I'm not patient enough to wait a week between colour and clear, which I suspect would only help the process and reduce the risk of screw ups and burnt thumbs!
Cheers
Steve
Comment
-
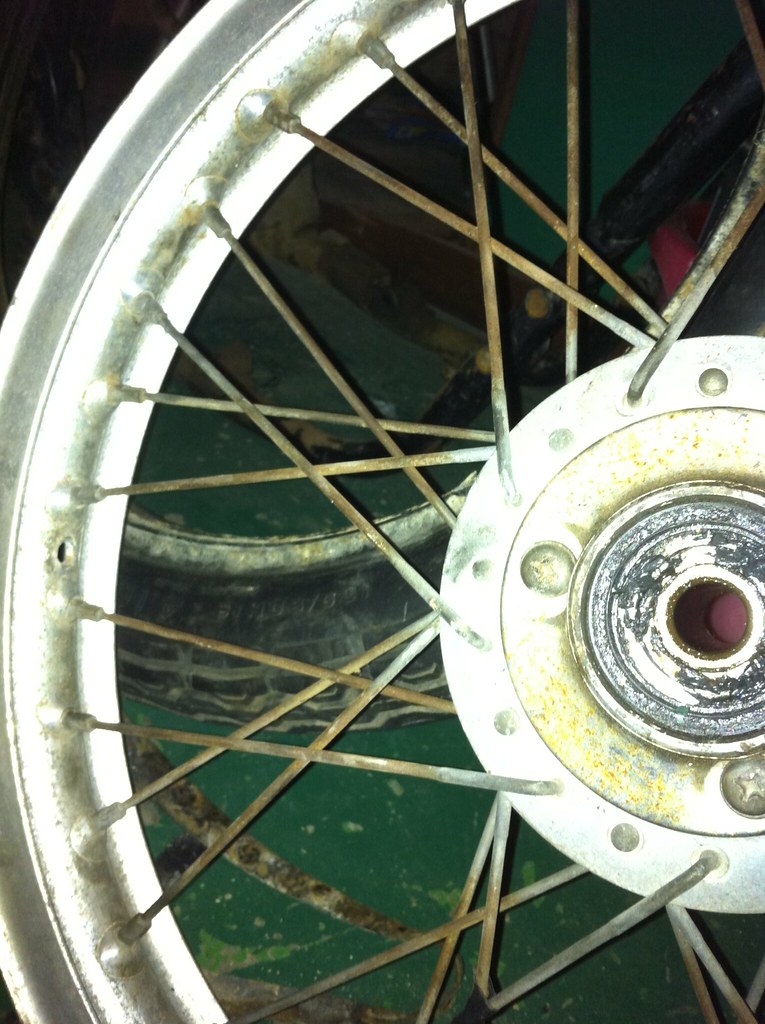
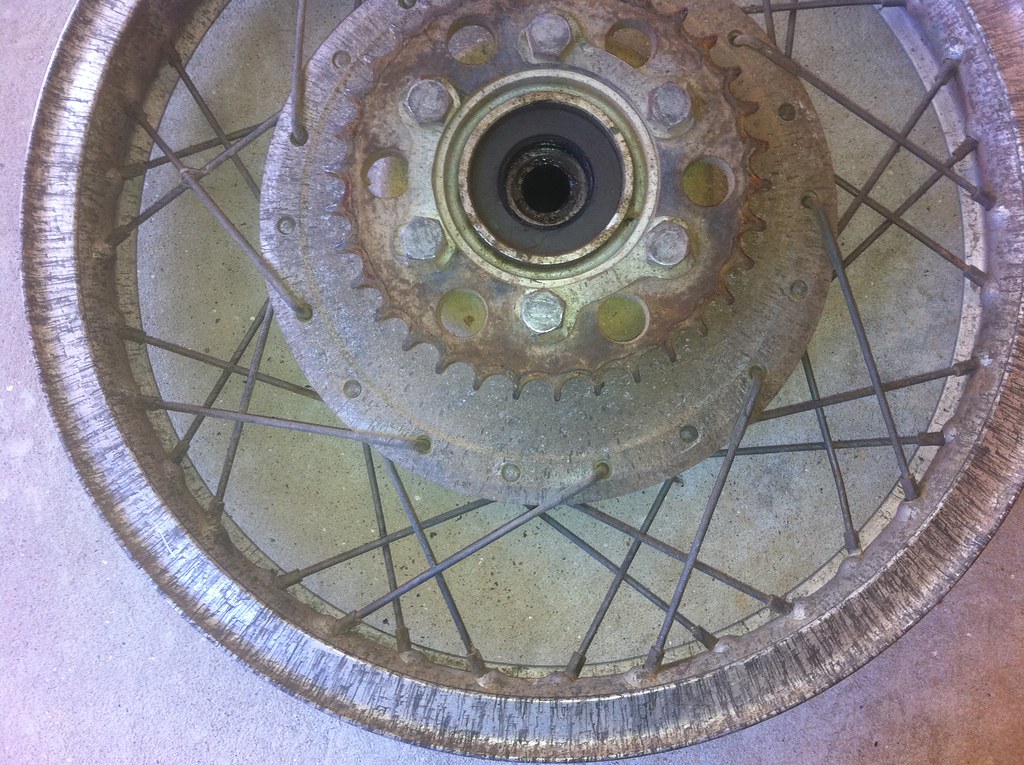
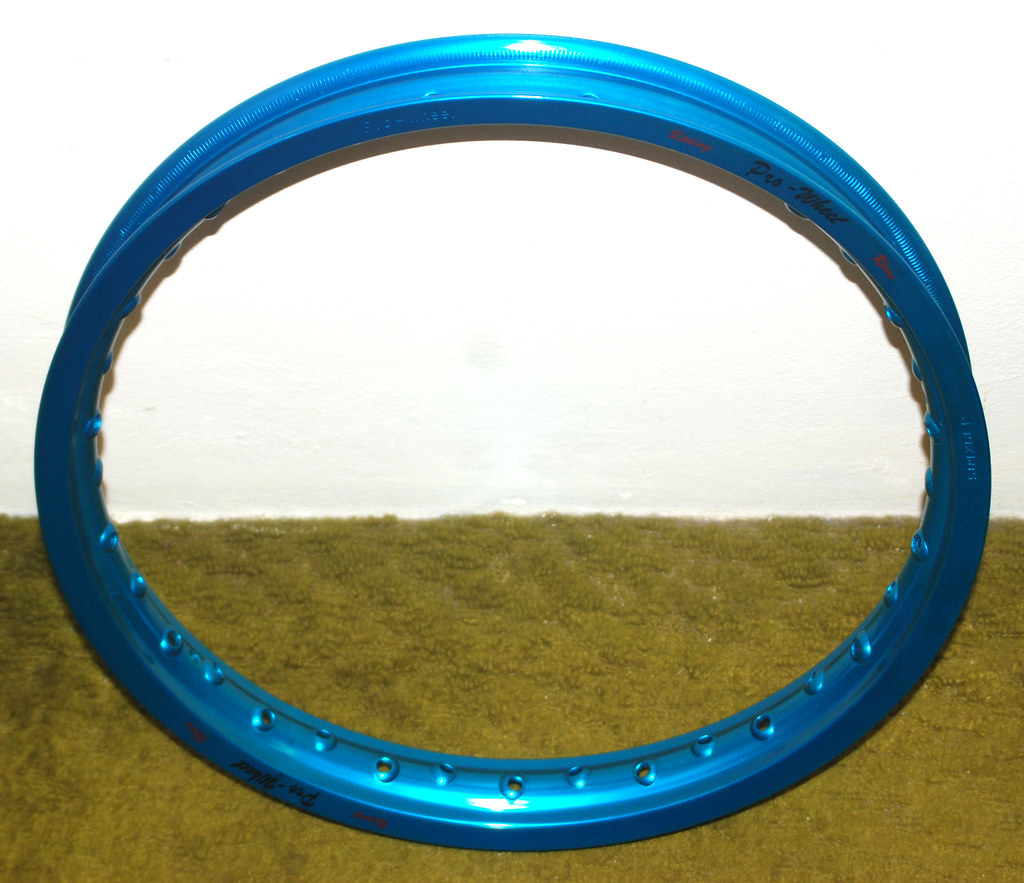
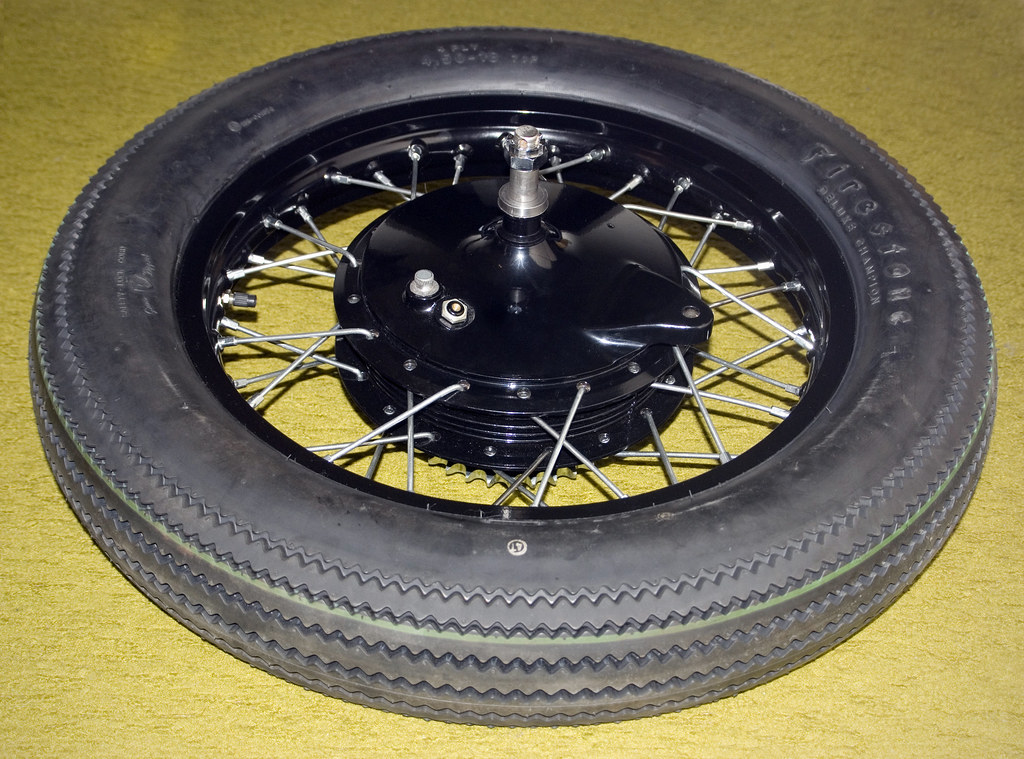
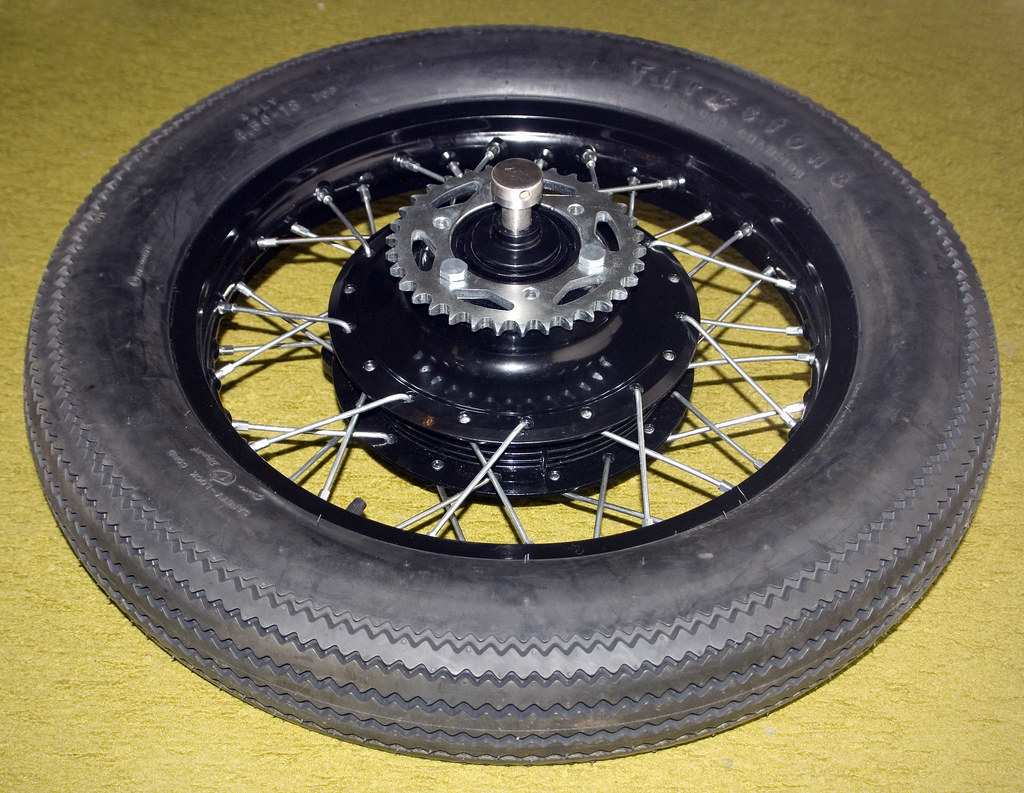
Wheels before and after - Thursday, 24 November 2011
Here's a handful of shots showing the progression of the wheels from rusty and grimy to freshly rebuilt and powder-coated.
I laced the rims myself taking advantage of the Fong Bros fantastic tutorial, with the truing and tyre mounting taking place tomorrow via a pro shop.
I also plan on getting the axles, nuts, rear sprocket and bolts black nickel plated.
IMG_0148
IMG_0690
DSC_0515
DSC_0615
DSC_0622
DSC_0624
Cheers
Steve
Last edited by inmotionphotog; 01-03-2012, 3:29 AM.Comment
-
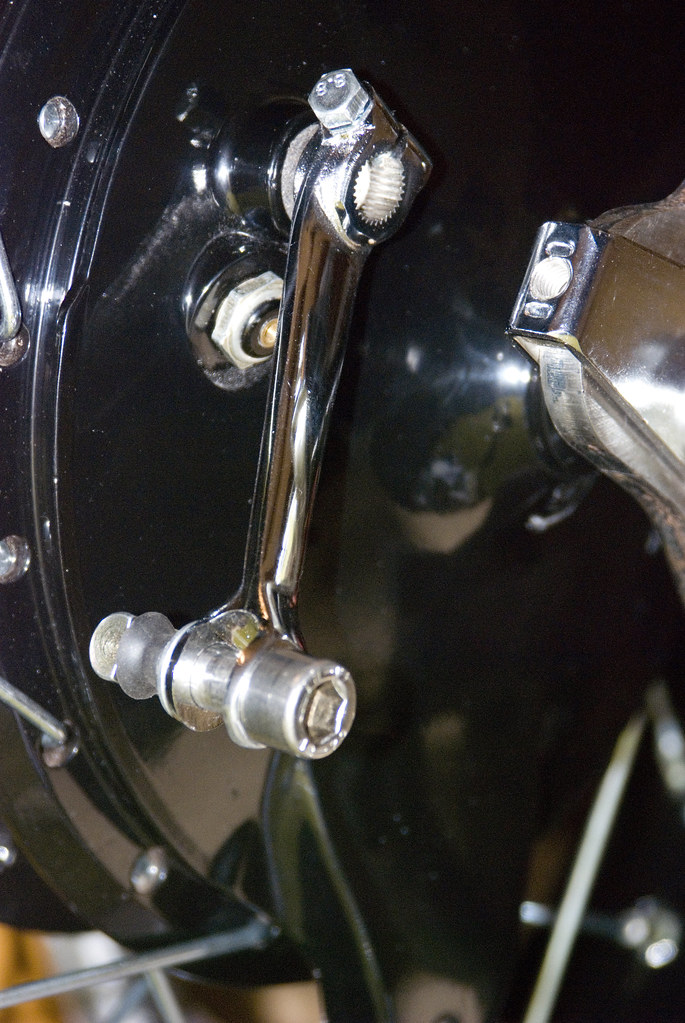
Saturday, 26 November 2011 - Braking news!
I had originally planned on using the TC Bros forward controls, brake pivot and linkage kit for my build, however have decided to stick to mid mounts for now.
I did however decide to utilise the linkage kit for the bike.
This struck it's own problem, especially considering how I was going to attach the rod end to the brake arm upon the rear hub.
I think I've come up with a pretty elegant solution that will work well and look good.
I simply found a shouldered bolt (Allan head) that was the correct diameter to fit within the lever. I had a thread machined into the bolt, and there you have it!
DSC_0636
DSC_0629
DSC_0642
Cheers
Steve
Last edited by inmotionphotog; 01-03-2012, 3:30 AM.Comment
-
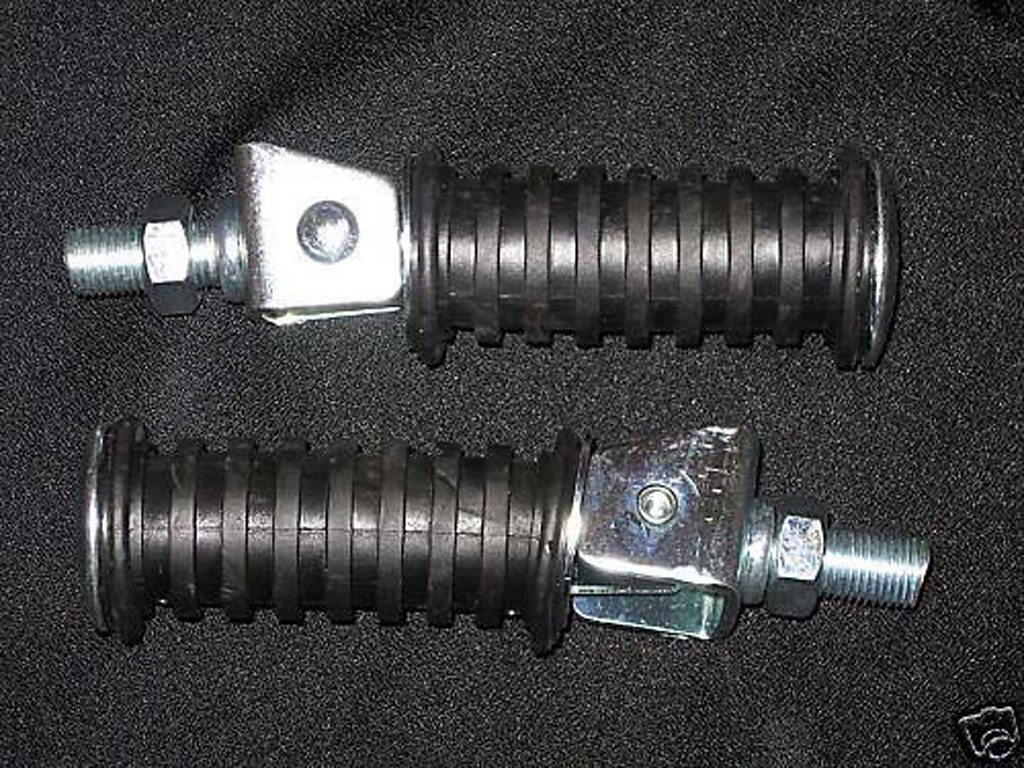
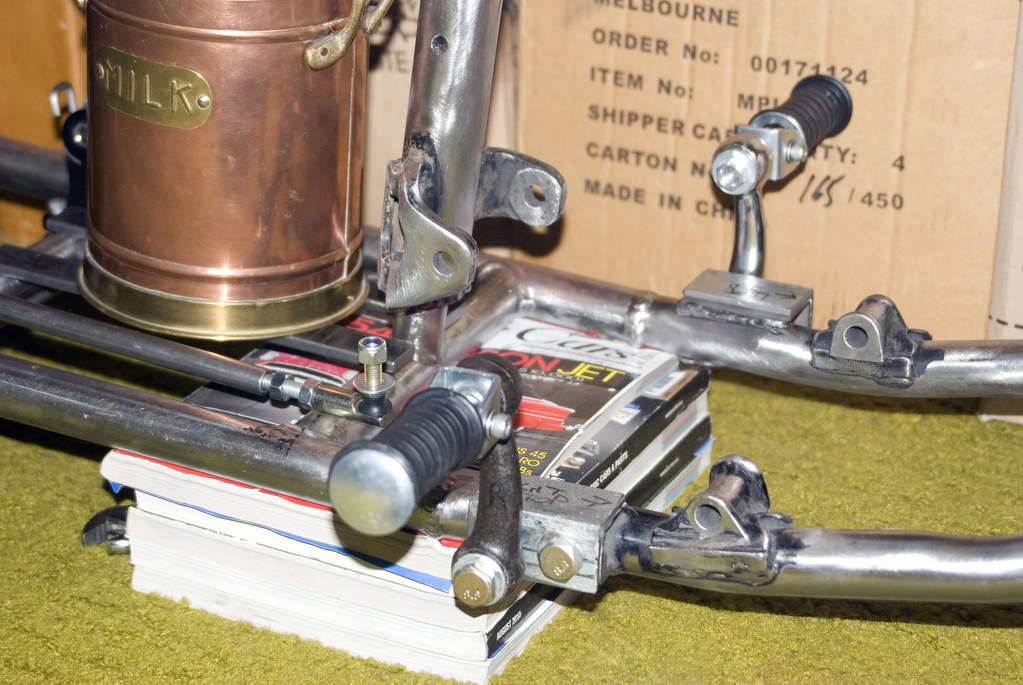
Monday, 28 November 2011 - Mids Mounted (well kind of)!
I finally got around to mocking up all of the elements to my version of the Mulligan Machine Mid Mount solution.
I picked up a set of folding pegs from Steadfast Cycles that closely match the factory rubber upon the kicker and clutch pedals.
Admittedly I wasn't comfortable with the strength of the pegs, so I set about making them durable enough to handle my frame. The original design was pretty much sheet steel folded into a tube. I located some stainless solid round bar that I managed to get into the ID of the tubular peg. I drilled out a larger diameter mounting bolt, also in stainless to ensure that they won't self destruct when if I put too much pressure on them.
I'm going to get the arms and mounting bracket gloss black powder-coated, whilst the all of the remaining metal within the pegs and bolts will be black nickel plated.
I loosely mocked everything up prior to getting them welded together once I double check there exact positions.
Microsoft Word - Document1
DSC_0681
DSC_0682
DSC_0683
Cheers
Steve
Last edited by inmotionphotog; 01-03-2012, 3:31 AM.Comment
-
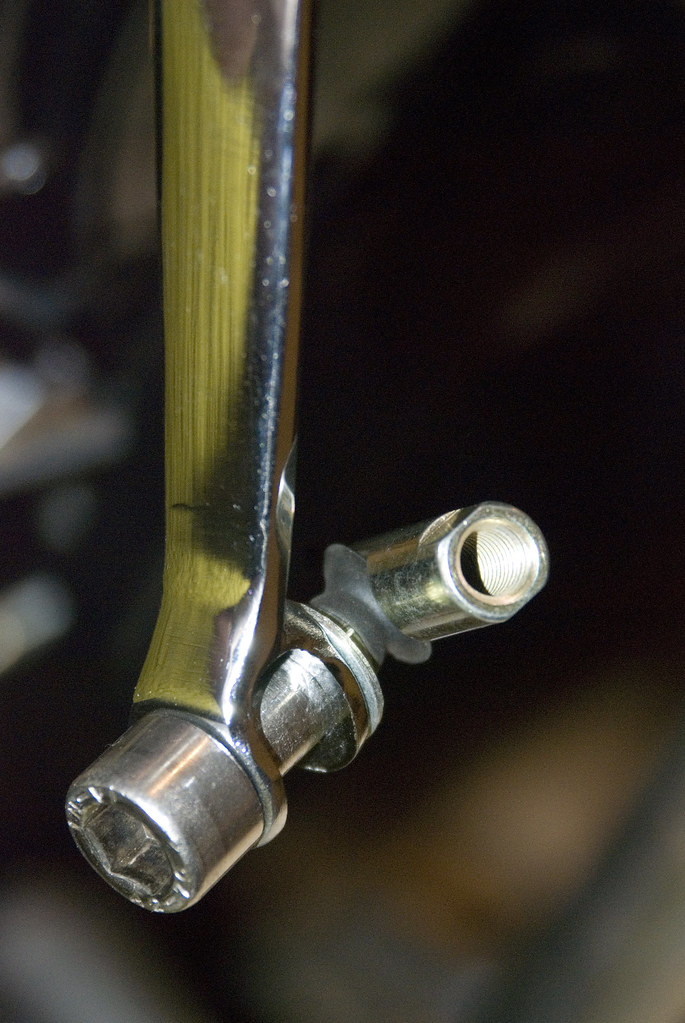
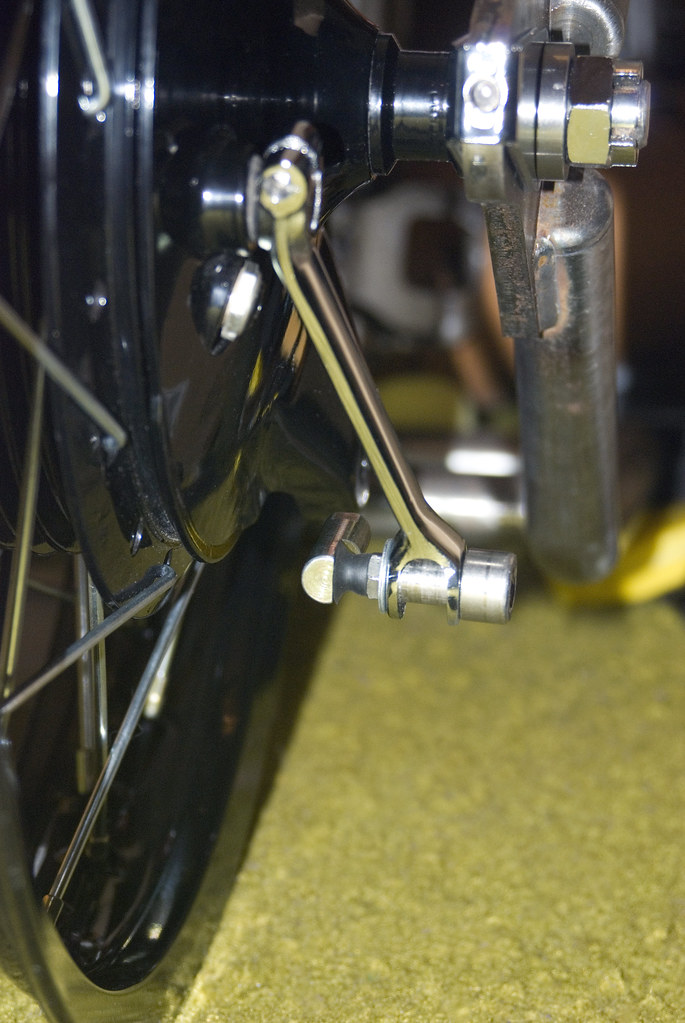
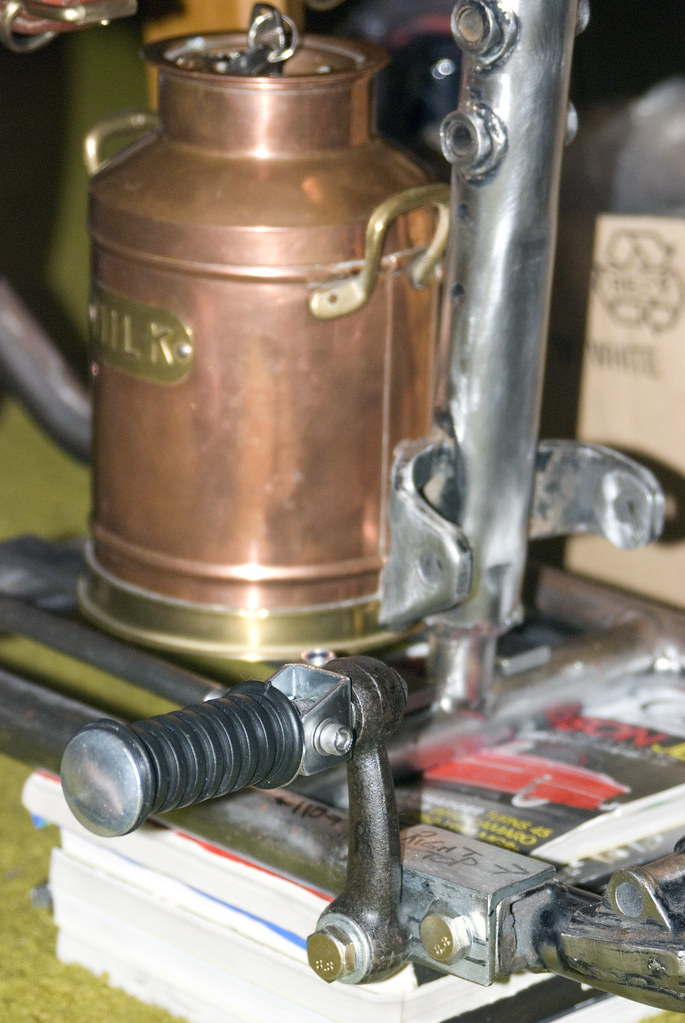
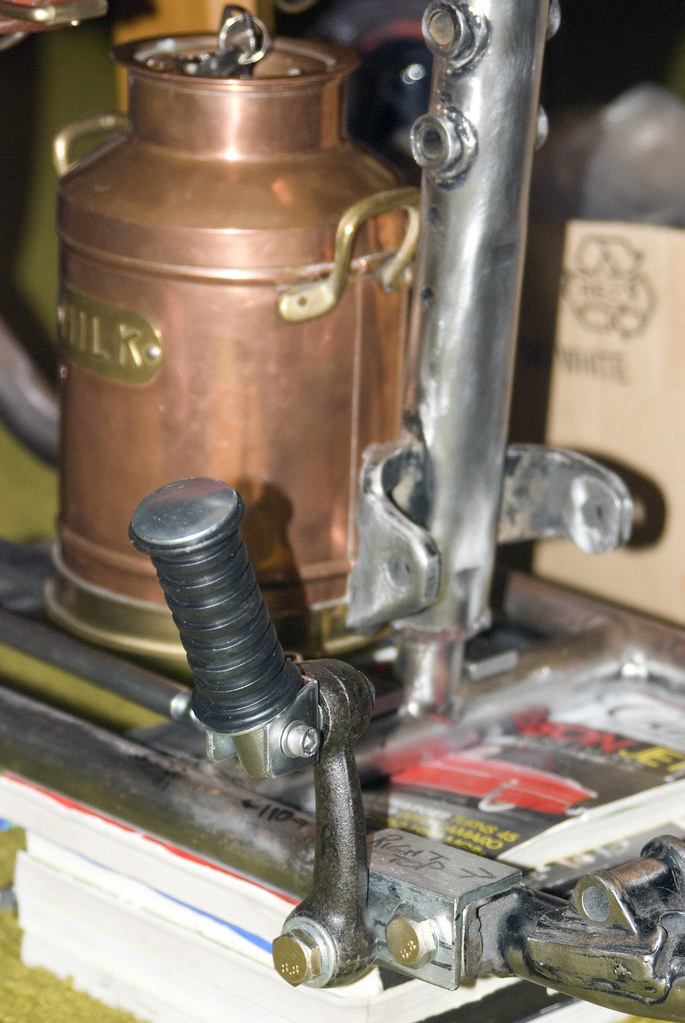
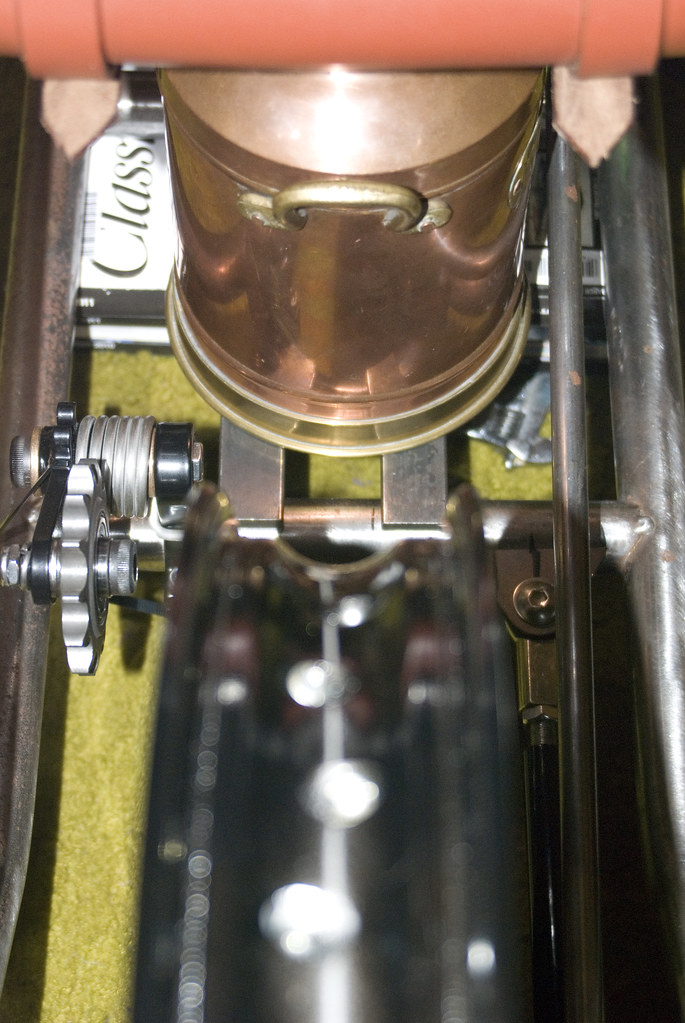
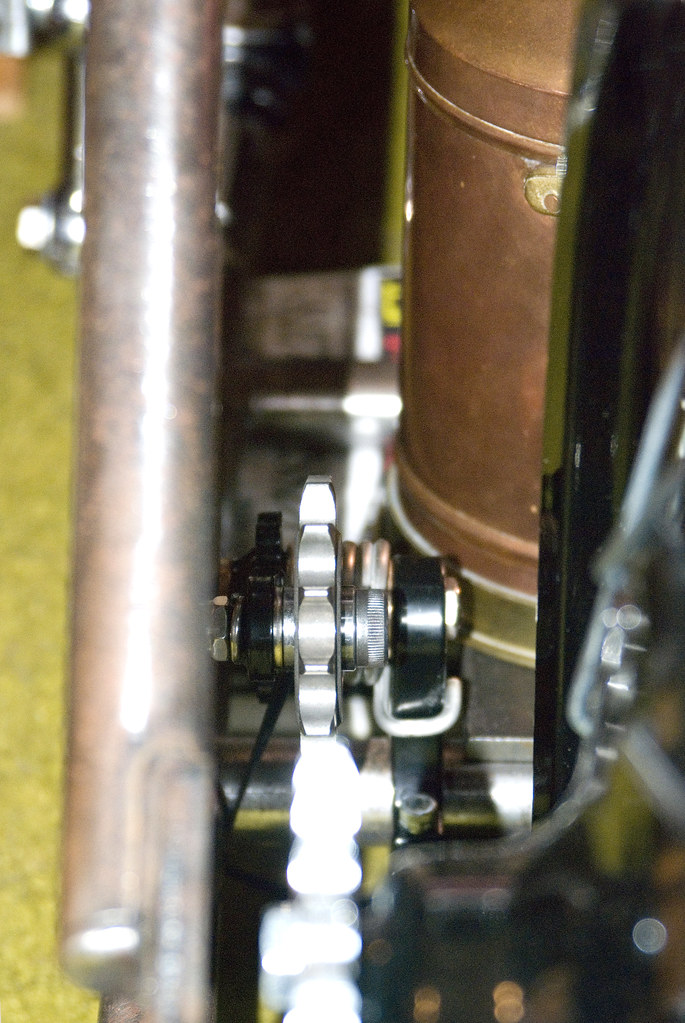
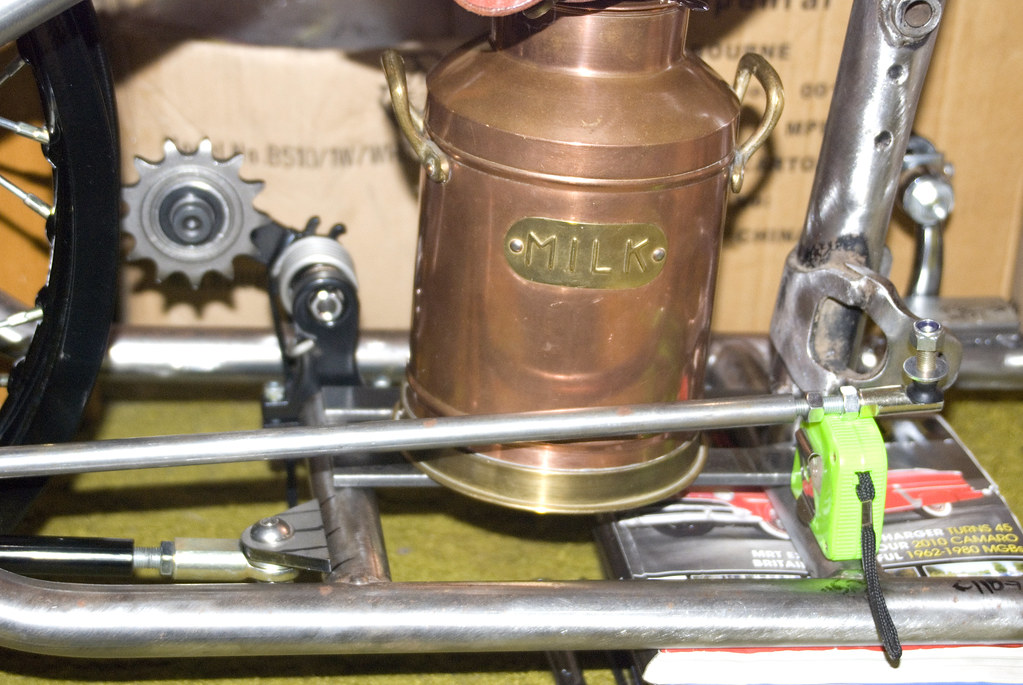
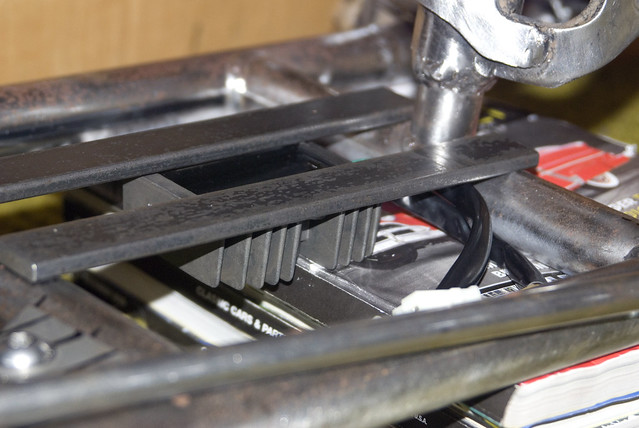
Monday, 28 November 2011 - Tight squeeze!
One of the main features of my bike is going to be the copper and brass milk urn that will double up as a battery, ignition switch and relay housing.
I was concerned that the diameter of the container would potentially pose problems with the chain and brake linkage.
DSC_0698
I mounted up the rear wheel including rear sprocket and the Monster Craftsmen bolt on chain tensioner to check the clearances should I mount the urn straight down the guts of the bike. Thankfully it appears that the chain will just clear the urn.
DSC_0692
I also had to make certain that the urn didn't interfere with the brake linkage that I am running. Again, there was just enough clearance which is what I had bargained on.
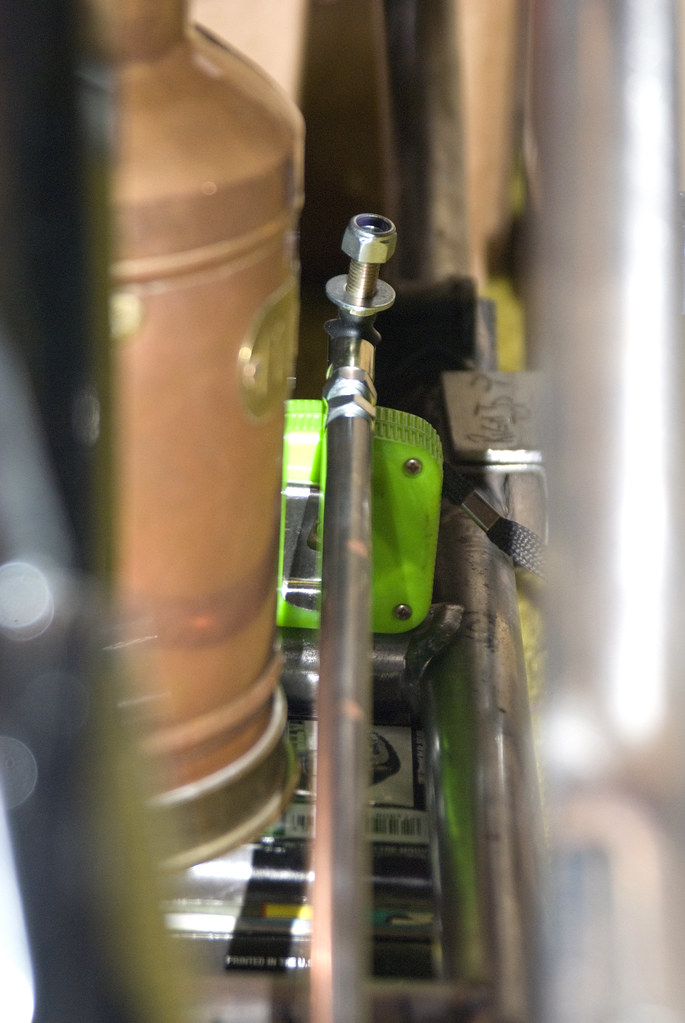
DSC_0695
The linkage rod will be sitting on a steeper angle than shown, which has left me pondering how to not screw up the overall theme of the copper urn. What I'll do is grab some copper tubing to act as a sleeve over the threaded ro in place of the steel tube that I currently have. I suspect it shouldn't look too bad.
DSC_0699
I'm also likely to get some copper tube for the brake stay too.
Today also gave me the chance to mark up the location of the Hugh's Handbuilt regulator that I got with my PMA kit. I propose to leave it outside of the urn, just under it to allow for air flow. In this location it is protected by the chassis rail, as well as being in a position that the wiring will be hidden very well.
DSC_0701
Cheers
Steve
Last edited by inmotionphotog; 01-03-2012, 3:32 AM.Comment
-
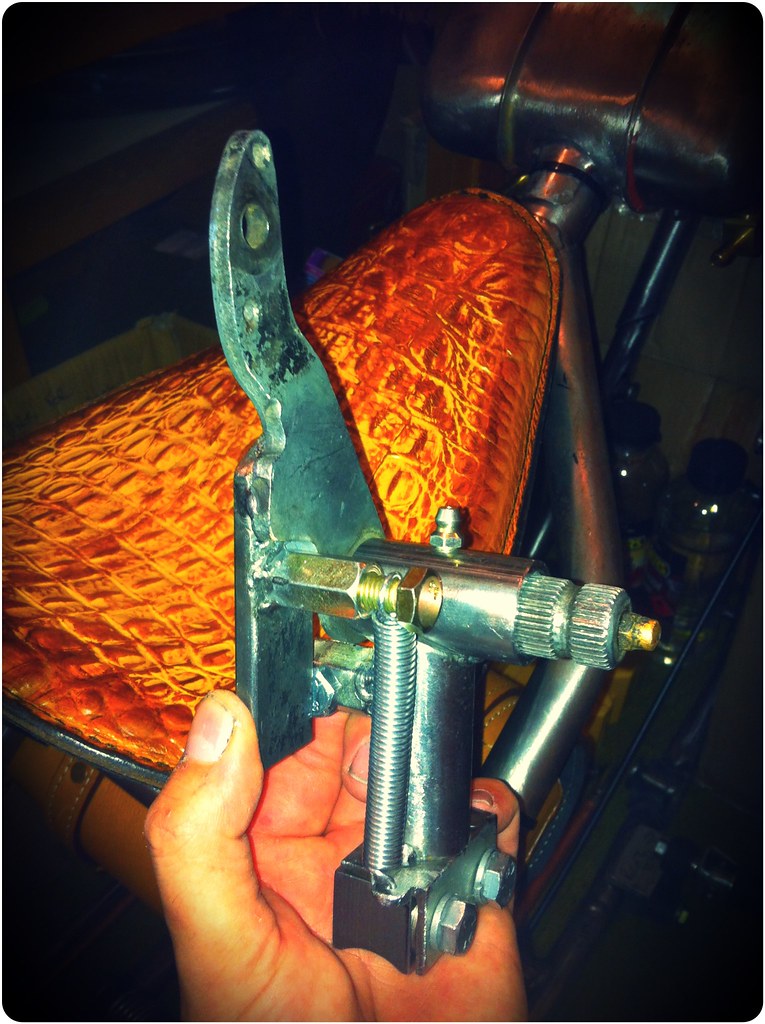
Saturday, 03 December 2011 - Brake pivot assembly
Yesterday I took the plunge and taught myself basic welding skills. I purchased a cheap as chips arc welder for the purposes of tacking together certain pieces for the experts to finish of properly.
One such part was a brake pivot that is a hybrid of sorts, containing bits from Hugh's Handbuilt, TC Bros and some of my own concepts.
As I am running the Mulligan Machine mid mount set-up, I was determined to keep the pedal in the orientation as per the original XS650. This meant that I needed to keep the relationship between the foot peg and pedal as close as possible. I used these reference points to determine the height of the assembly and the correct position that it was to be mounted upon the chassis.
I didn't like the idea of mounting an extra tab to the chassis for the return spring, as it was going to spoil the appearance of the milk urn, and most importantly make the articulation of the spring when the brake pedal was pressed down a little clumsy.
My solution was simple, I used the mounting block that came with the TC Bros brake pivot kit as a starting point. I knocked up some angle with a spring mount hole, and tacked together the Hugh's Handbuilt kit atop it.
Since my linkage kit will be a fixed rod length, it left me wanting a brake shoe solution once wear occurs. I welded on an extra arm upon the pivot bracket and an adjustment bolt. I simply screw out the bolt should the shoes show signs of wear and rotate the brake pedal a tooth or two to keep it in the correct position.
I'm also going to change the upper spring bolt for a shouldered one to allow the spring to have free rotational movement.
Another significant reason I chose to use the mounting block, was that I now have the ability to swap over to the TC Bros pivot assembly that is suitable for their forward control set-up. I also managed to come up with an integrated return spring solution for this pivot too. It means that I can swap over to a full forward control system in moments!
photo
Cheers
Steve
Last edited by inmotionphotog; 01-03-2012, 3:33 AM.Comment
-
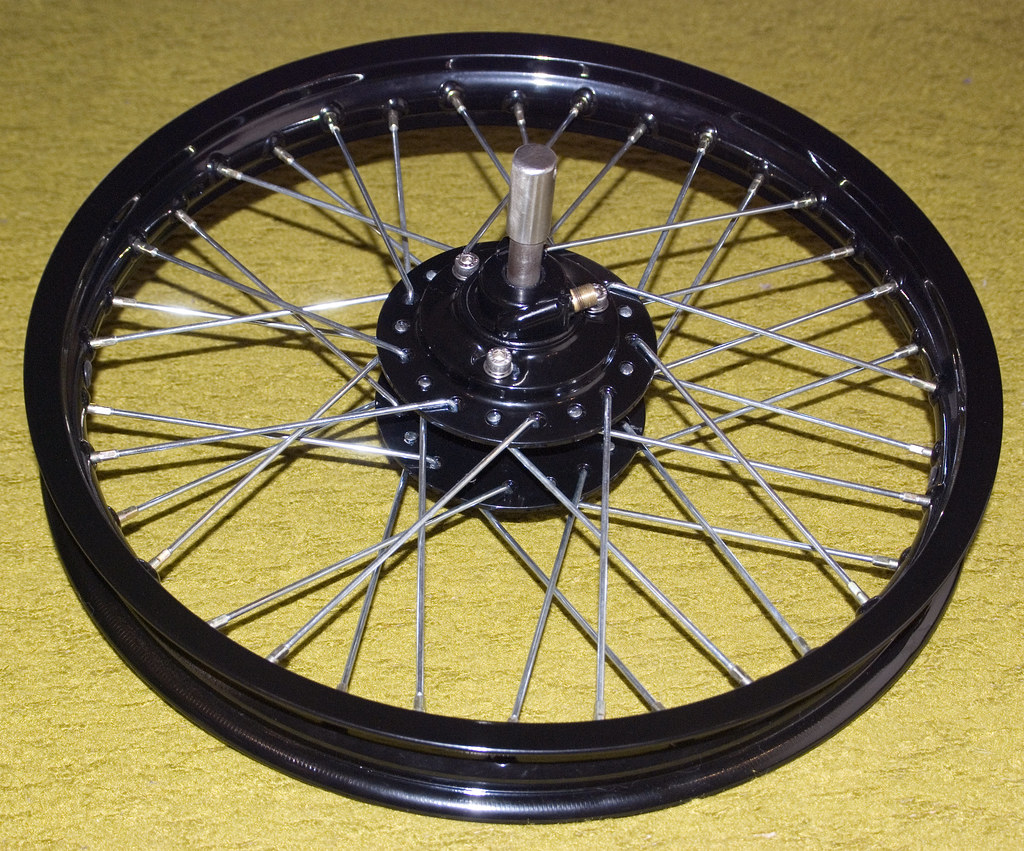
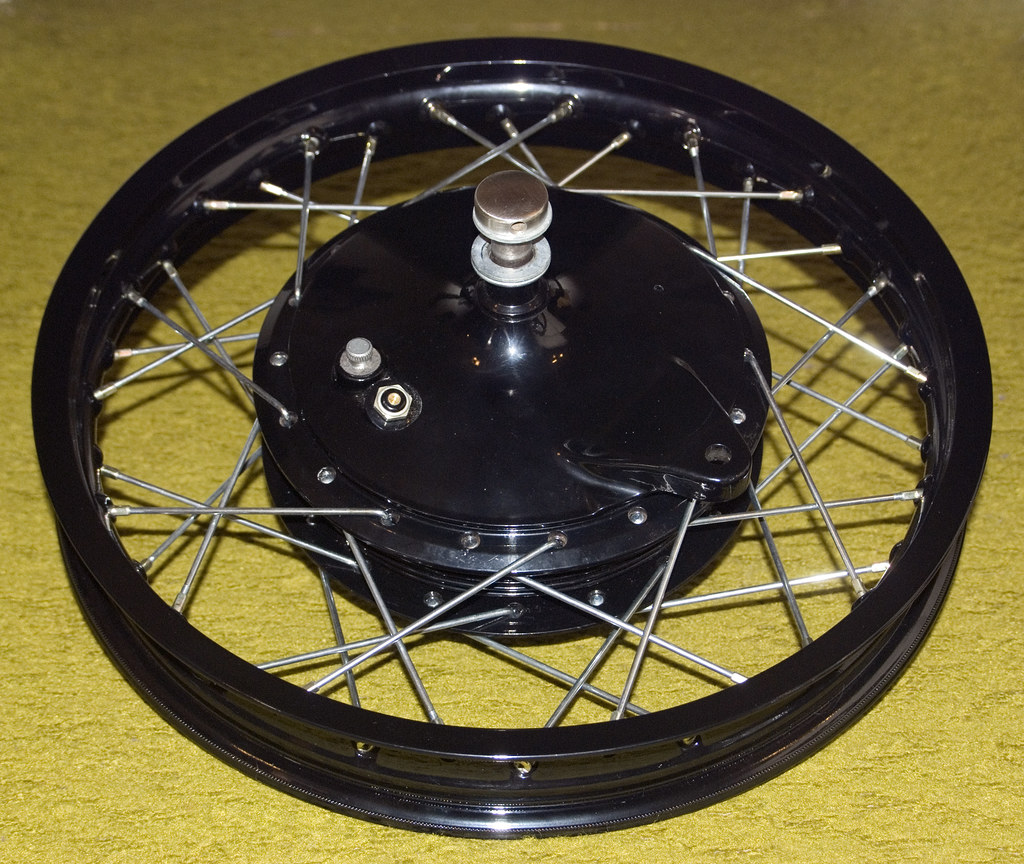
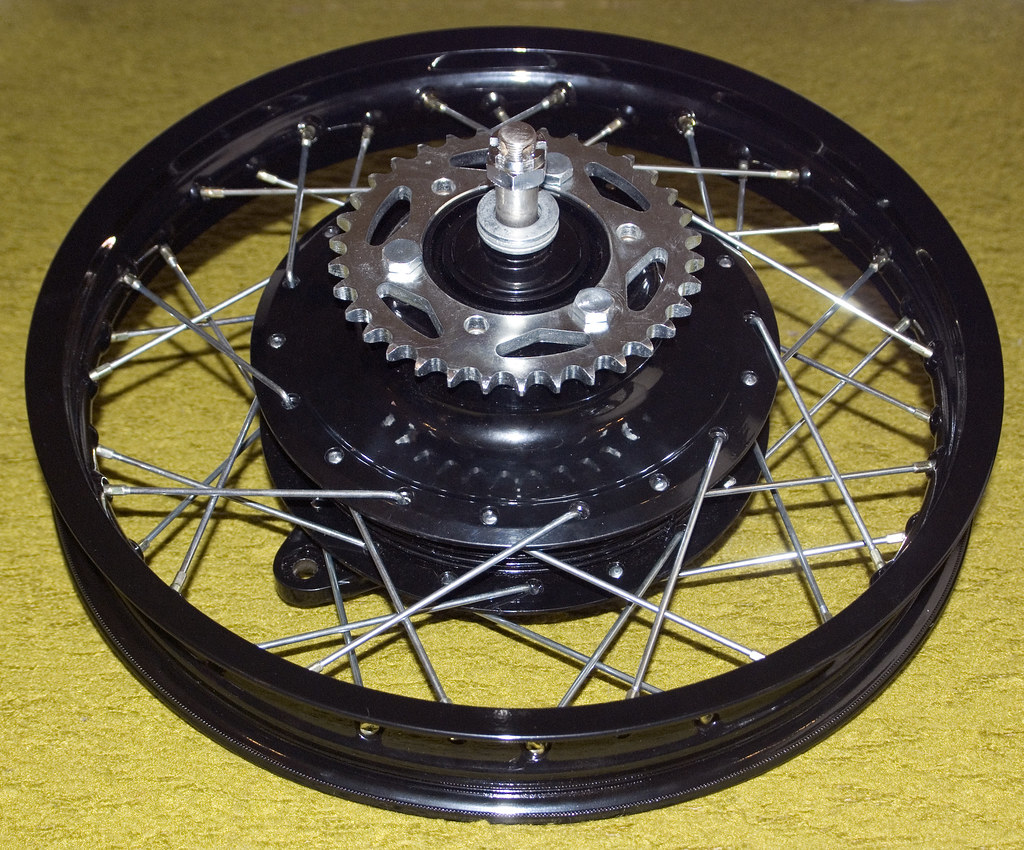
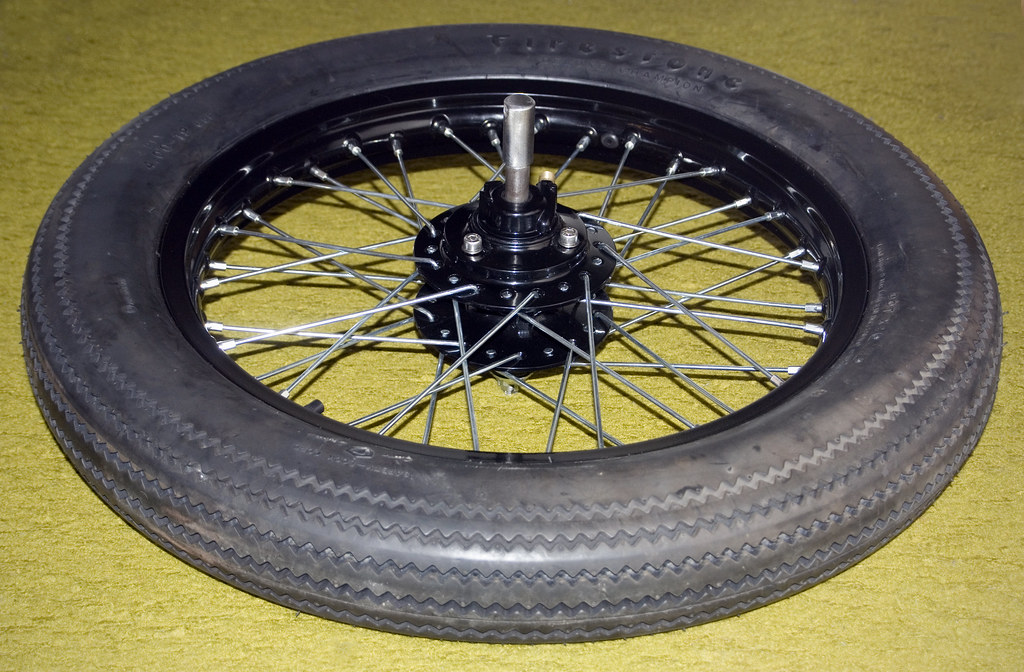
Sunday, 4 December 2011 - A rim is not a rim, is not a rim!
Last week I managed to get my wheels trued by a pro-shop in Sydney by the name of Chivo's.
I am running aluminium 36 hole pro-wheel motocross rims that I had powder-coated gloss black. The front hub is the standard XS650 unit, whilst the rear brake and hub is from a 1973 TX750 (larger diameter than XS650 rear setup).
Prior to dropping them off I discovered a problem that I was facing on the rear, with the dimple and hole directions being slightly off what they need to be to suit the angle of the spokes. Once they were being tightened too far, they started bending the spokes. The head of the nipples also didn't seat well within the dimples.
Thankfully Doug Chivas had a solution which included, shortening and re-rolling new threads for the rear spokes, larger nipples and re-lacing in a 1 Cross pattern.
I also got some larger matching nipples for the front rim too.
Thanks Doug!
DSC_0705 copy
DSC_0706 copy
DSC_0712 copy
Cheers
Steve
Last edited by inmotionphotog; 01-03-2012, 3:34 AM.Comment
-
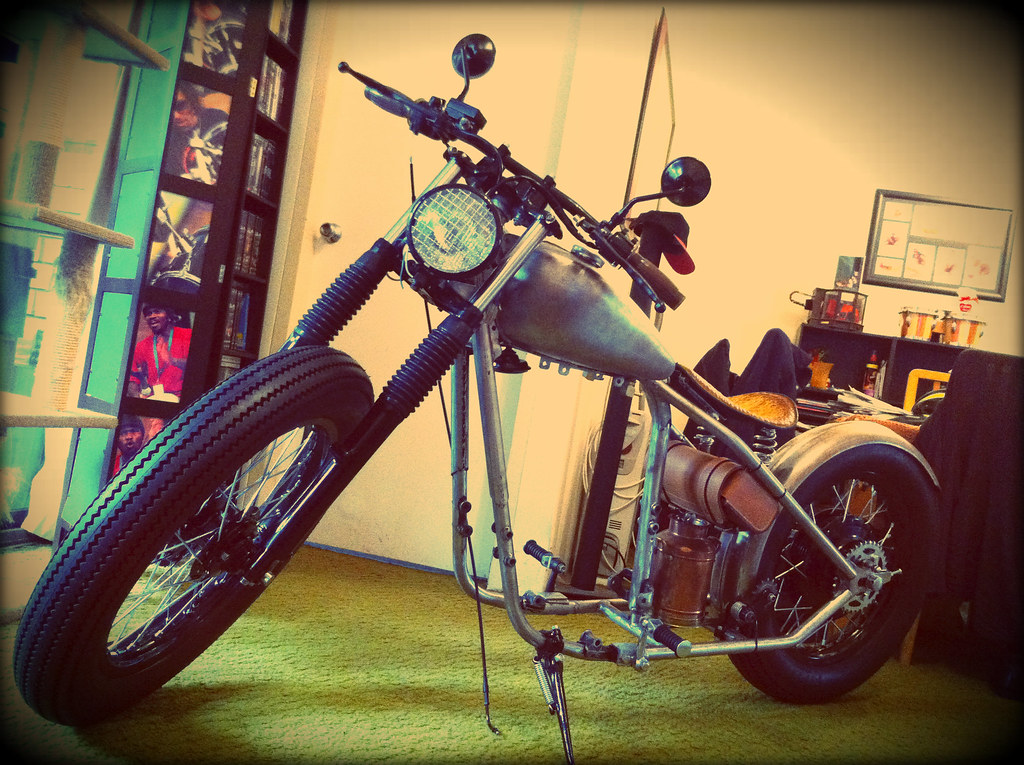
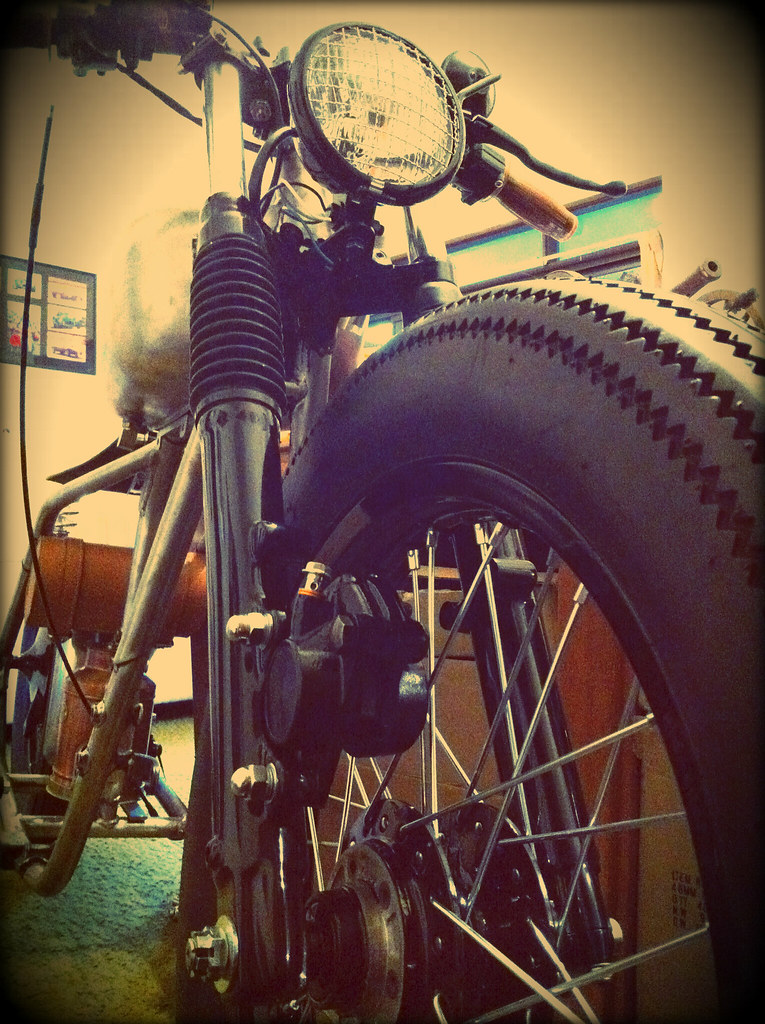
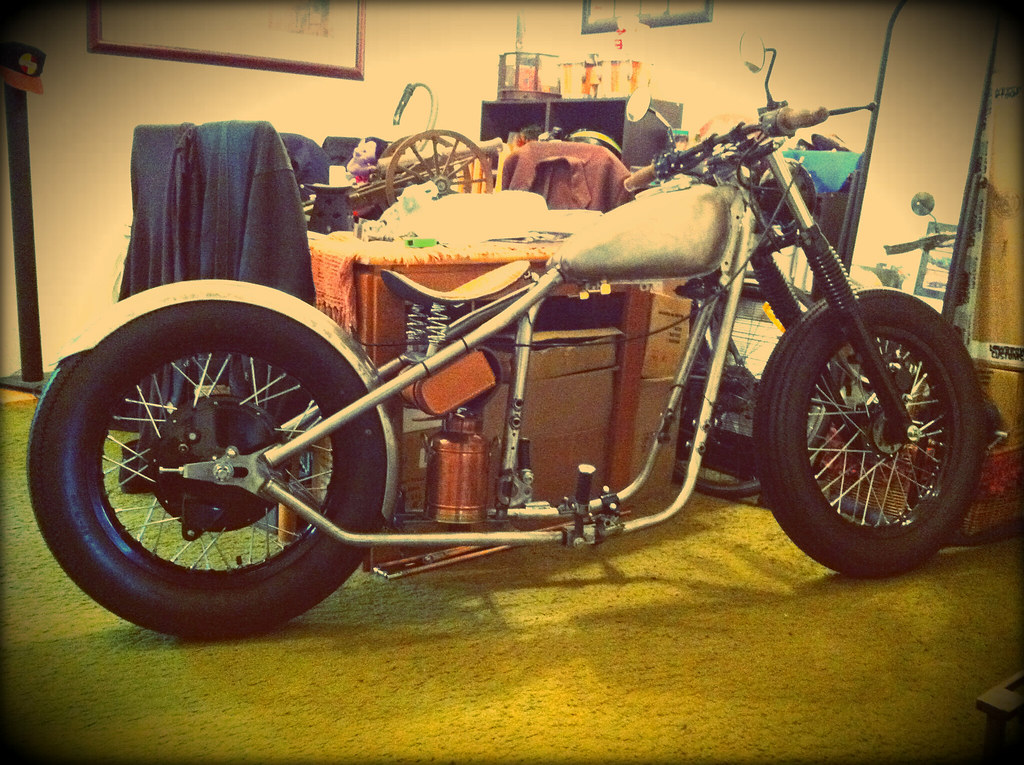
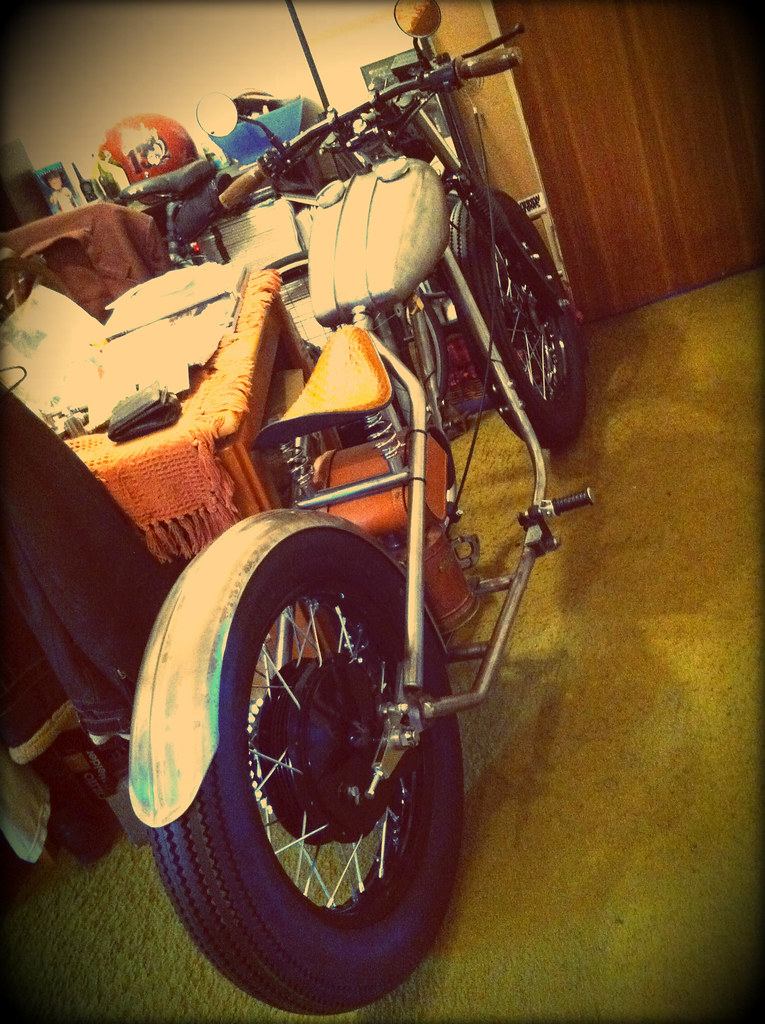
Sunday, 4 December 2011 - We have a roller!
This morning I completed the assembly of my front end and threw it, along with the rear wheel upon the chassis.
I now officially have a roller!
Here's a couple of quick pics I took on the phone.
There's still plenty of small bits and pieces that require welding to the chassis, which one completed I'll do another more detailed photo shoot.
IMG_1066 copy
IMG_1077
IMG_1071 copy
IMG_1079
Cheers
Steve
Last edited by inmotionphotog; 01-03-2012, 3:34 AM.Comment
-
My gosh, you really think and plan well, I really like what you have done and what you are doing, and great choice with leather things!!! Rich is very good at his ways! Is that real reptile skin, for that seat? That is one type I have not been able to use or have on hand to do what I do!!!! I really wished I could really plan things out better, that way I would not regret after it is done, and want to change so many things! Keep on doing what you are doing!Comment
-
G'day swinewrx, thanks for the great comments and encouragement!
Rich's seat is very nice. I believe it is actually cow hide made to look like alligator skin.
In terms of planning, I guess because it's my first bike and build, I wanted to blow the socks off of some of the guys I know that have quite a few scoots under their belt.
I suppose I also set myself the challenge of building a practical, well thought out and hopefully eye-catching bike with the limited tools and metal working experience that I have. Hopefully other guys that are somewhat daunted yet keen to start on a project might actually take the plunge after seeing that even I can do it (and in a second story apartment to boot)!
Cheers
Steve
Last edited by inmotionphotog; 12-04-2011, 3:34 AM.Comment


Comment