
 Tweet
Tweet
Decided to fill some holes on Saturday. This is part of a CB750 project that I'm working on. Thought since I was already doing this, I would put this little how to out there for the poor man who wants to fill holes the simple way.
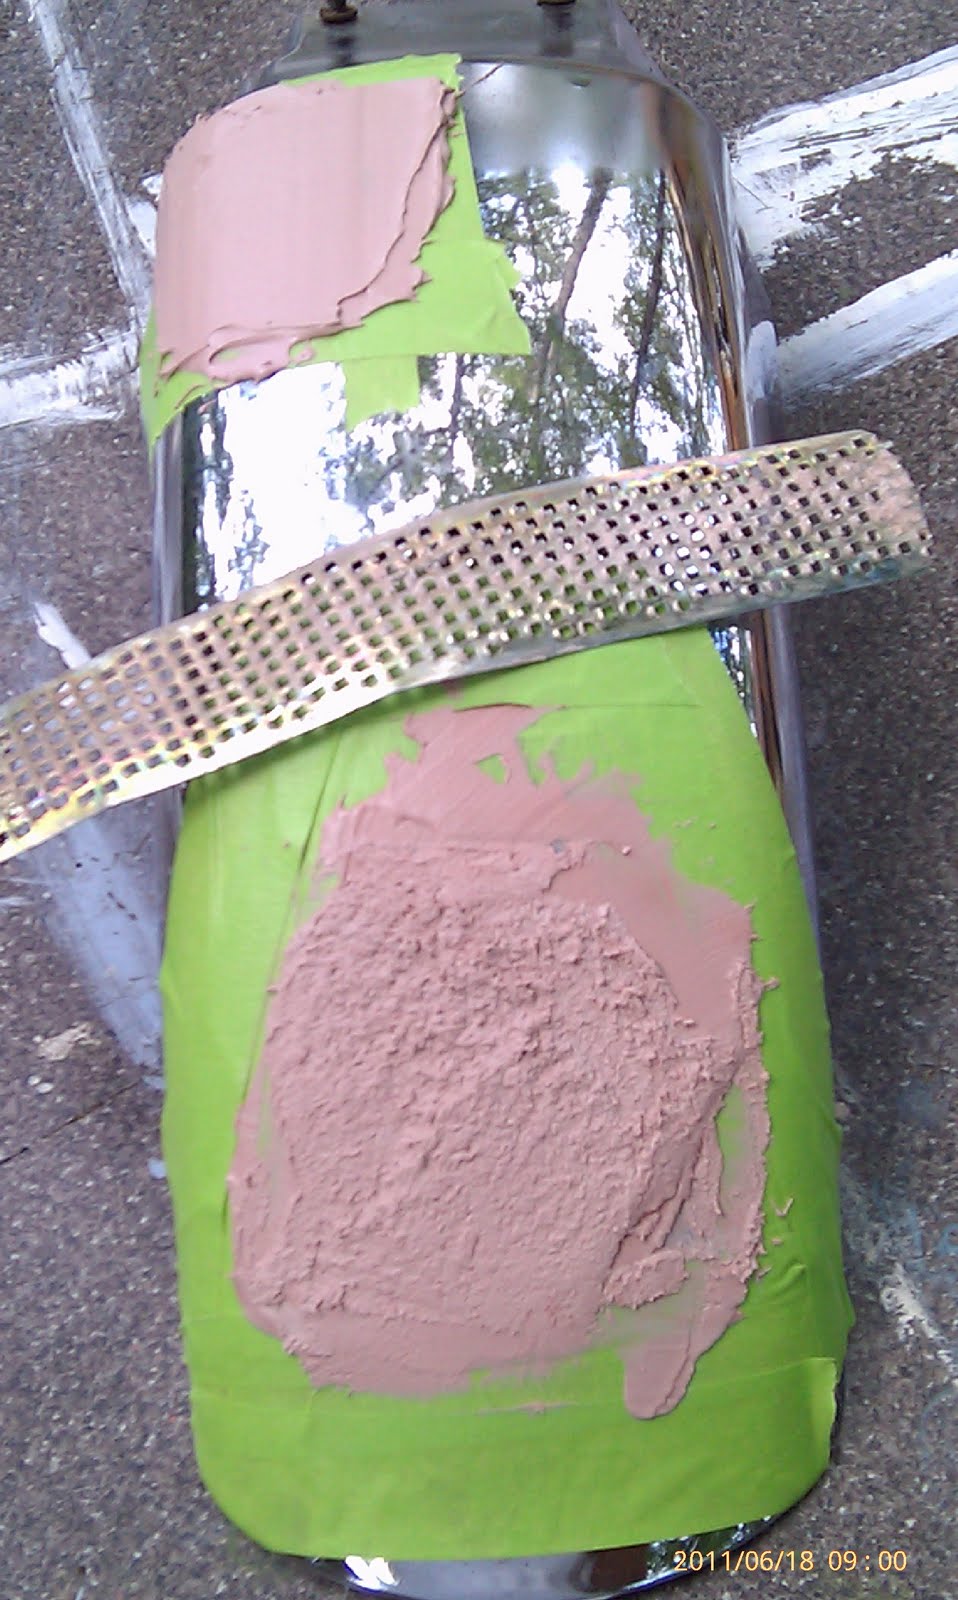
First, apply a little Duck Tape to the outside of the area you want filled. Sometimes you may want to take a hammer and give this area a slight indention.

Next cut your fiberglass sheets to size for the area you want filled. Mix the hardener with the material you can purchase in Fiberglass kit from most any automotive parts house. Brush some of the mixed material onto the surface the sheets will be applied to, lay the sheets down, and cover them with the mixture, taking care to spread out the edges. The finished area should look something similiar to what's below. (This is definately not professional work but CAN save you some $$$$.)
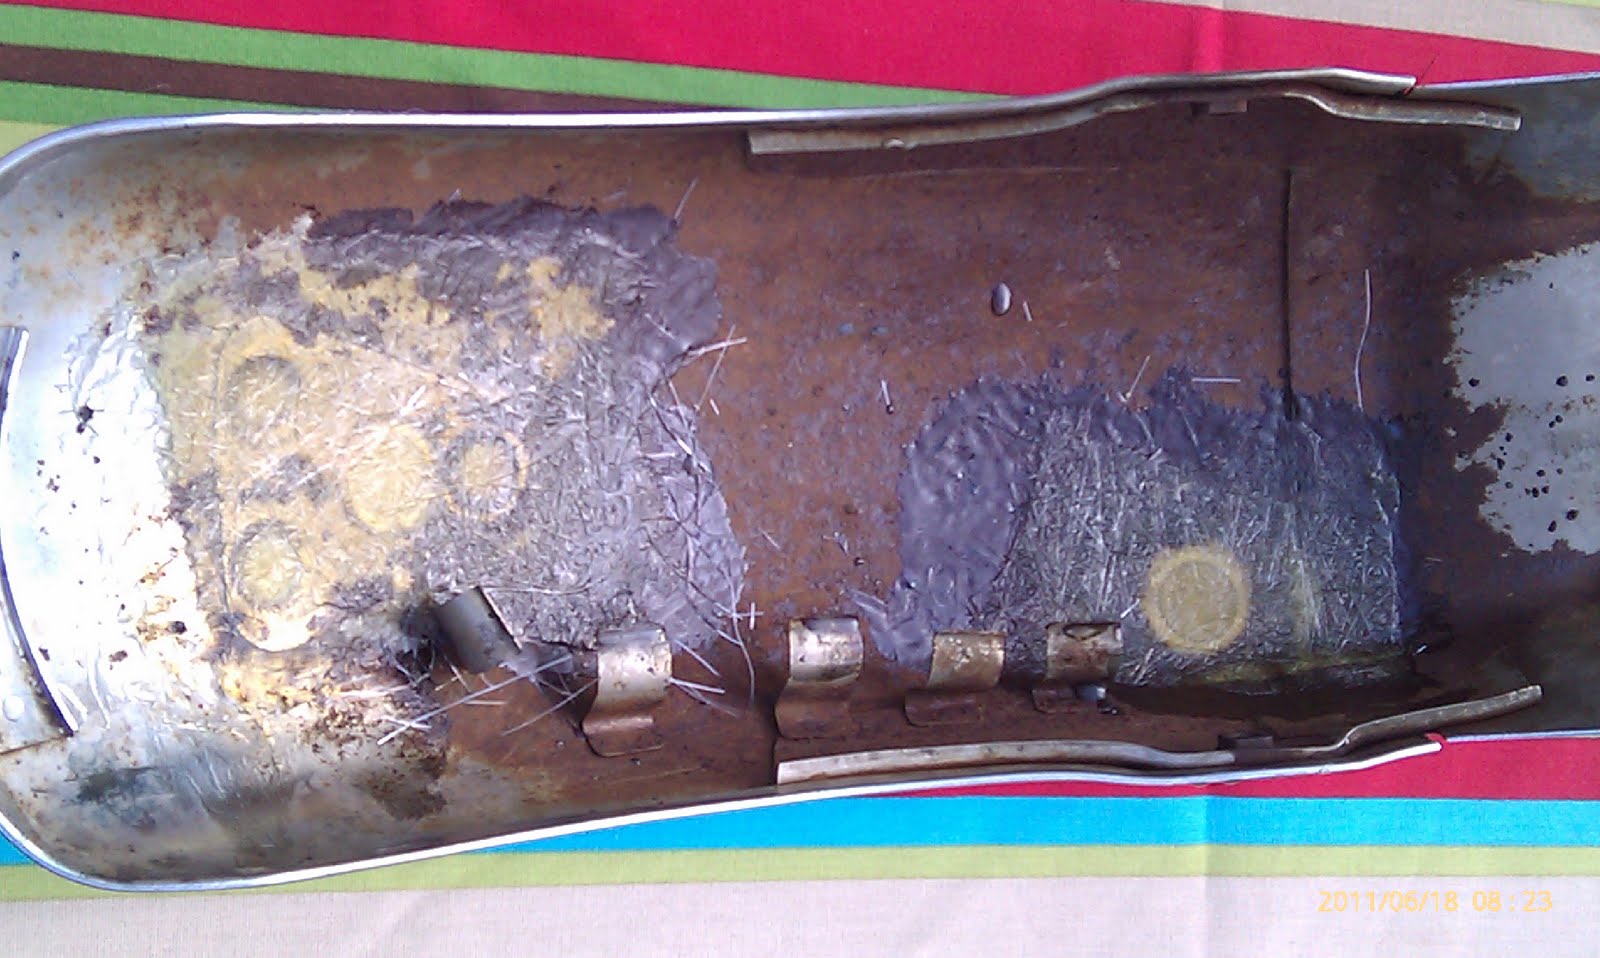
Once the fiberglass has been applied to the inside of the fender and allowed to set for several minutes, the Duck Tape can be pulled from the outside of the fender. The result will appear similiar to the two pictures below.


You can see the basic items you will need in this picture, although you really don't need tape for body work, I was just trying to experiment and reduce the sanding since my DA sander is not functioning currently. The fiberglass kit in the box will have everything you need to do many of these type jobs. It's also a great way to fix the pesky fender well holes in old trucks. The process is the same.

Next, Mix your Bondo Body Filler and apply generously over the holes. Wait a minute or two and grab a simple "cheese grater" (about $4 bucks at the parts house) to knock down the excess before it gets to hard and to begin getting the desired shape. (Again the tape was an experiment and I don't recommend it at all.)
After some sanding with varioud grits of sandpaper ending with some vary fine, you should not be able to feel where the bondo meets the fender. It is now ready to be primed and painted.

Like I said earlier, this is a quick and dirty way to do it and it has never failed me before. I know there are some people on CC who probably do this for a living and can give a much better tutorial, but this is how I have done it the last few times and thought I would share. If anyone has any suggestions or questions, I don't mind either one. I would definately like to learn more about doing body work and painting. If anyone thought this was helpful in any way, let me know.
Oh yeah, and my apologies if the pics come out huge. I'm new to this CC thing and will work on learning how to post pics better.
First, apply a little Duck Tape to the outside of the area you want filled. Sometimes you may want to take a hammer and give this area a slight indention.
Next cut your fiberglass sheets to size for the area you want filled. Mix the hardener with the material you can purchase in Fiberglass kit from most any automotive parts house. Brush some of the mixed material onto the surface the sheets will be applied to, lay the sheets down, and cover them with the mixture, taking care to spread out the edges. The finished area should look something similiar to what's below. (This is definately not professional work but CAN save you some $$$$.)
Once the fiberglass has been applied to the inside of the fender and allowed to set for several minutes, the Duck Tape can be pulled from the outside of the fender. The result will appear similiar to the two pictures below.
You can see the basic items you will need in this picture, although you really don't need tape for body work, I was just trying to experiment and reduce the sanding since my DA sander is not functioning currently. The fiberglass kit in the box will have everything you need to do many of these type jobs. It's also a great way to fix the pesky fender well holes in old trucks. The process is the same.
Next, Mix your Bondo Body Filler and apply generously over the holes. Wait a minute or two and grab a simple "cheese grater" (about $4 bucks at the parts house) to knock down the excess before it gets to hard and to begin getting the desired shape. (Again the tape was an experiment and I don't recommend it at all.)
After some sanding with varioud grits of sandpaper ending with some vary fine, you should not be able to feel where the bondo meets the fender. It is now ready to be primed and painted.
Like I said earlier, this is a quick and dirty way to do it and it has never failed me before. I know there are some people on CC who probably do this for a living and can give a much better tutorial, but this is how I have done it the last few times and thought I would share. If anyone has any suggestions or questions, I don't mind either one. I would definately like to learn more about doing body work and painting. If anyone thought this was helpful in any way, let me know.
Oh yeah, and my apologies if the pics come out huge. I'm new to this CC thing and will work on learning how to post pics better.


Comment