1967 Triumph Bonneville Salt Flats Racer Redux

Collapse

Desktop Ad Forum Top

Collapse

Mobile ad top forum

Collapse
X
 
  • Time
  • Show
Clear All
new posts
  • NITRO
    Senior Member
    • Jul 2009
    • 392

    1967 Triumph Bonneville Salt Flats Racer Redux

    kyle_malinky_1967_bonneville_salt_flats_race_bike_  1
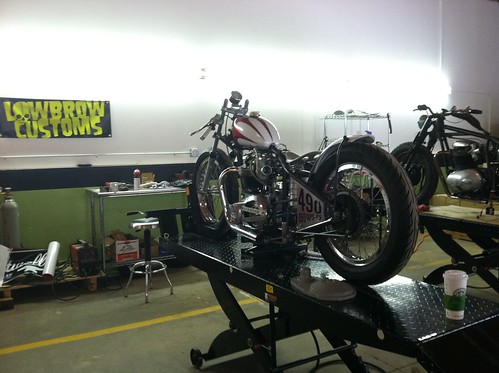
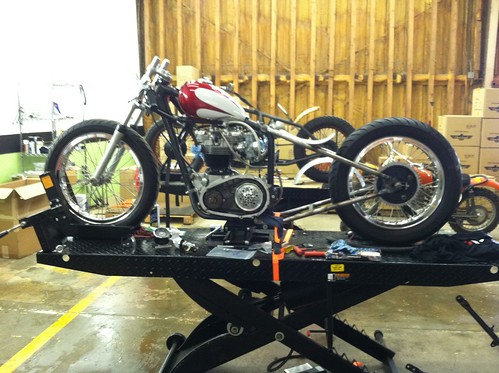
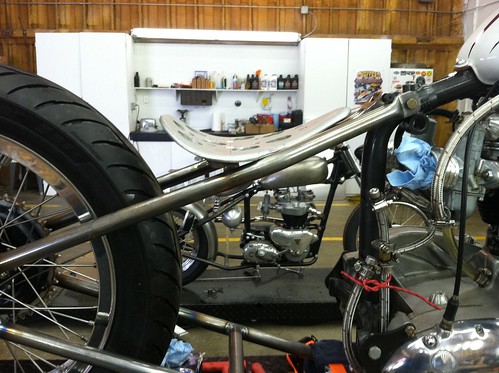
    Last week I finally got my 1967 Triumph T120 Bonneville land speed race bike back into the shop and started to tear it down to do a few small charges. Well....It quickly became a huge list of changes! The goal is to really improve the aerodynamics of the bike and my riding position (I weigh damn near as much as the bike and I am 6'2" tall so I need every advantage I can get!) as well as fix issues we ran into on the salt last year and finish up a few things I never was able to finish to my standards due to time constraints last year.
    kyle_malinky_1967_bonneville_salt_flats_race_bike_  dissassembly_2

    kyle_malinky_1967_bonneville_salt_flats_race_bike_  dissassembly_1
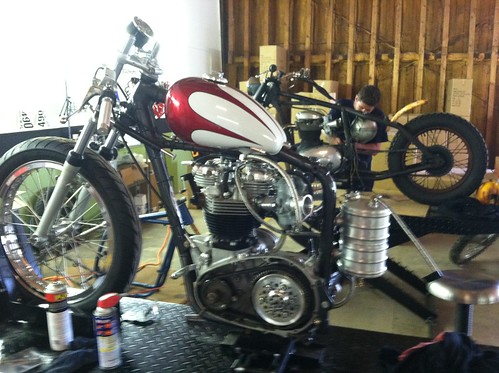
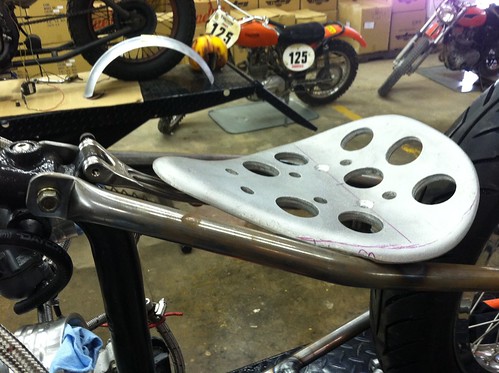
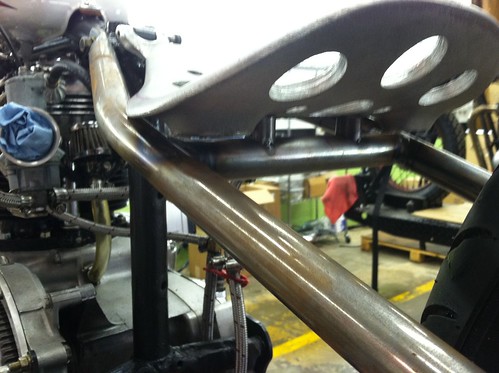
    I started by stripping the rear half of the bike down to install my new David Bird hardtail. This is a 6" stretch 2.5" drop hardtail so it will move my body down and back quite a bit to help get me into the most streamlined position I can get in.
    kyle_malinky_1967_bonneville_salt_flats_race_bike_  hard_tail_install_1
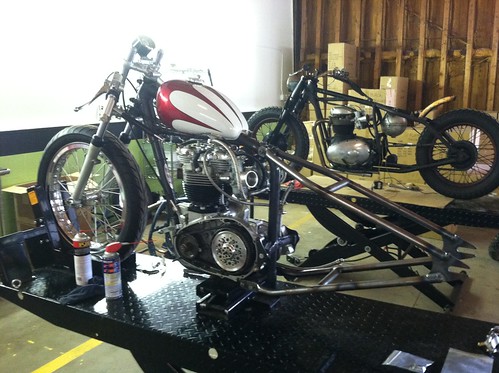
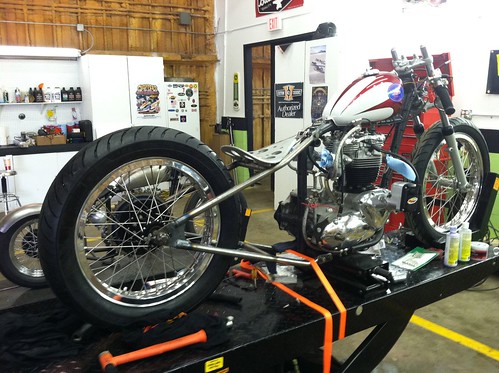
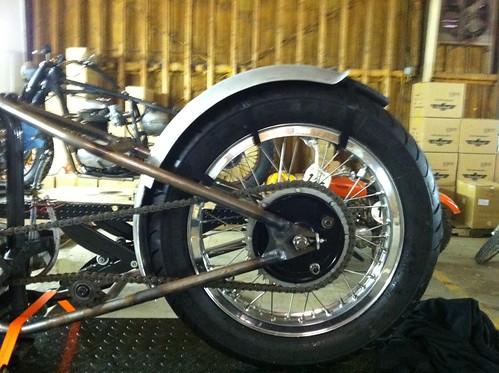
    I re-installed the rear wheel and started taking some measurements for the fender and seat mounts. I will be posting more pictures and updates as I continue modifying the bike.
    78 days and counting!
    kyle_malinky_1967_bonneville_salt_flats_race_bike_  seat_pan_1
    Last edited by NITRO; 05-27-2011, 9:49 PM.
  • Pete
    Senior Member
    • Sep 2009
    • 414

    #2
    Looks great so far! I'll be really interested to see what the improvements do to your times! Good luck.

    Comment

    • Kyle
      Senior Member
      • Jul 2009
      • 392

      #3
      More progress!

      kyle_malinky_1967_bonneville_salt_flats_race_bike_  seat_pan_2
      I decided to use the same drilled Lowbrow Customs aluminum seat pan I used last year but with some significant changes. I used a Biltwell polished stainless seat pivot (with some modification to make it work at the angle I needed). This setup changed my seating position drastically from the previous year. I had to do dome slight notches in the edges to clear the frame rails, these will all be cleaned up when the seat goes out for polishing. This seat is being hard-mounted to the frame in the rear, I used a couple bungs off our shelf which are welded to the frame cross member and then drilled the pan and allowed clearance to countersink the buttonhead allens to secure it.
      kyle_malinky_1967_bonneville_salt_flats_race_bike_  seat_pan_3
      Here is a close up of the bungs under the seat.
      kyle_malinky_1967_bonneville_salt_flats_race_bike_  seat_pan_1
      Between the new stretched hardtail and the seat the profile of the bike has been altered significantly. By hardmounting the pan I can now keep it extremely close to the fender without worry of damaging it, and while making my runs I can easily slide back up the seat onto the fender.
      kyle_malinky_1967_bonneville_salt_flats_race_bike_  seat_pan_5


      kyle_malinky_1967_bonneville_salt_flats_race_bike_  seat_pan_4

      Comment

      • Moparkevin
        Senior Member
        • Jan 2011
        • 149

        #4
        nice improvements, comparing the differences should really let you know what's going on.

        Comment

        • Kyle
          Senior Member
          • Jul 2009
          • 392

          #5
          Originally posted by Moparkevin
          nice improvements, comparing the differences should really let you know what's going on.
          Yeah for sure, after racing the sale flats last year we learned a tone, just from issues we had, seeing other peoples bikes, and really just seeing what we were dealing with first hand. Seeing it on TV or reading about it and actually doing it are very different things!

          Comment

          • Hoofhearted
            Senior Member
            • Dec 2009
            • 141

            #6
            Originally posted by Kyle
            Seeing it on TV or reading about it and actually doing it are very different things!
            Ain't that the truth!! With small displacement engines its all about drag. The more compact you can make yourself, the less drag, the faster you go. Good luck and hope to see you there.

            Comment

            • Kyle
              Senior Member
              • Jul 2009
              • 392

              #7
              Originally posted by Hoofhearted
              Ain't that the truth!! With small displacement engines its all about drag. The more compact you can make yourself, the less drag, the faster you go. Good luck and hope to see you there.
              You got it, I ran production modified last year, but I am competing in 650 pushrod gas partial streamlined special construction this year. The engine mods aren't that huge I never even tapped it since I lost several days last year to electrical issues, so this year I will go with everything runnng right and as skinny a profile as I possibly can and we will see where it goes!

              Comment

              • UNKLian
                Member
                • Dec 2010
                • 97

                #8
                Looks good with the extra stretch.

                Comment

                • Hoofhearted
                  Senior Member
                  • Dec 2009
                  • 141

                  #9
                  If you are going to run a fairing make it cover as much as possible. You can also do a lot to cover the rear wheel. Maybe you could talk Tyler into making a front fender like his. A 650 makes so much HP and you create so much drag. At some point drag and HP come together and thats as fast as you wil go. The Triumph is limited in how much reliable HP it can make. So its up to you to make the drag as little as possible. As you have gone to special construction you have freed yourself of the constraints of keeping it like a bobber/Triumph etc.

                  I spent ten years trying to get a record at El Mirage. I ran 500 APS/PG (there is no Modified class at El Mirage). My Norton is a Manx styled featherbed with a Weslake pushrod 500 in it. I was determined that if it was going to set a record it was going to do it looking like a Norton. A really stupid attitude. Eventually I got it to run just on 130 for a record.

                  Are you going to run 650 APS/PG? That record is very breakable (114.567). Take advantage of all that is allowed in the rulebook. And a lot is allowed. Looking forward to seeing how this re-build turns out. Good luck.
                  Last edited by Hoofhearted; 05-30-2011, 12:31 AM.

                  Comment

                  • specialseventynine
                    Senior Member
                    • Aug 2009
                    • 237

                    #10
                    Kyle, the bike definitely looks more streamlined with just those couple changes. Are you going to have to change the footpeg position at all?

                    Comment

                    • LowbrowCustoms
                      Senior Member
                      • May 2010
                      • 117

                      #11
                      Originally posted by Hoofhearted
                      If you are going to run a fairing make it cover as much as possible. You can also do a lot to cover the rear wheel. Maybe you could talk Tyler into making a front fender like his. A 650 makes so much HP and you create so much drag. At some point drag and HP come together and thats as fast as you wil go. The Triumph is limited in how much reliable HP it can make. So its up to you to make the drag as little as possible. As you have gone to special construction you have freed yourself of the constraints of keeping it like a bobber/Triumph etc.

                      I spent ten years trying to get a record at El Mirage. I ran 500 APS/PG (there is no Modified class at El Mirage). My Norton is a Manx styled featherbed with a Weslake pushrod 500 in it. I was determined that if it was going to set a record it was going to do it looking like a Norton. A really stupid attitude. Eventually I got it to run just on 130 for a record.

                      Are you going to run 650 APS/PG? That record is very breakable (114.567). Take advantage of all that is allowed in the rulebook. And a lot is allowed. Looking forward to seeing how this re-build turns out. Good luck.
                      The fairing I am making should help to redirect a lot of air around my upper body so I am doing my best to make the bike slippery. If I have time I will work on the fenders as well I am just not sure as I have alot of work to do, we will see how everything works out time-wise!

                      I have to be honest I am still keeping some of the original style this year, I would like to grab my class record in this configuration. With the schedule we had and moving over the winter I just did not hit this as hard as I should have, plans for next year include a full custom frame, pure race and very light. I had some real issues last year that cost me days on the salt and some issues with the design as I built this in 4 months last year. When I started bolting items together I realized things like wow my pipes need to lose 8" just so I can use my rearsets (they still exited on my toes and cooked them), and my carb spacers are restrictive! Ahh the details.

                      That is the class I am running, my best last year was 105.7 I believe and with the days I lost to isses I never felt I got everything out of the motor and I never even got to touch gearing. I think the streamlining this year will be huge, I saw picture and I was so high up on the bike last year (modified production requires the seat to be above rear tire height) I just couldn't believe how un-aerodynamic I was.

                      Comment

                      • LowbrowCustoms
                        Senior Member
                        • May 2010
                        • 117

                        #12
                        Originally posted by specialseventynine
                        Kyle, the bike definitely looks more streamlined with just those couple changes. Are you going to have to change the footpeg position at all?
                        Definately, they are going to be located nearer to the rear axle. Once I finish my fender mounting and get the seat all mocked up there will be some serious thought put into this. I will have someone take pictures with me on the bike (in leathers) so I can see what the best position is (that I can bend myself into!).

                        Comment

                        • Kyle
                          Senior Member
                          • Jul 2009
                          • 392

                          #13
                          Happy Memorial day!

                          Did just a bit of work in the shop, the 6" stretch required a chain tensioner so my chain does not hit the frame cross member so I grabbed one of the Monster Craftsman static tensioners off the shelf and got to cutting it up!
                          kyle_malinky_1967_bonneville_salt_flats_race_bike_  chain_tensioner_4
                          I took a few measurements and figured out how long the tensioner post needed to be for my application and used a 1" hold saw to radius the post of fit the tubing perfectly. It works pretty well if you don't have a tubing notcher!
                          kyle_malinky_1967_bonneville_salt_flats_race_bike_  chain_tensioner_1
                          The trickiest part is to then get the chain aligned, I started by just getting the rear sprocket and drive sprocket properly lined up and making the center of the chain on the cross member and then mocking the tensioner up to make sure it looked good. A couple tacks stong enough to hold it in place and I could then run the wheel and make sure my sprockets were all falling dead center of the links. Amazingly enough first time was the charm!
                          kyle_malinky_1967_bonneville_salt_flats_race_bike_  chain_tensioner_5
                          A couple more heavy tacks and a final chain adjustment and test and it is good to go until final welding!

                          Comment

                          • Hoofhearted
                            Senior Member
                            • Dec 2009
                            • 141

                            #14
                            Its always grea when something works the first time!! I can understand you keeping some of the original style. Getting the air off you smoothly is as important as what you present to the air. Just a suggestion but that back wheel offers a lot of possibilities for streamlining. Sorry. Its your build and I shouldn't be telling you what to do. If I'm annoying you tel me to bugger off and mind my own business.

                            Comment

                            • Kyle
                              Senior Member
                              • Jul 2009
                              • 392

                              #15
                              Originally posted by Hoofhearted
                              Its always grea when something works the first time!! I can understand you keeping some of the original style. Getting the air off you smoothly is as important as what you present to the air. Just a suggestion but that back wheel offers a lot of possibilities for streamlining. Sorry. Its your build and I shouldn't be telling you what to do. If I'm annoying you tel me to bugger off and mind my own business.
                              I know you are right I do not know if I will have the time the fairing is going to be a huge piece of work anything I can't do this year I will for next!

                              Comment

                              300 mobile ad bottom forum

                              Collapse
                              Working...
                              ;