Choptember How-To XS650 Banshee Charging System Swap

Collapse

Desktop Ad Forum Top

Collapse

Mobile ad top forum

Collapse
X
 
  • Time
  • Show
Clear All
new posts
  • Punkskalar
    Senior Member
    • Jan 2010
    • 1139

    Choptember How-To XS650 Banshee Charging System Swap

    ATTN: NEW TECH FOR THE PMA SWAP LISTED BELOW

    I'm Leaving this up for now, but there are some major changes that have taken place with the new parts we supply - so make sure to read the NEW Tech Article on the BLOG - http://hughshandbuilt.blogspot.com/2...built-pma.html

    I am hoping to update this thread as time permits for the new hardware and parts that are available, as this one was just way out of date, and causing some fuss for folks trying to install a PMA on their XS650

    Ok gang,

    Everyone with an XS650 should do this swap. Your stock charging system WILL FAIL YOU at some point, and it is $$$$ to fix, and you'll likely have trouble again. The stock XS650 charging system is terrible for many reasons.

    Those reasons being:

    1: Requires nearly 40 Amps just to "Turn-On" the system. Sucks for almost dead batteries
    2: Won't charge at idle
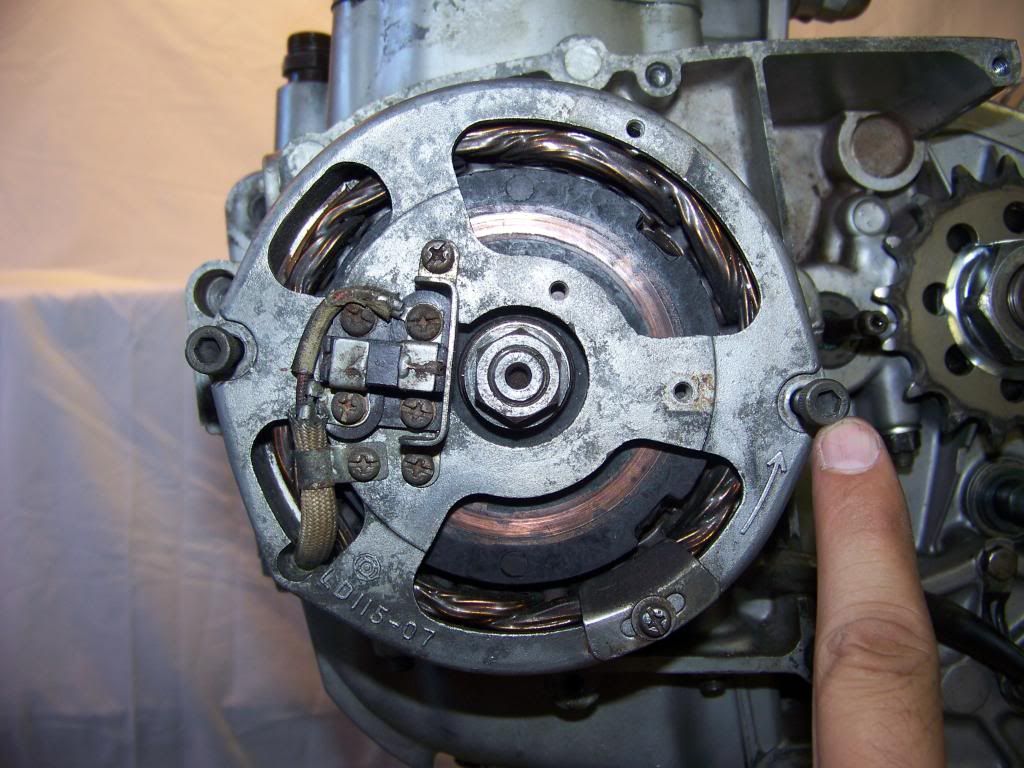
    3: Uses a brushed alternator style system - Charging requires contact of moving parts
    4: Requires a battery
    5: 30 Year old charging rotors are wound with materials that are starting to decay and ground out.
    5.5: Replacement rotors are $$$$
    6: Regulators fail without notice and are very expensive.
    7: Wiring is a nightmare, and most online diagrams are not accurate.
    8: Parts are not exactly scarce, but no one seems to have good luck mixing old parts and new.


    Reason to swap to the good stuff:

    1: Will charge at idle
    2: Non-Contact system (nothing to wear out)
    3: No Battery required, will need a condenser if not using a battery.
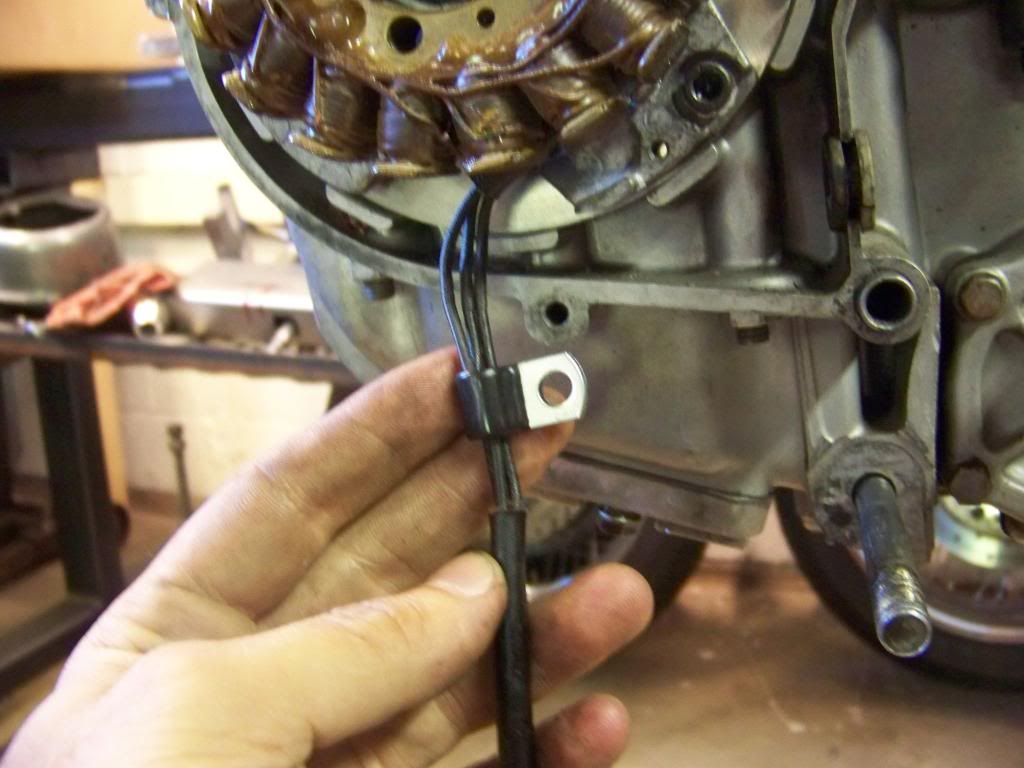
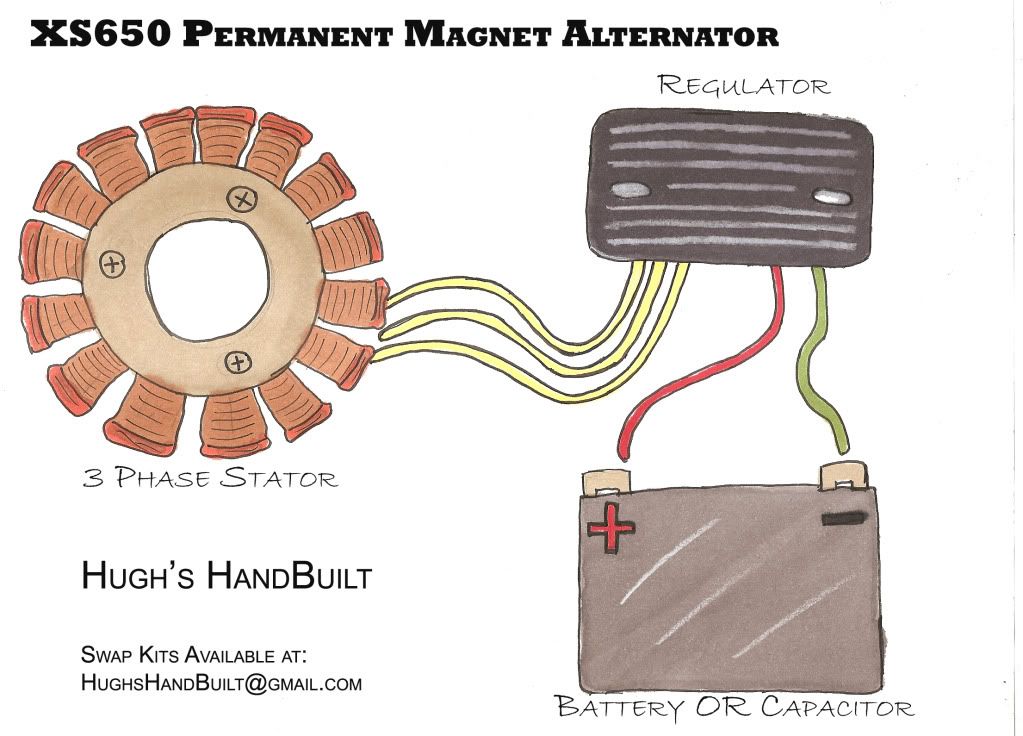
    4: Simple wiring. 3 wires out of the stator to the Regulator. Then 2 wires to the battery/condenser.
    5: Never be stranded with a dead battery, will always kick start.
    6: Cheaper to swap than to fix stock system. Lots of guys are doing it for $150ish...
    7. You can sell the stock stuff (if it still works) to some schmuck on Ebay and probably pay for this whole swap plus a cheap 6 pack!!


    Here is what you will need:
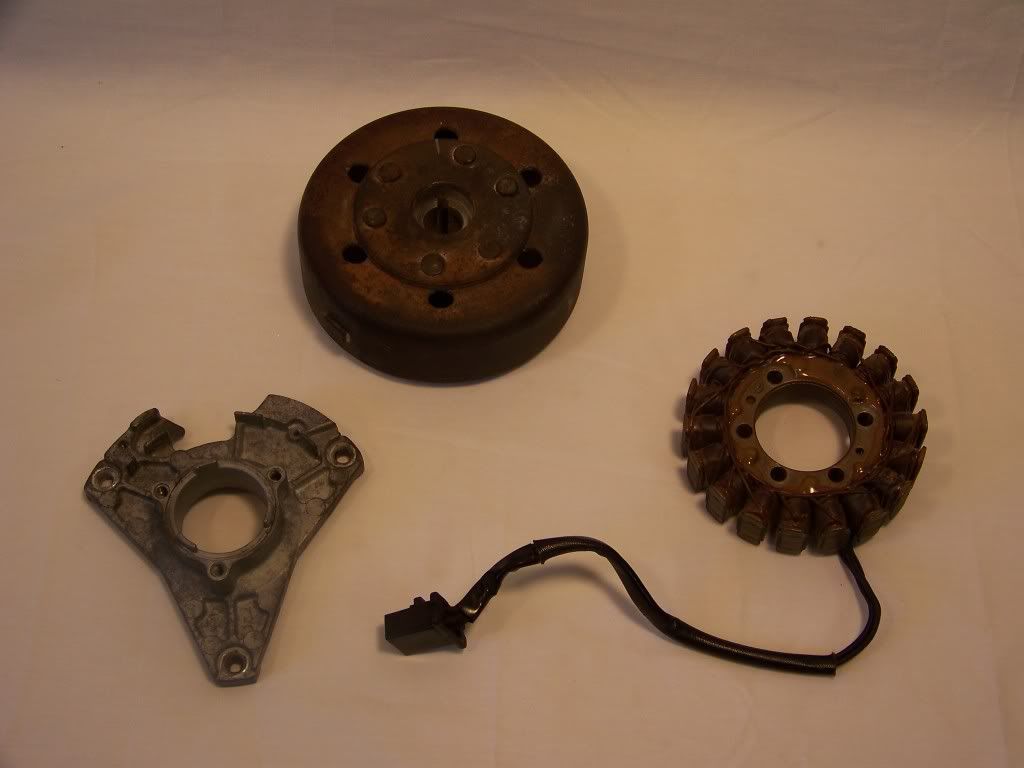
    Used Parts:

    1. YFZ350 Banshee Stator Bracket - Usually about $10-20 on Ebay Any year will work.
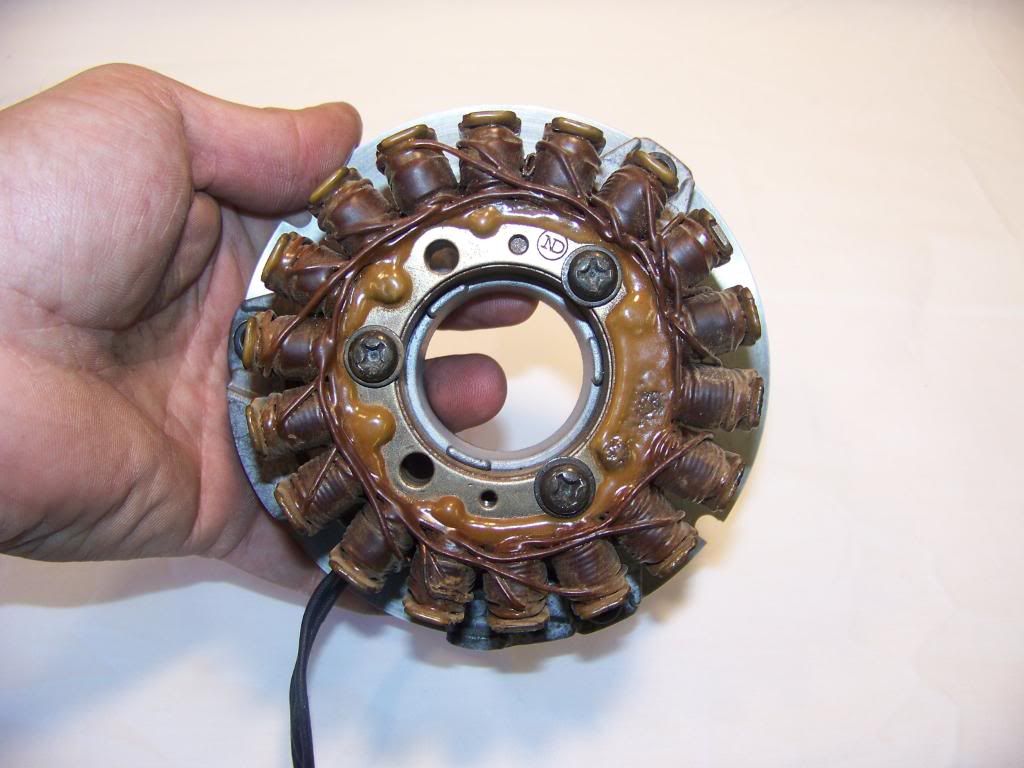
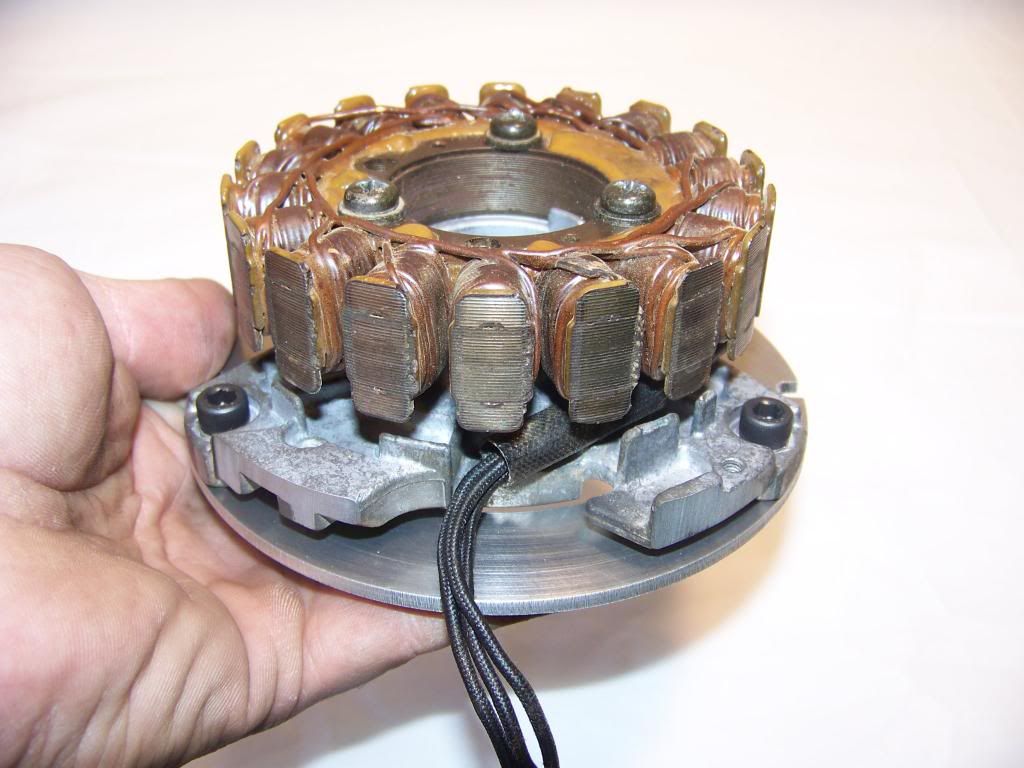
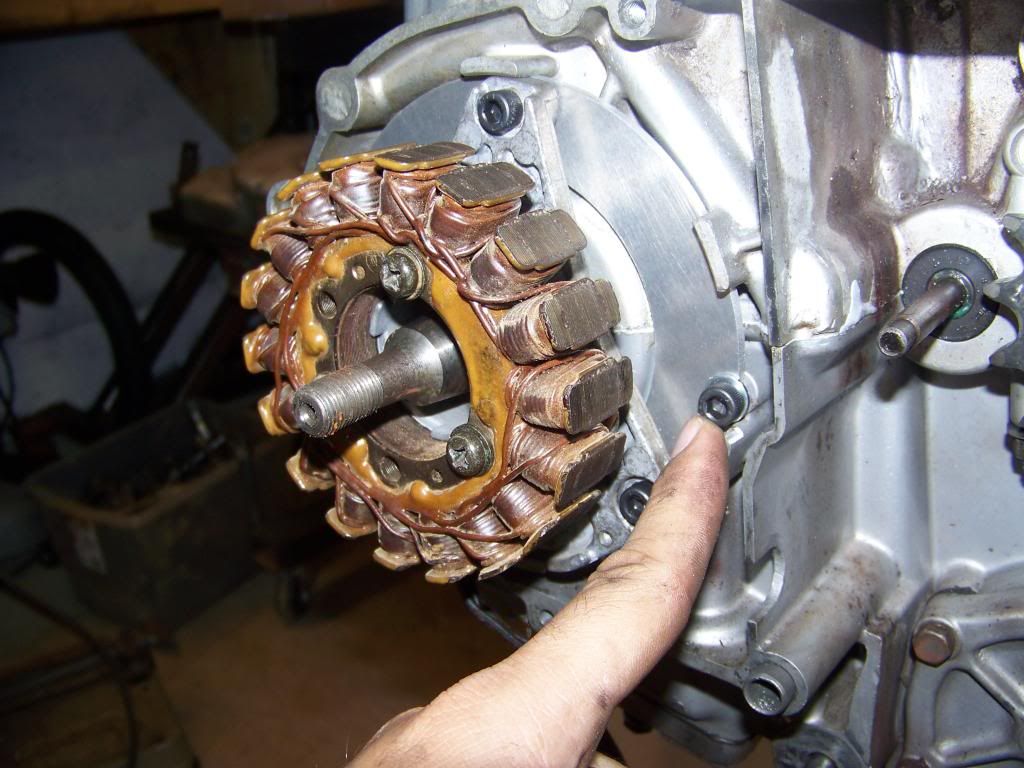
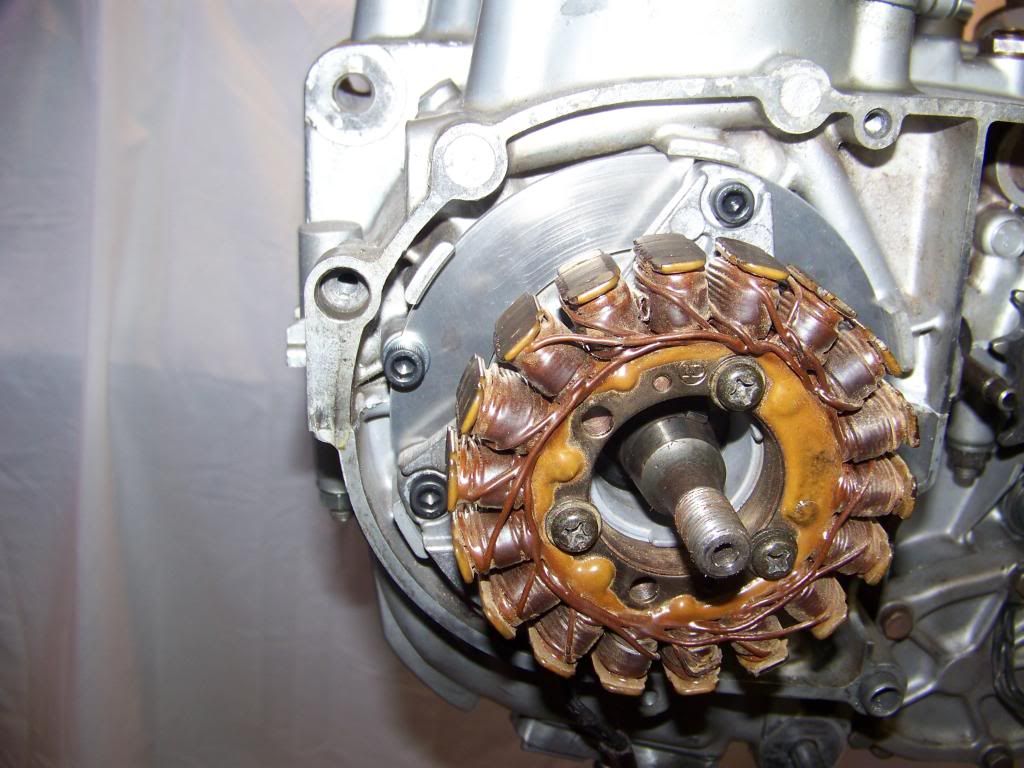
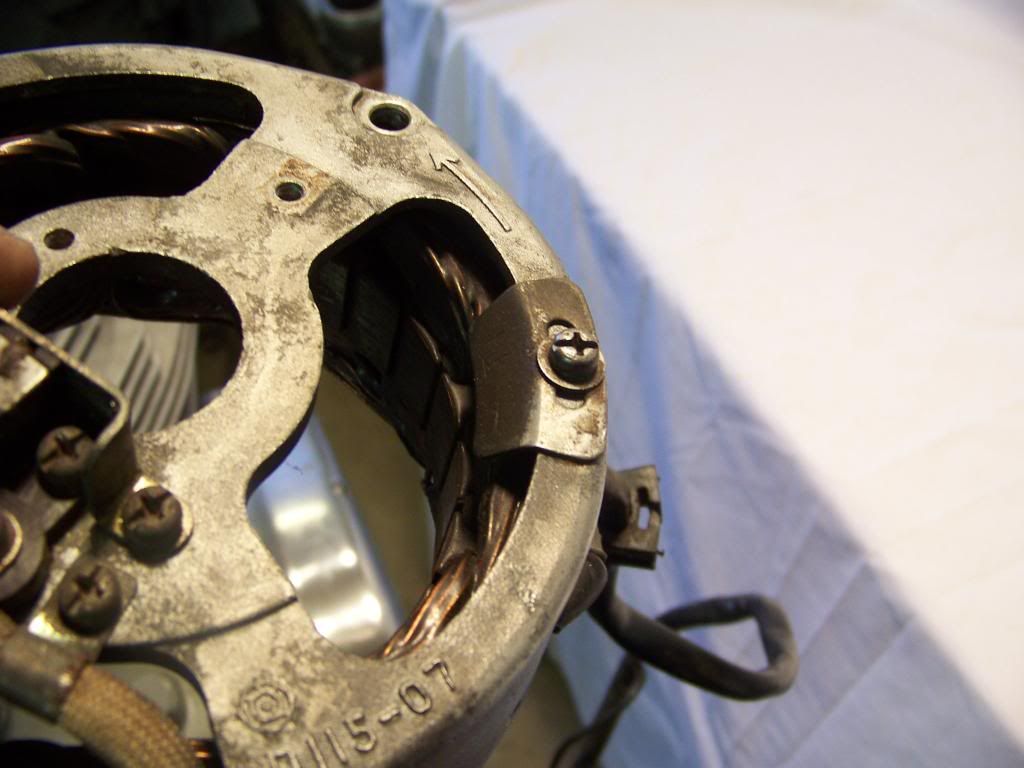
    2. 3 Phase Stator -Can be found anywhere from $20 on up on ebay. Will put a list of useable stators below.
    3. YFZ350 Banshee Flywheel. Any year will work


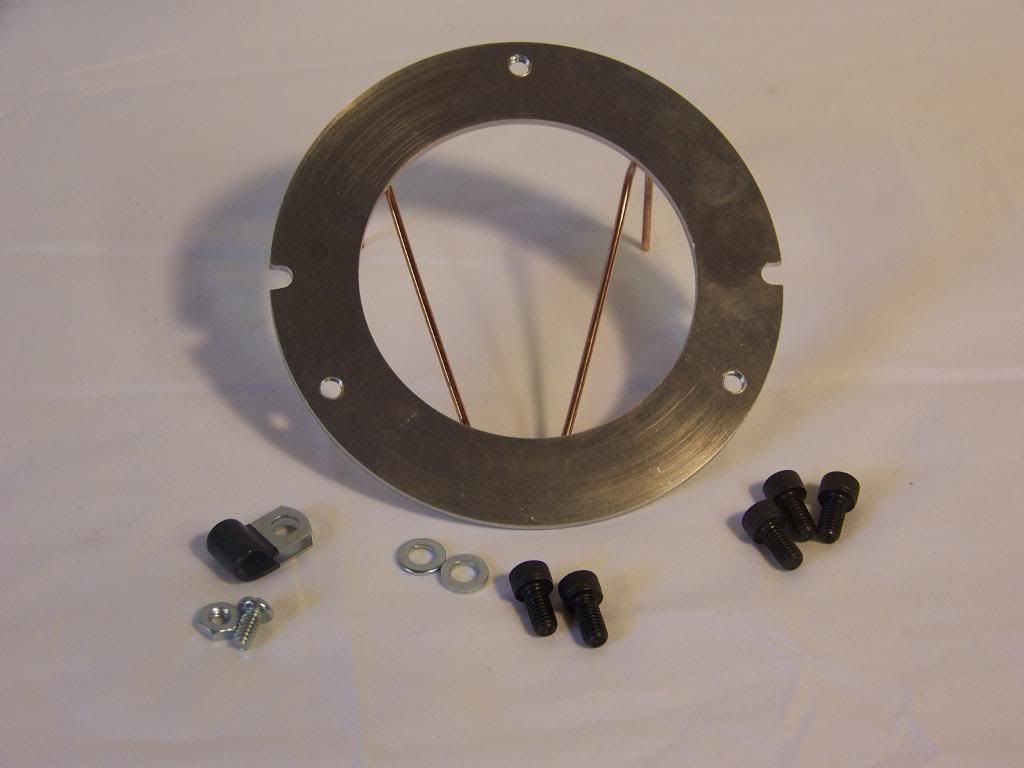
    New Parts: Check me out in the the Chop Market for the kit http://www.chopcult.com/forum/showthread.php?t=6576

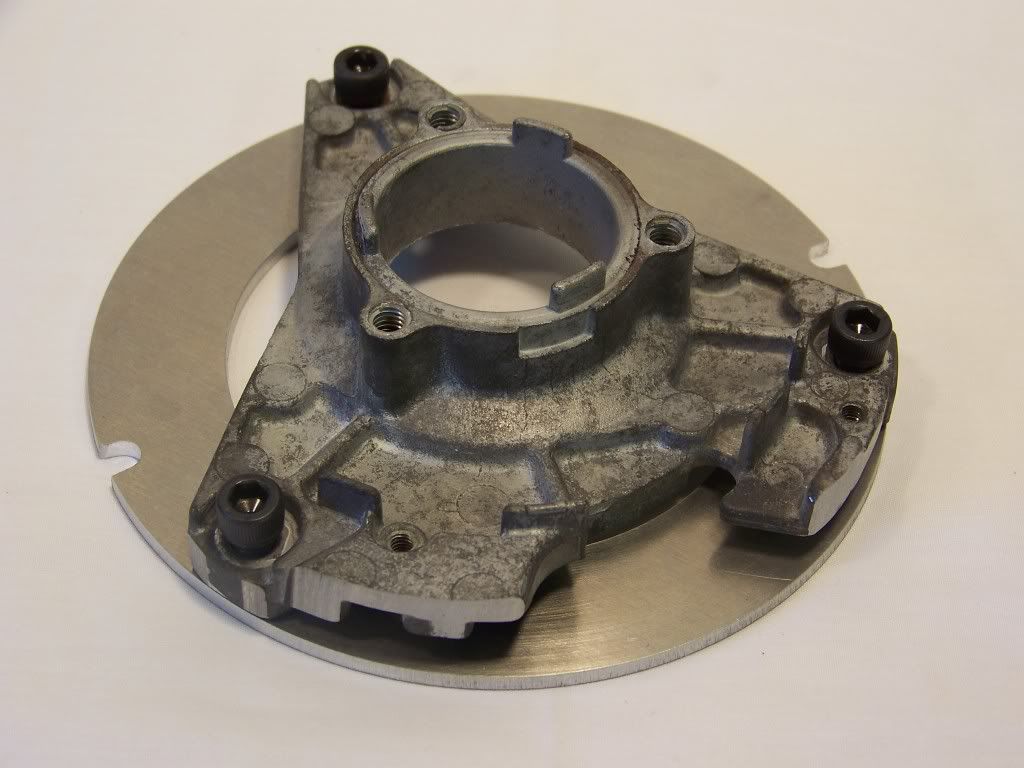
    1. Mounting Plate for Stator. I sell the one shown here, contact me via PM or Email at the end of the how to and hardware
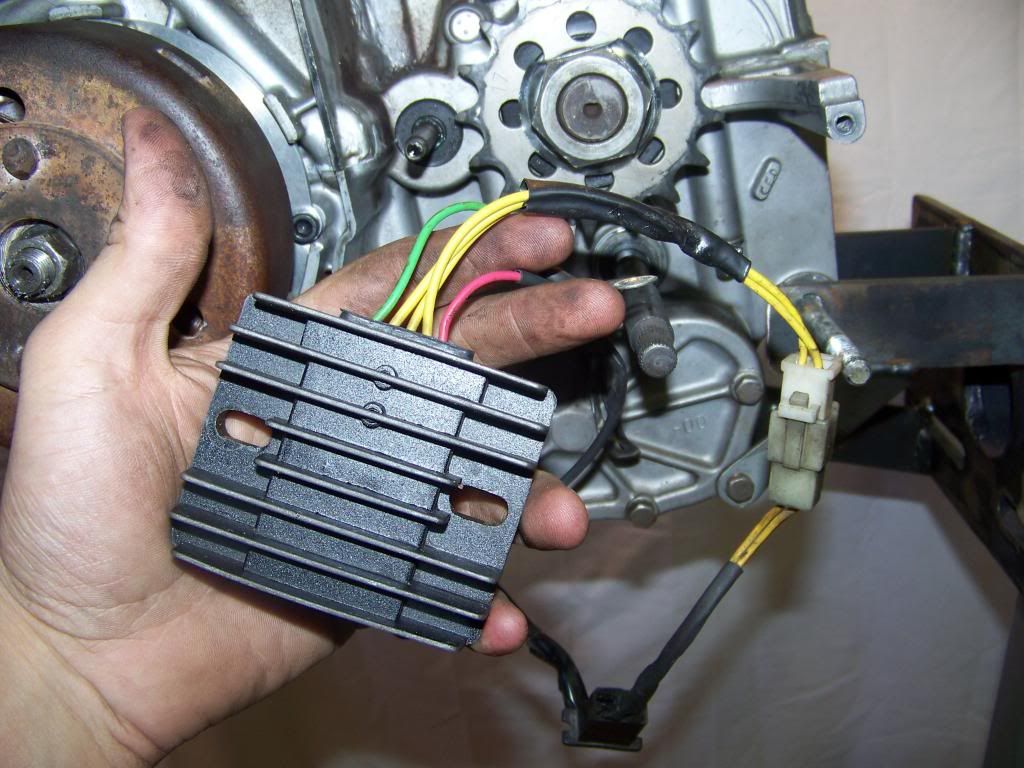
    2. 3 Phase Regulator - I have a connection to get these new cheaper than most can be found used.
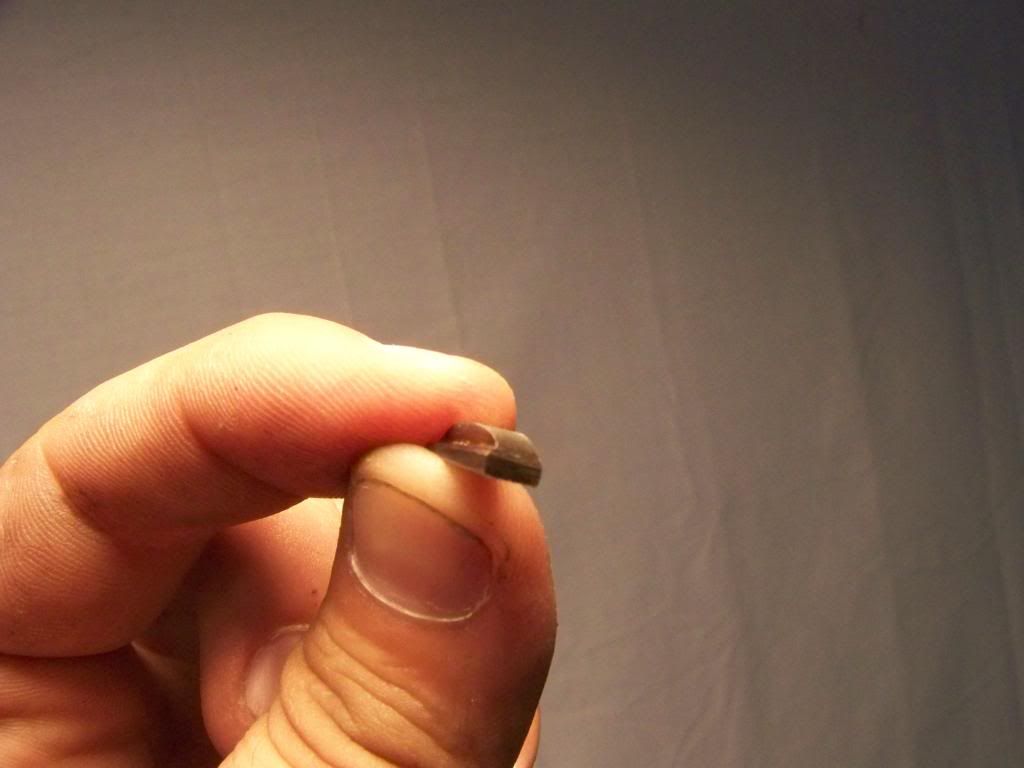
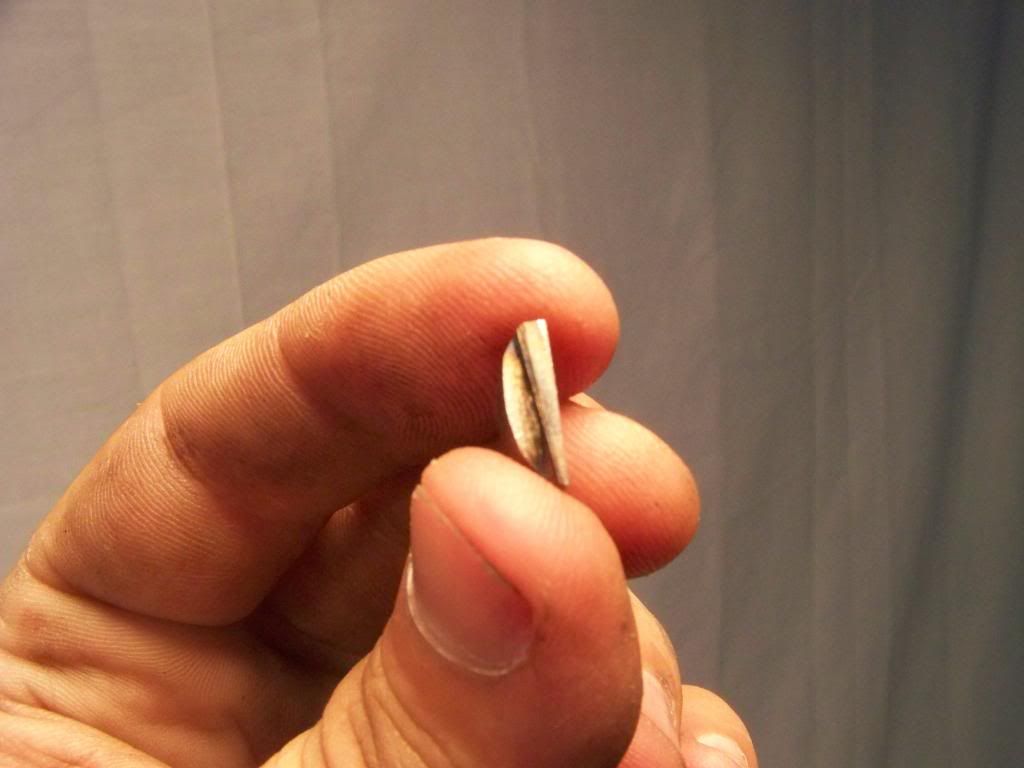
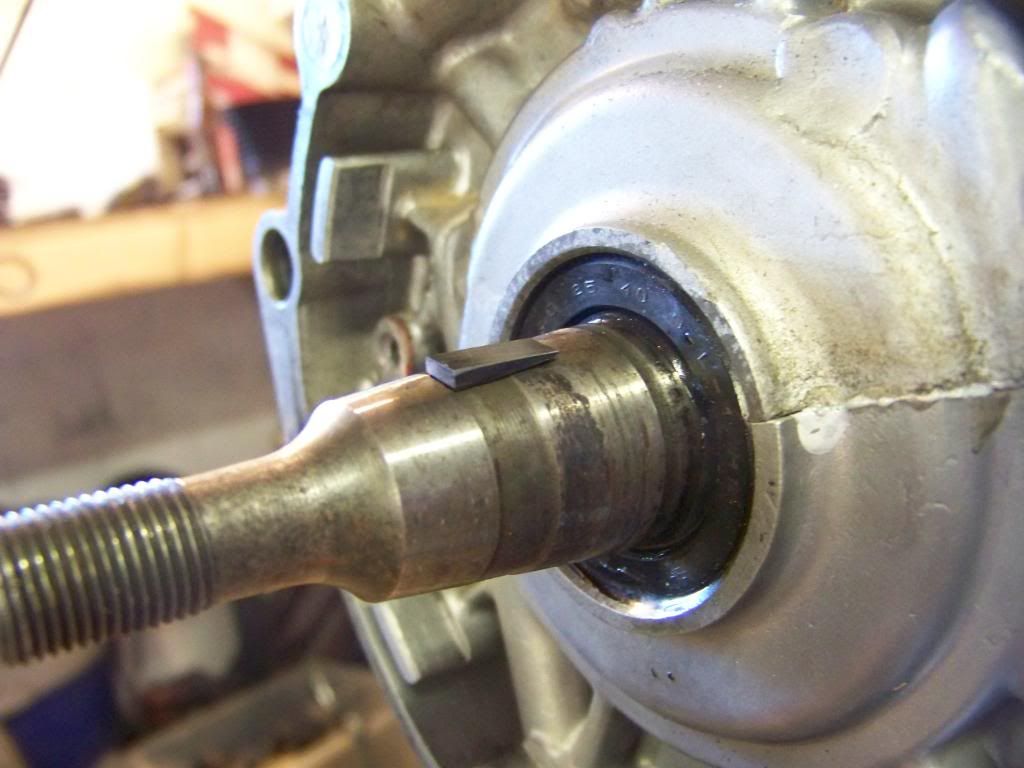
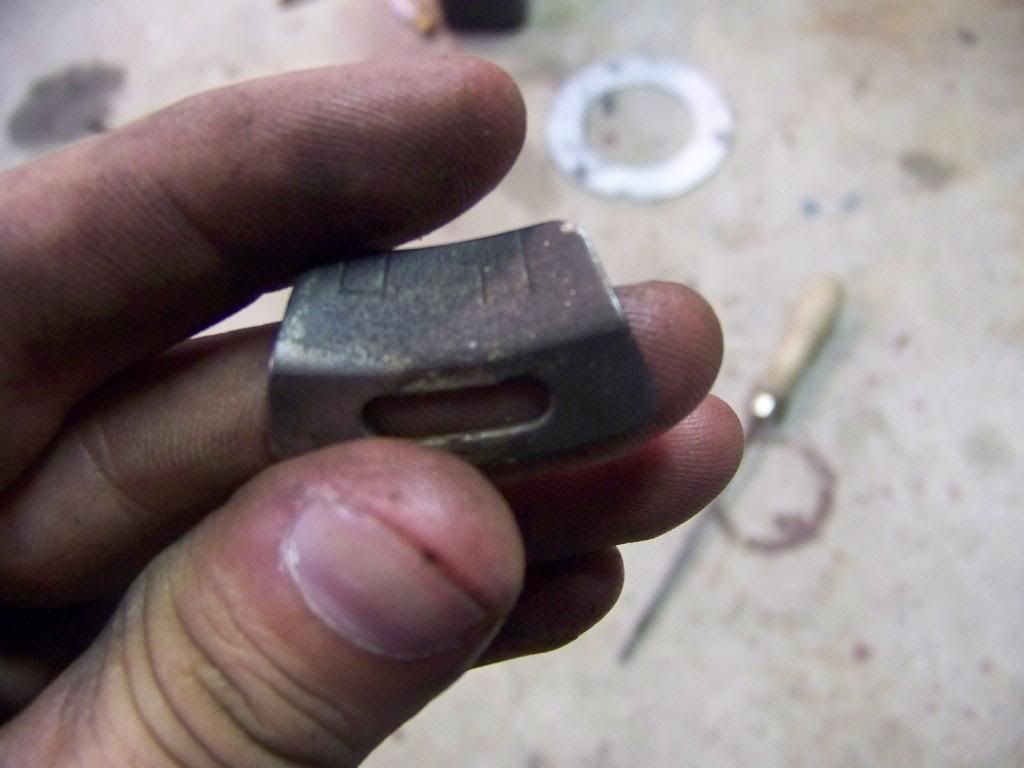
    3. 5/8"x3/16" woodruff key - Can be found at Lowe's Hardware for under $1
    4. Use your stock battery, or a capacitor. OR, you can have the best of both worlds and use this tiny battery that Fellow Chop Cult'r JH282 has sourced. It works very well on his daily rider, and will fit just about anywhere. According to JH282, it is smaller than the capacitor you would need as well, and still has a battery reserve for when the bike isn't running. http://cgi.ebay.com/12Volt-0-8amp-ho...item43a24ca1de


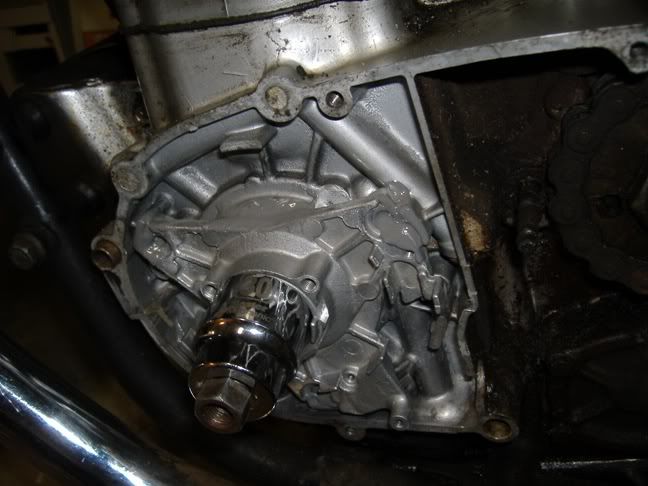
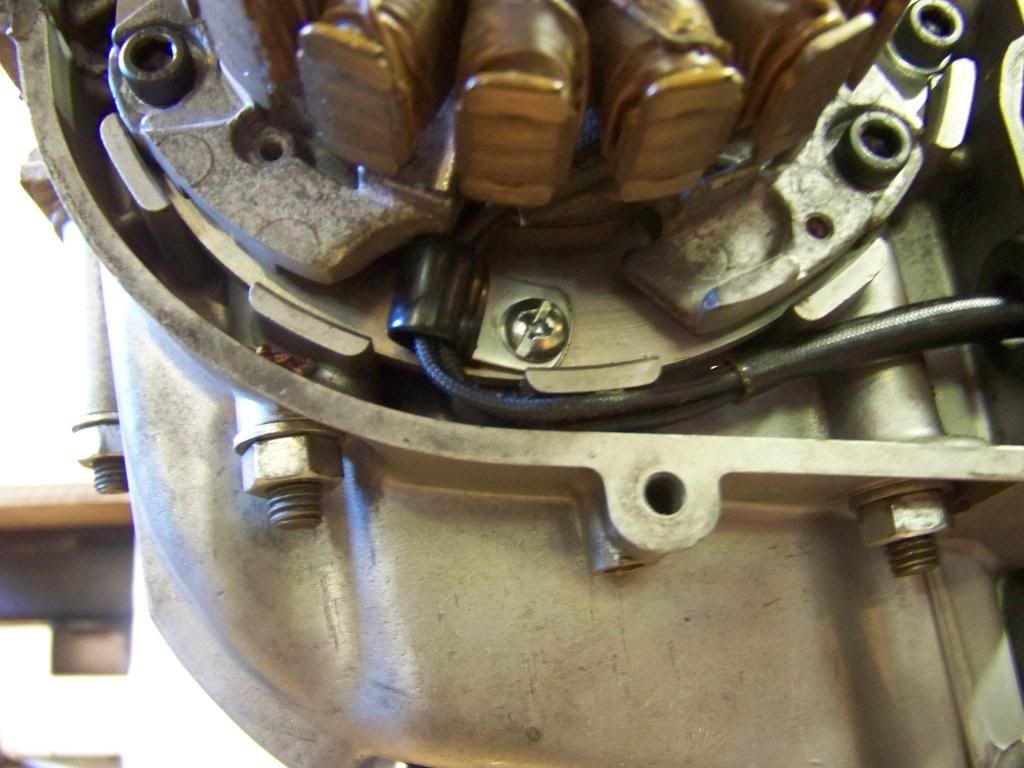
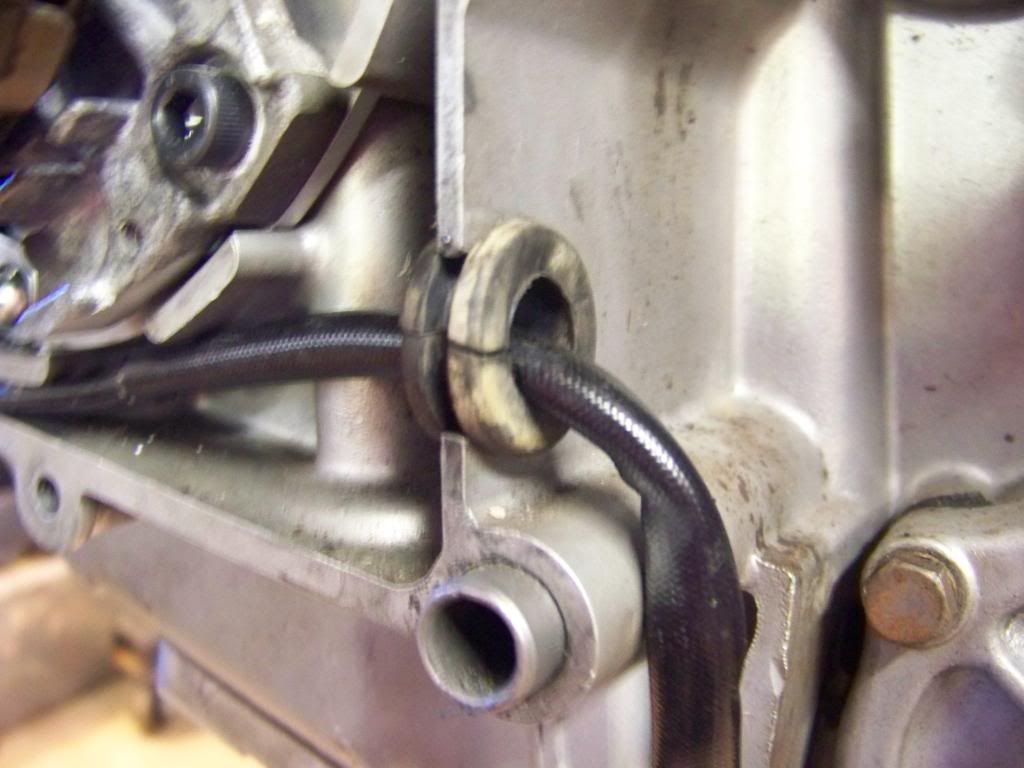
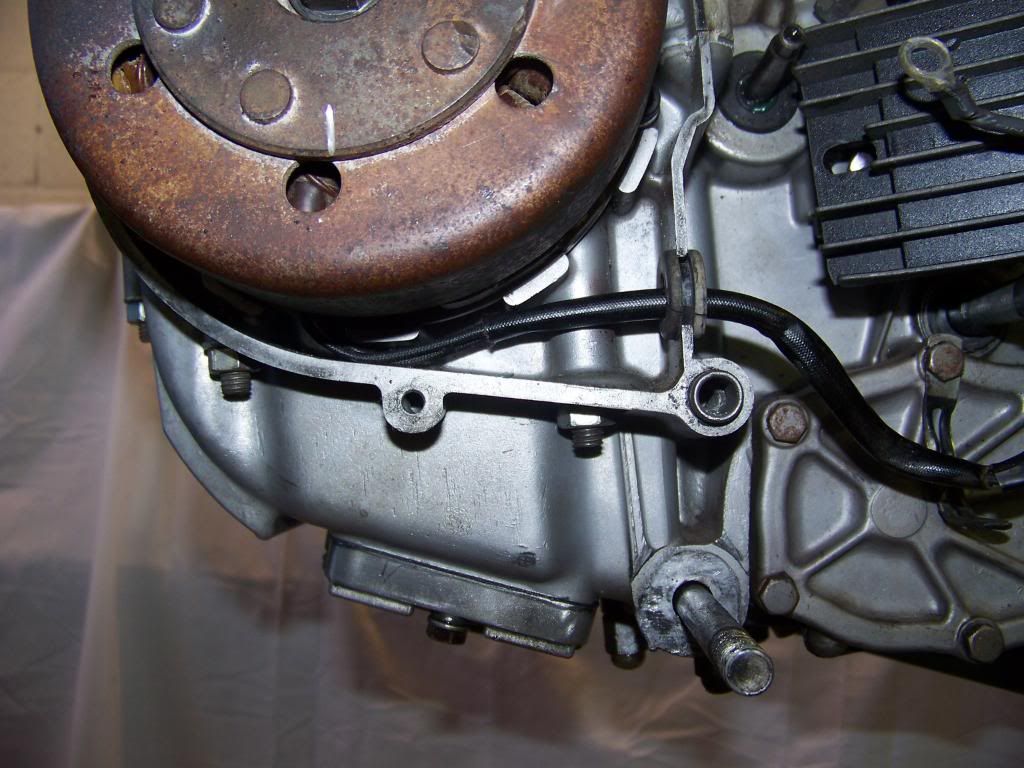
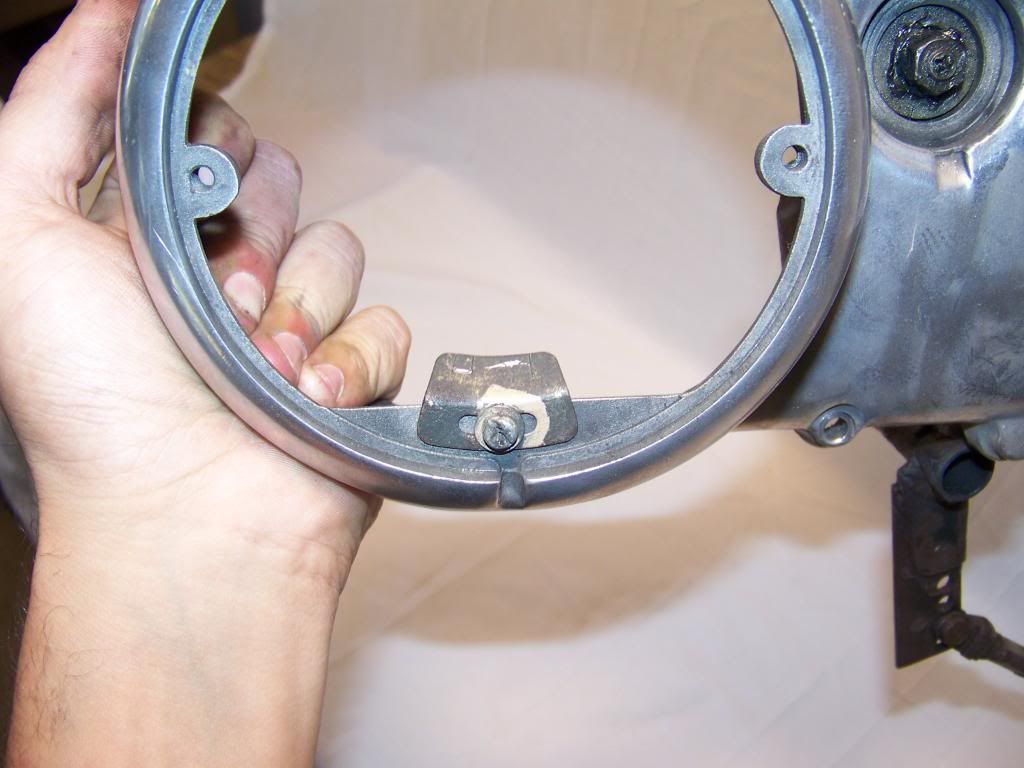
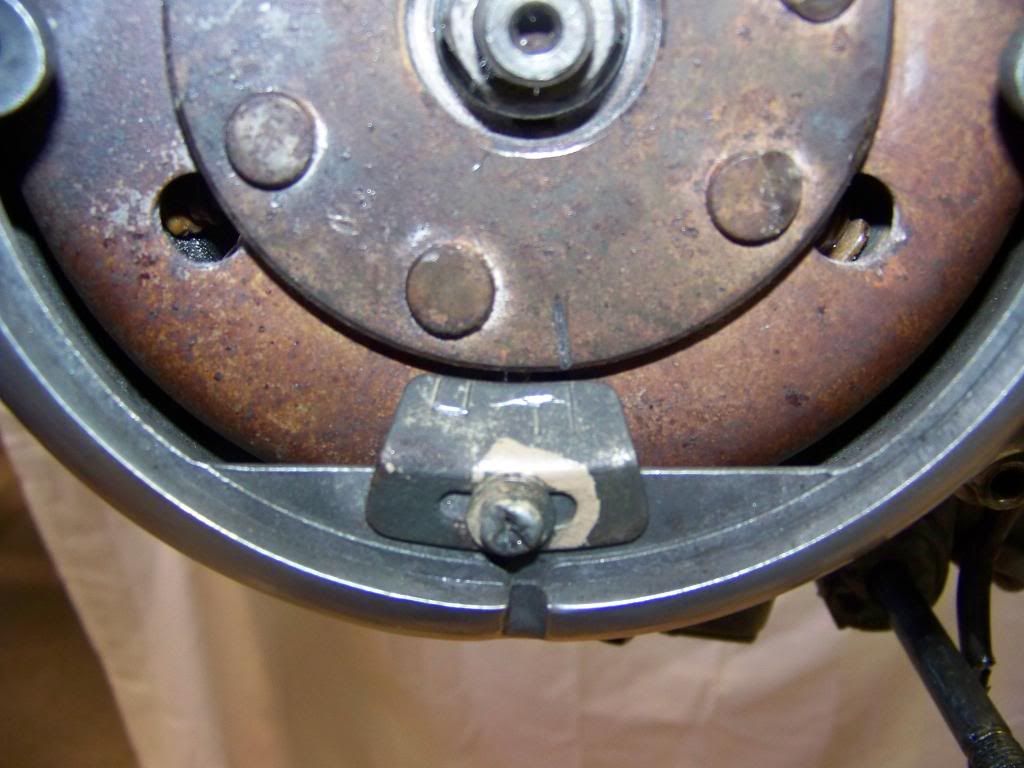
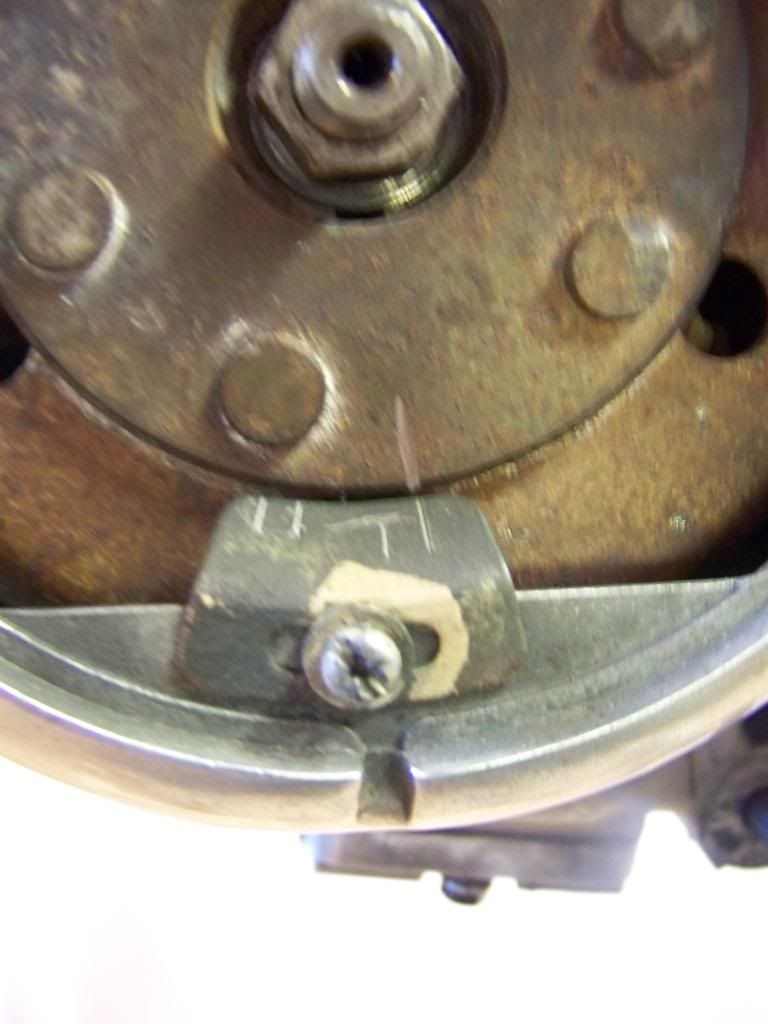
    My kit will keep you from doing something aweful like this JB welded stator bracket to the cases, no chance to replace the seals, and generally a terrible idea... This is a motorcycle, not a middle school science project!!! (This was a test for Mr Rigg's engine to see if the stator was even going to work, no hate, just don't do this ) I have had LOTS people confused about JB'ing the bracket to the engine as they thought that was the way to go. After reading other threads and seeing the JB weld fail, I knew something different and inexpensive had to be done. I have even had to clean the JB off of 1 guys engine he sent me to re-phase because he had done it the same way Talk about a mess... DO NOT JB WELD THE BRACKET TO THE CASE
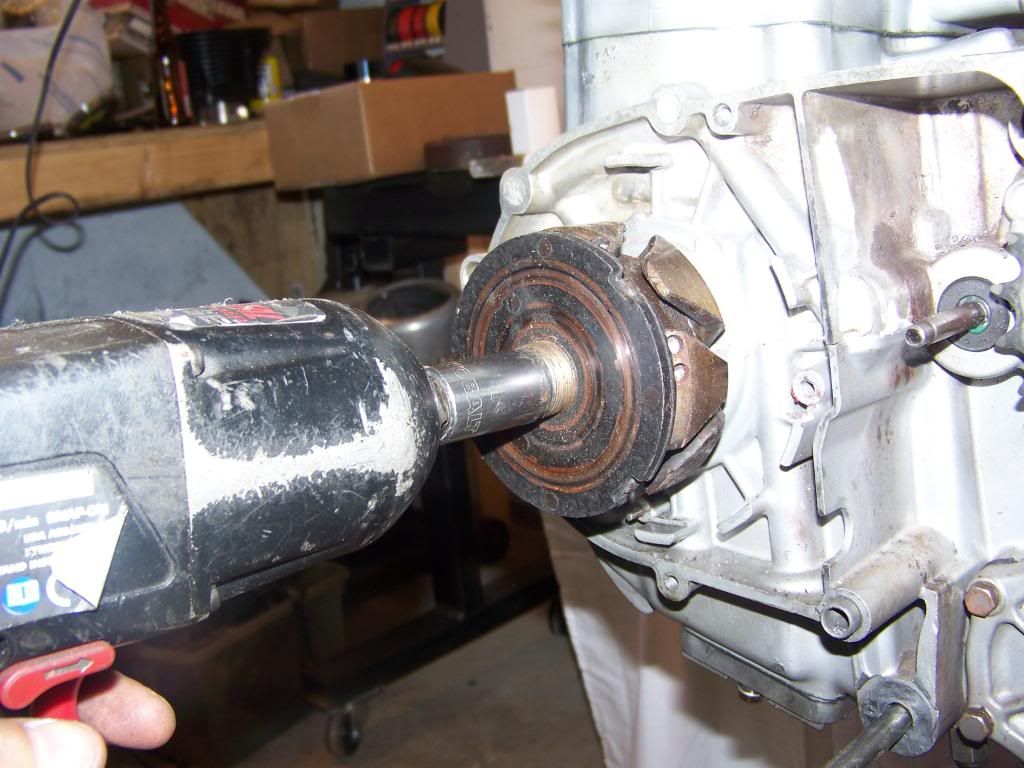
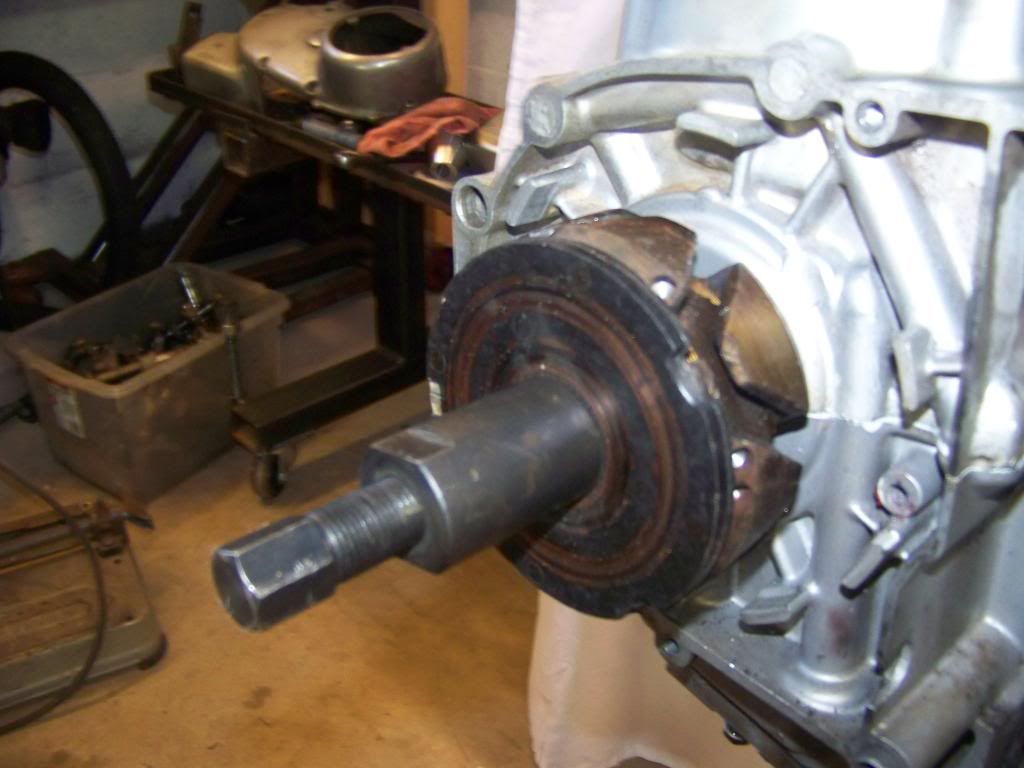
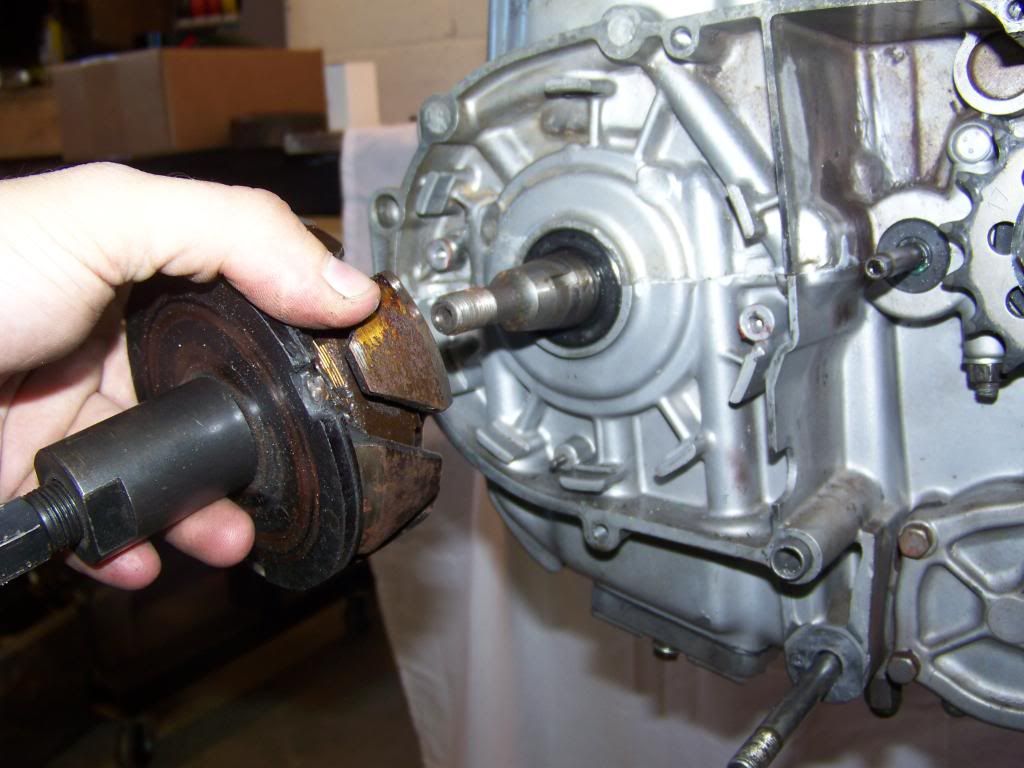


    Let's Get Started
    Last edited by Punkskalar; 03-01-2012, 6:16 PM.
  • Punkskalar
    Senior Member
    • Jan 2010
    • 1139

    #2
    First things first, remove the side cover and pegs, controls, etc... that are in the way. If I have to show you how to do this, you'll be needing to step away from the motorcycle and call your Mom to come help

    Remove the alternator. Most of you will have Phillips head screws that are tight as hell, feel free to use Vice Grips, they are going in the trash!!!


    Remove the 17mm Nut holding the rotor on. I use a cordless impact.


    Then you'll need to remove the rotor. I happen to have a puller, but if you don't have one, use a 2 or 3 jay puller and beat that sucker with a hammer. It was probably bad to start with so its going in the trash as well.


    Pull the rotor.


    Then pull the pin at the bottom of the case.

    Comment

    • Punkskalar
      Senior Member
      • Jan 2010
      • 1139

      #3
      You are now ready to start assembling the good stuff.

      I missed a step here, but the Banshee Stator Bracket will have a couple of cast tabs on it. Basically anything that is larger than the O.D. of the adapter plate will be ground off. Use a grinder, hacksaw, file, belt sander, it doesn't really matter, just clean those things off. You can see the "fresh" marks where I removed the material. Assemble the Banshee Stator Bracket to the Aluminum Disk supplied in the kit using the supplied hardware. No washers are needed, but a little red lock-tite is recommended.

      Once assembled and modified, it should look like this. (Hardware will be included in the package, just not shown here)


      Then bolt the stator to the previously assembled bracket. Make sure the wires are free and come out of the bottom of the assembled unit. It should look like this.


      At this time you will need to modify the Woodruff key mentioned in the list of needed parts. The Banshee Flywheel uses a 3/16" key, while the XS650 crankshaft uses a smaller key. this took about 5 minutes with a good file. Its a small part to photograph, I'll try to show lots of pics.


      When you install it on the crank, it should fit like this. Feel free to loosely slide on the flywheel to test fit as you are working on this step. I like to use a little grease to hold these in place during final assembly.

      Comment

      • Punkskalar
        Senior Member
        • Jan 2010
        • 1139

        #4
        Once you have the key installed on the crank, its time to install the Stator Assembly. Use the supplied bolts and washers. It should look like this. Use a little lock-tite during final assembly, but right now you are just mocking it all up... There is an important step later you'll not want to miss


        Now, you'll want to make sure that the wiring is secured. I have found that not all stators are wired equally, so I didn't have the disks cut for this operation, its all on you. Don't worry, its easy.

        Slip the supplied wire clamp over the 3 stator wires and position it in a place out of the way and routed to where they won't be clamped, rubbed, chaffed, etc..


        You'll be needing to locate a good spot to drill and bolt down the clamp. I usually drill and tap the plate to 10NC24 but you can use a through hole and the supplied nut in some locations. You may have to remove the plate for this operation, hence not installing the bolts with lock-tite just yet


        Finish routing the wires and use a grommet to protect them.

        Comment

        • Punkskalar
          Senior Member
          • Jan 2010
          • 1139

          #5
          Now you will just be slipping on the Banshee Flywheel, carefully lining up the woodruff key to the notch on the flywheel as you go. Make sure the wiring is free and clear, but there is plenty of room, so don't stress too much.


          Now you'll be ready to pull the old alternator cover off and steal the timing marks off of it.


          You'll find that the stock timing tabs will fit nicely on the side cover. Drill and tap a 4mmx.070 hole and use the stock screw to fasten it to the cover. You can again use a through hole and a bolt/nut if you want.


          Slip the side cover back over the cases. Locate TDC by looking through the spark plug hole, using a special tool whatever you want. Mark the Flywheel with a corresponding cut to T on the timing tab. It doens't have to be perfect, because once you start the bike back up, you can slide the tab back and forth while using your timing light to the "Fire" location. I marked it first with a marker/pencil


          Then I cut a notch into the flywheel using a dremel, file, whatever...

          Comment

          • Punkskalar
            Senior Member
            • Jan 2010
            • 1139

            #6
            Wiring is now the the only major thing left. Hook up the 3 wires coming from the Stator to the 3 yellow wires on the regulator. It doesn't matter which wire go where, just make sure all the yellow wires are used. Red goes to the battery/condenser and green is a ground. You are all done


            Obviously you'll need to mount the regulator somewhere, but this is all for the how-to.

            Had lots of folks who wanted a wiring diagram. This is ONLY for the charging system, the rest of the wiring on your ride is up to you.


            Reinstall your cover, route wires away from the chain (duh) and reinstall your controls and all that mess you took off to get started.


            NOTES: If you are using a TCI ignition, you'll need to change over to points or Pamcopete's awesome setup before doing this modification. You'll get the timing working first, get it all timed properly and use the timing marks from your setup to reinstall the timing tab on the side cover.

            Here is the list of sourced Stators that should work. I've never had to buy a new one for any reason, they work just fine used off of ebay/CL. I stole this list from another source, be sure to double check bolt patterns and that a Stator has 3 Yellow wires coming out of it (mine had 3 black, but it works just the same, you just need a 3 Phase Stator)

            MAKE SURE TO GET THE CORRECT PART NUMBERS FROM A STATOR!!! THIS LIST IS NOT 100% ACCURATE. CORRECT STATOR MEASUREMENTS SHOULD BE 103mm X 42mm X 20mm
            YAMAHA (ESR080)

            Honda CBR600 F1 86-90
            Honda VF500 84-85
            Kawasaki VN800 Vulcan 00-05
            Kawasaki VN800 Classic 01-06
            Kawasaki VN800 Drifter 01-05
            Kawasaki ZL600 86-87
            Kawasaki ZX600, ZX-6 Ninja, ZZR600 85-04 [!!NOT ZX6-R, ZX6-RR 98+!!]
            Suzuki VS800 92-07
            Suzuki VX800 90-93
            Suzuki VZ800 97-04
            Suzuki LT250 91-96
            Suzuki LT4WD 91-96
            Suzuki LT-F4WD 91-98
            Yamaha XV250 Route66 88-90
            Yamaha XT600 90-95


            TAGS: XS650 XS 650 Big Bore 750 Kit Charging System Permanent Magnet Alternator Banshee Hugh'sHandBuilt Hugh Owings Chopper Bobber Wiring Swap Stator Rotor PMA 3 Phase Regulator
            Last edited by Punkskalar; 10-20-2010, 10:15 PM.

            Comment

            • viz
              Senior Member
              • Dec 2009
              • 315

              #7
              Great job on the write up and pics! Awesome!!!

              Comment

              • respek
                Senior Member
                • Feb 2010
                • 133

                #8
                Where is all the chrome bro?

                Nice write up Hugh thank you very much.

                Comment

                • miller0613
                  Member
                  • Sep 2010
                  • 93

                  #9
                  Great write up I have read many of these and never read anything about changing the key size I think that could have been a big WTF when I get to it. I have to order one of those plates from you but I have to wait till the end of the semester for the extra cash

                  Comment

                  • mrriggs
                    Junior Member
                    • Oct 2010
                    • 1

                    #10
                    Originally posted by Punkskalar
                    Ok gang,
                    My kit will keep you from doing some god aweful shit like this JB welded stator bracket to the cases, no chance to replace the seals, and generally a terrible idea... This is a motorcycle, not a middle school science project!!! (Not my picture, stolen from another source!!)
                    Someone just sent me a link to this thread. That JB Weld mess is mine and I can explain. That was the prototype Banshee/VF500 alternator. Nobody knew if the three phase stator was going to work with the Banshee rotor so I didn't want to sink a bunch of time and money into making a proper bracket. It did in fact work so I proceeded to build a foundry and design a bullet proof bolt-on bracket.


                    It is machined to close tolerances so it is practically press fit to the engine case. There is no guess work centering the stator and the screws only hold it against the case, they are not relied upon to keep the stator aligned.

                    By the way, I like what you did with the timing marks.

                    Comment

                    • Tomcat
                      Junior Member
                      • Sep 2010
                      • 3

                      #11
                      Originally posted by mrriggs
                      Someone just sent me a link to this thread. That JB Weld mess is mine and I can explain. That was the prototype Banshee/VF500 alternator. Nobody knew if the three phase stator was going to work with the Banshee rotor so I didn't want to sink a bunch of time and money into making a proper bracket. It did in fact work so I proceeded to build a foundry and design a bullet proof bolt-on bracket.


                      It is machined to close tolerances so it is practically press fit to the engine case. There is no guess work centering the stator and the screws only hold it against the case, they are not relied upon to keep the stator aligned.

                      By the way, I like what you did with the timing marks.
                      I sent you that message yesterday. I was interested in each of your brackets. It looks like they both do different things. Punkskalar's bracket mounts to the 650 case. Mrriggs bracket mounts to Punkskalar's bracket and allows the banshee stator to be mounted. Am I right? I was just trying to see if both the brackets are compatible?

                      Comment

                      • Punkskalar
                        Senior Member
                        • Jan 2010
                        • 1139

                        #12
                        Originally posted by Tomcat
                        I sent you that message yesterday. I was interested in each of your brackets. It looks like they both do different things. Punkskalar's bracket mounts to the 650 case. Mrriggs bracket mounts to Punkskalar's bracket and allows the banshee stator to be mounted. Am I right? I was just trying to see if both the brackets are compatible?
                        Actually, Mr. Riggs is a great piece... Nicely cast and machined. It mounts the stator directly to the case. You would not mix his brackets with mine. Mine uses the stock Banshee Bracket and mounts that to the case. Both get the job done equally the same, and both center up the stator just right on the crankcases


                        Apologies all around on the JB thing. I have had LOTS people confused about JB'ing the bracket to the engine as they thought that was the way to go. After reading other threads and seeing the JB weld fail, I knew something different and inexpensive had to be done. I have even had to clean the JB off of 1 guys engine he sent me to re-phase because he had done it the same way Talk about a mess...
                        Last edited by Punkskalar; 10-10-2010, 8:10 AM.

                        Comment

                        • XS2rat
                          Member
                          • Dec 2009
                          • 80

                          #13
                          i pieced together this setup with mr. riggs's bracket and it's working well.

                          my question is how many of all of you have done this swap and are running without a battery?

                          after losing yet another wet acid battery from vibration i decided to hook in the capacitor i had lying around and sure enough the bike fired right up and ran fine off idle but the bike starts to break up at idle. after talking back and forth with mr riggs about it he advises switching to an HEI setup pieced together for about $19 from junkyard parts to keep the power draw from the ignition much lower than with points or the pamco ignition. he also advises switching to LED lights to draw less power. with these two modifications im told the bike will have plenty of juice from the PMA at idle to run ignition, lights, and still read about 13 volts if i remember correctly. im in the process of gathering parts for this ignition and he has a thread explaining how to do it if anyone is interested.

                          my bike runs with points and no battery but i have to turn the idle up higher than im comfortable with to keep it running.

                          don't want to clutter the thread but just curious if anyone is running with points or pamco with no battery using this setup or has any other tricks that work.

                          Comment

                          • mlc216
                            • Apr 2024

                            #14
                            problems

                            I'm using mr riggs' bracket and it is a beautiful peace of aluminum and works great. The biggest problem I've had is with the regulator. I have tried 2 reg/rectifier combo's with the 5 or 7 wire setup and neither was keeping the voltage down. It wasn't until I put a 6 wire (extra voltage sensing wire) reg/rectifier on the bike that it actually kept the voltage down. So why does the 5 wire work for everyone but me?

                            Comment

                            • convergecult
                              Senior Member
                              • Mar 2010
                              • 284

                              #15
                              Does anyone know what the difference in weight form the xs flywheel to the banshee flywheel is? Can you feel a difference?

                              Comment

                              300 mobile ad bottom forum

                              Collapse
                              Working...
                              ;